2019
desk
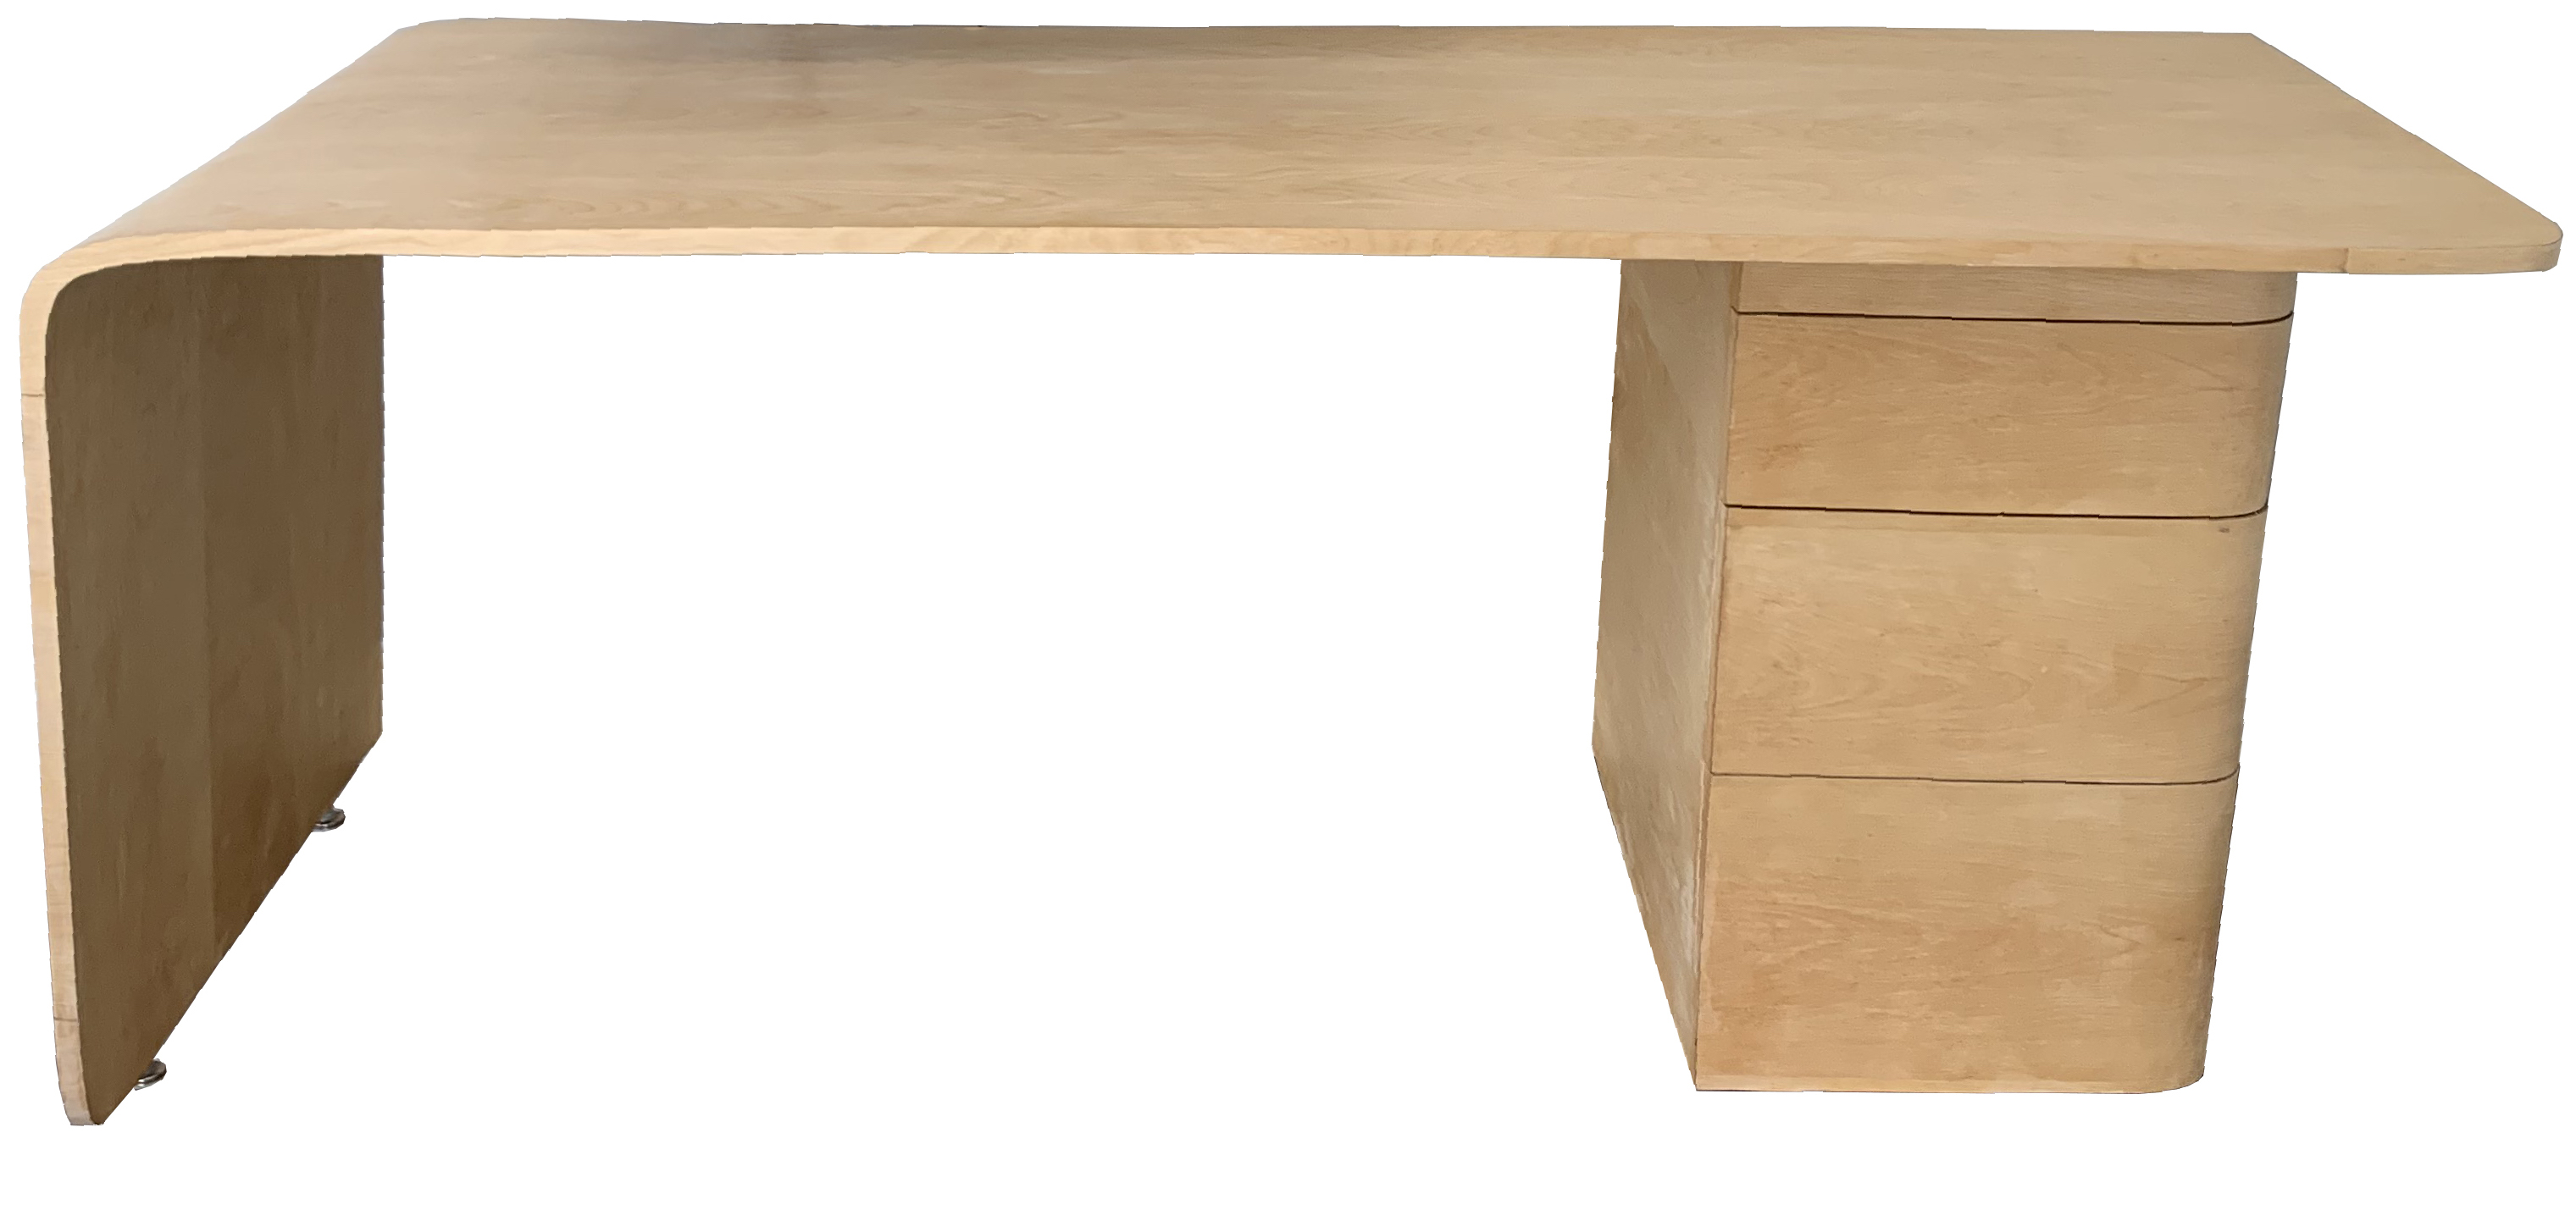
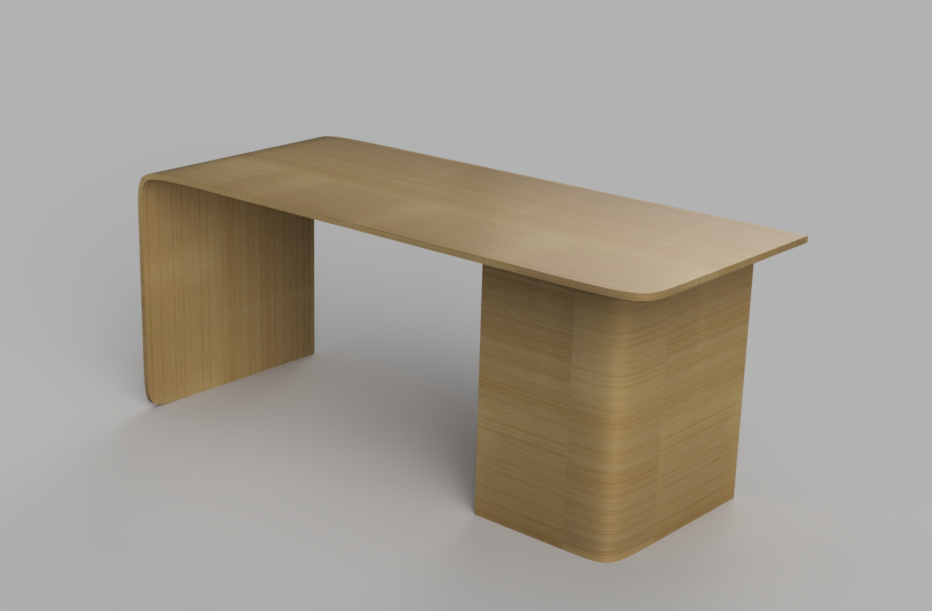
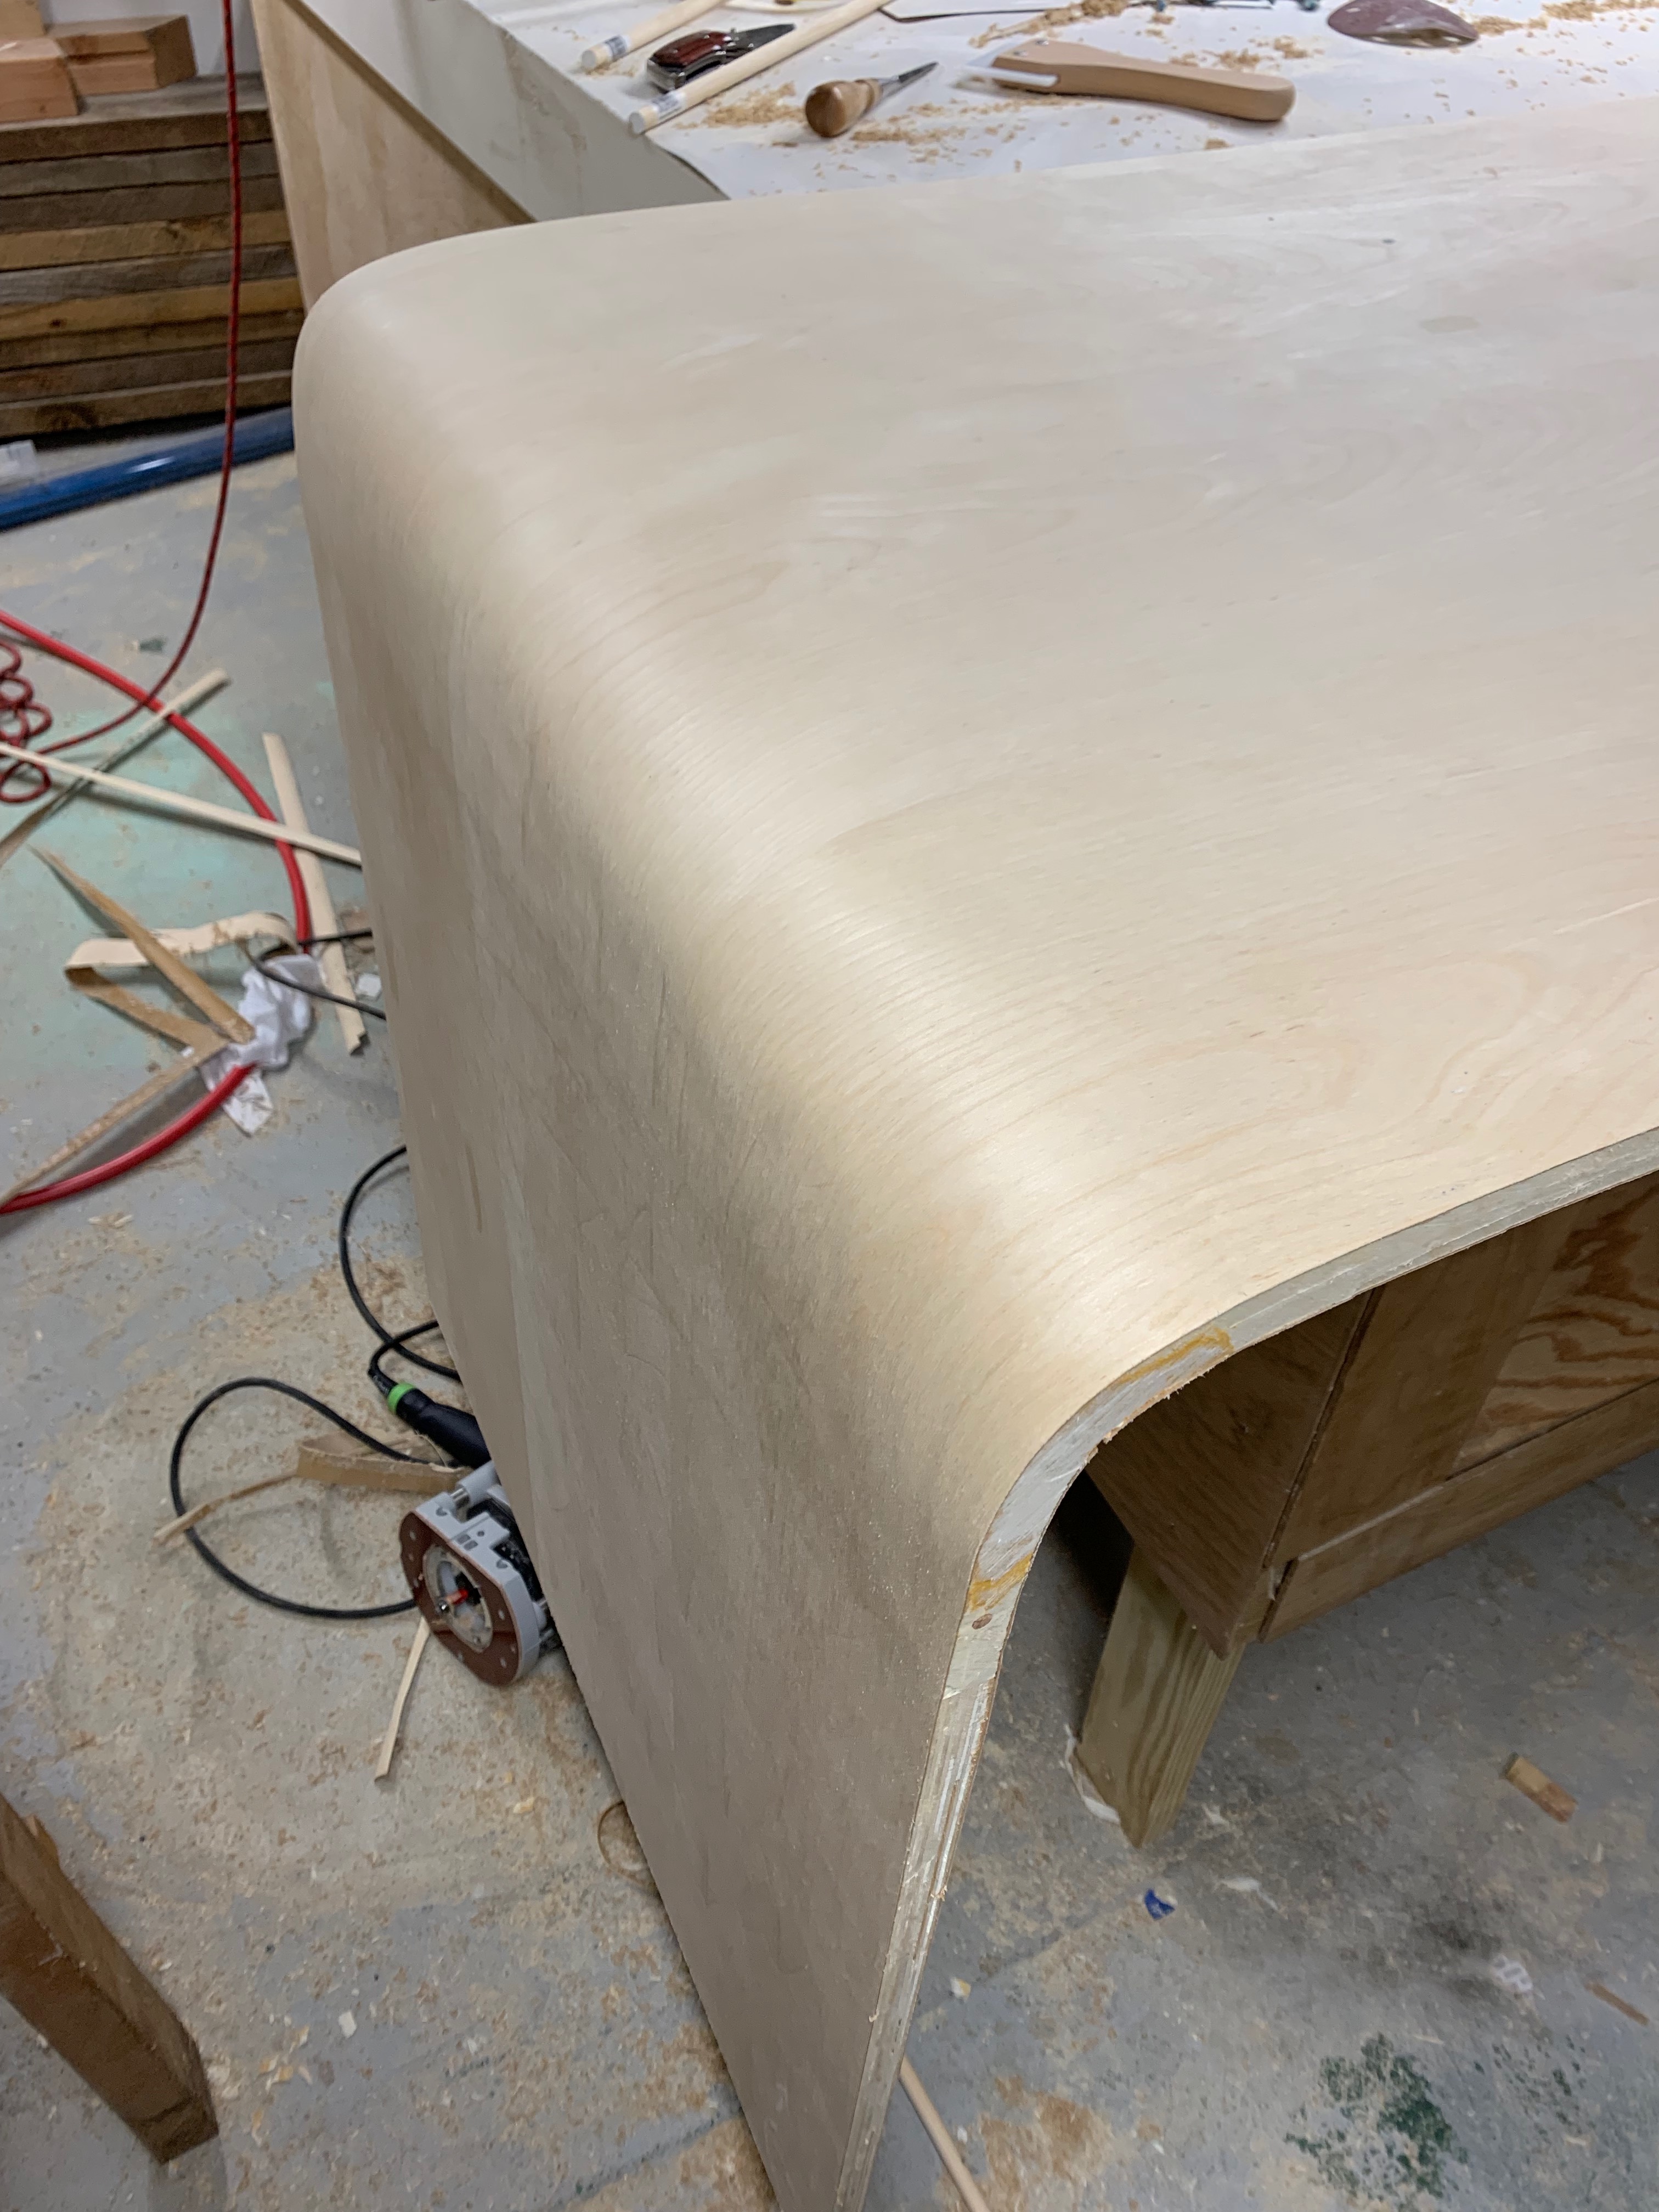
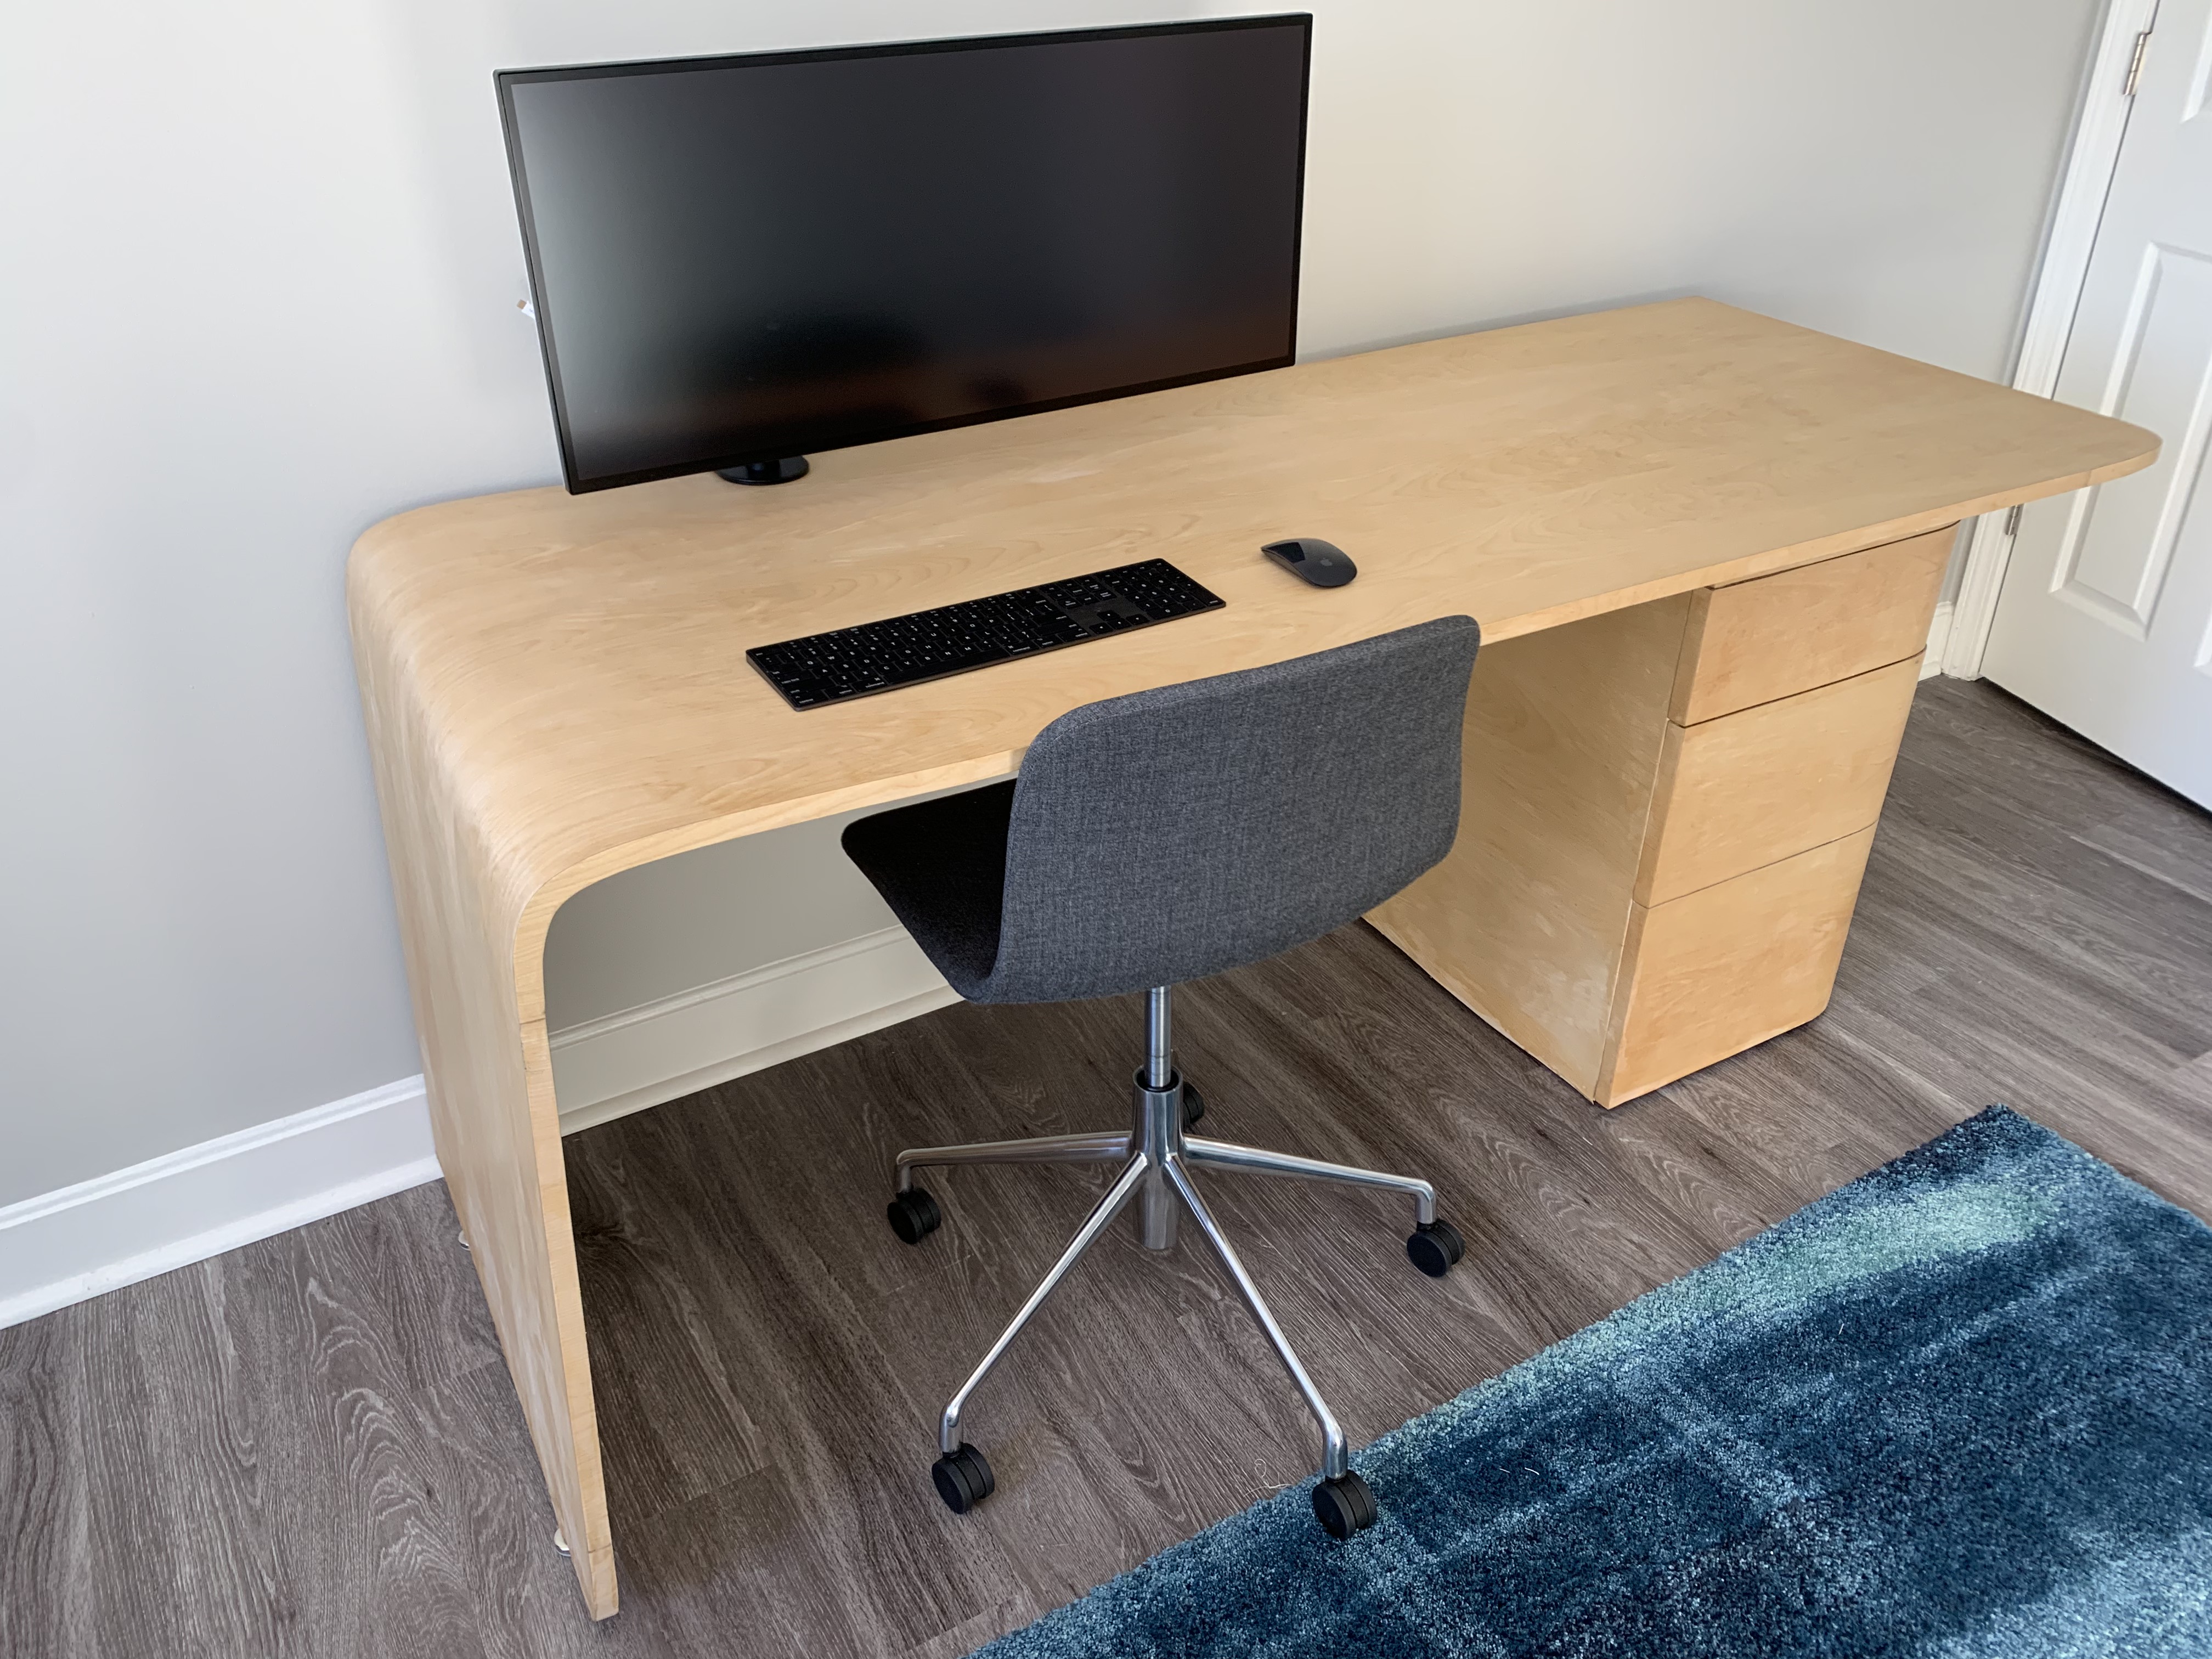
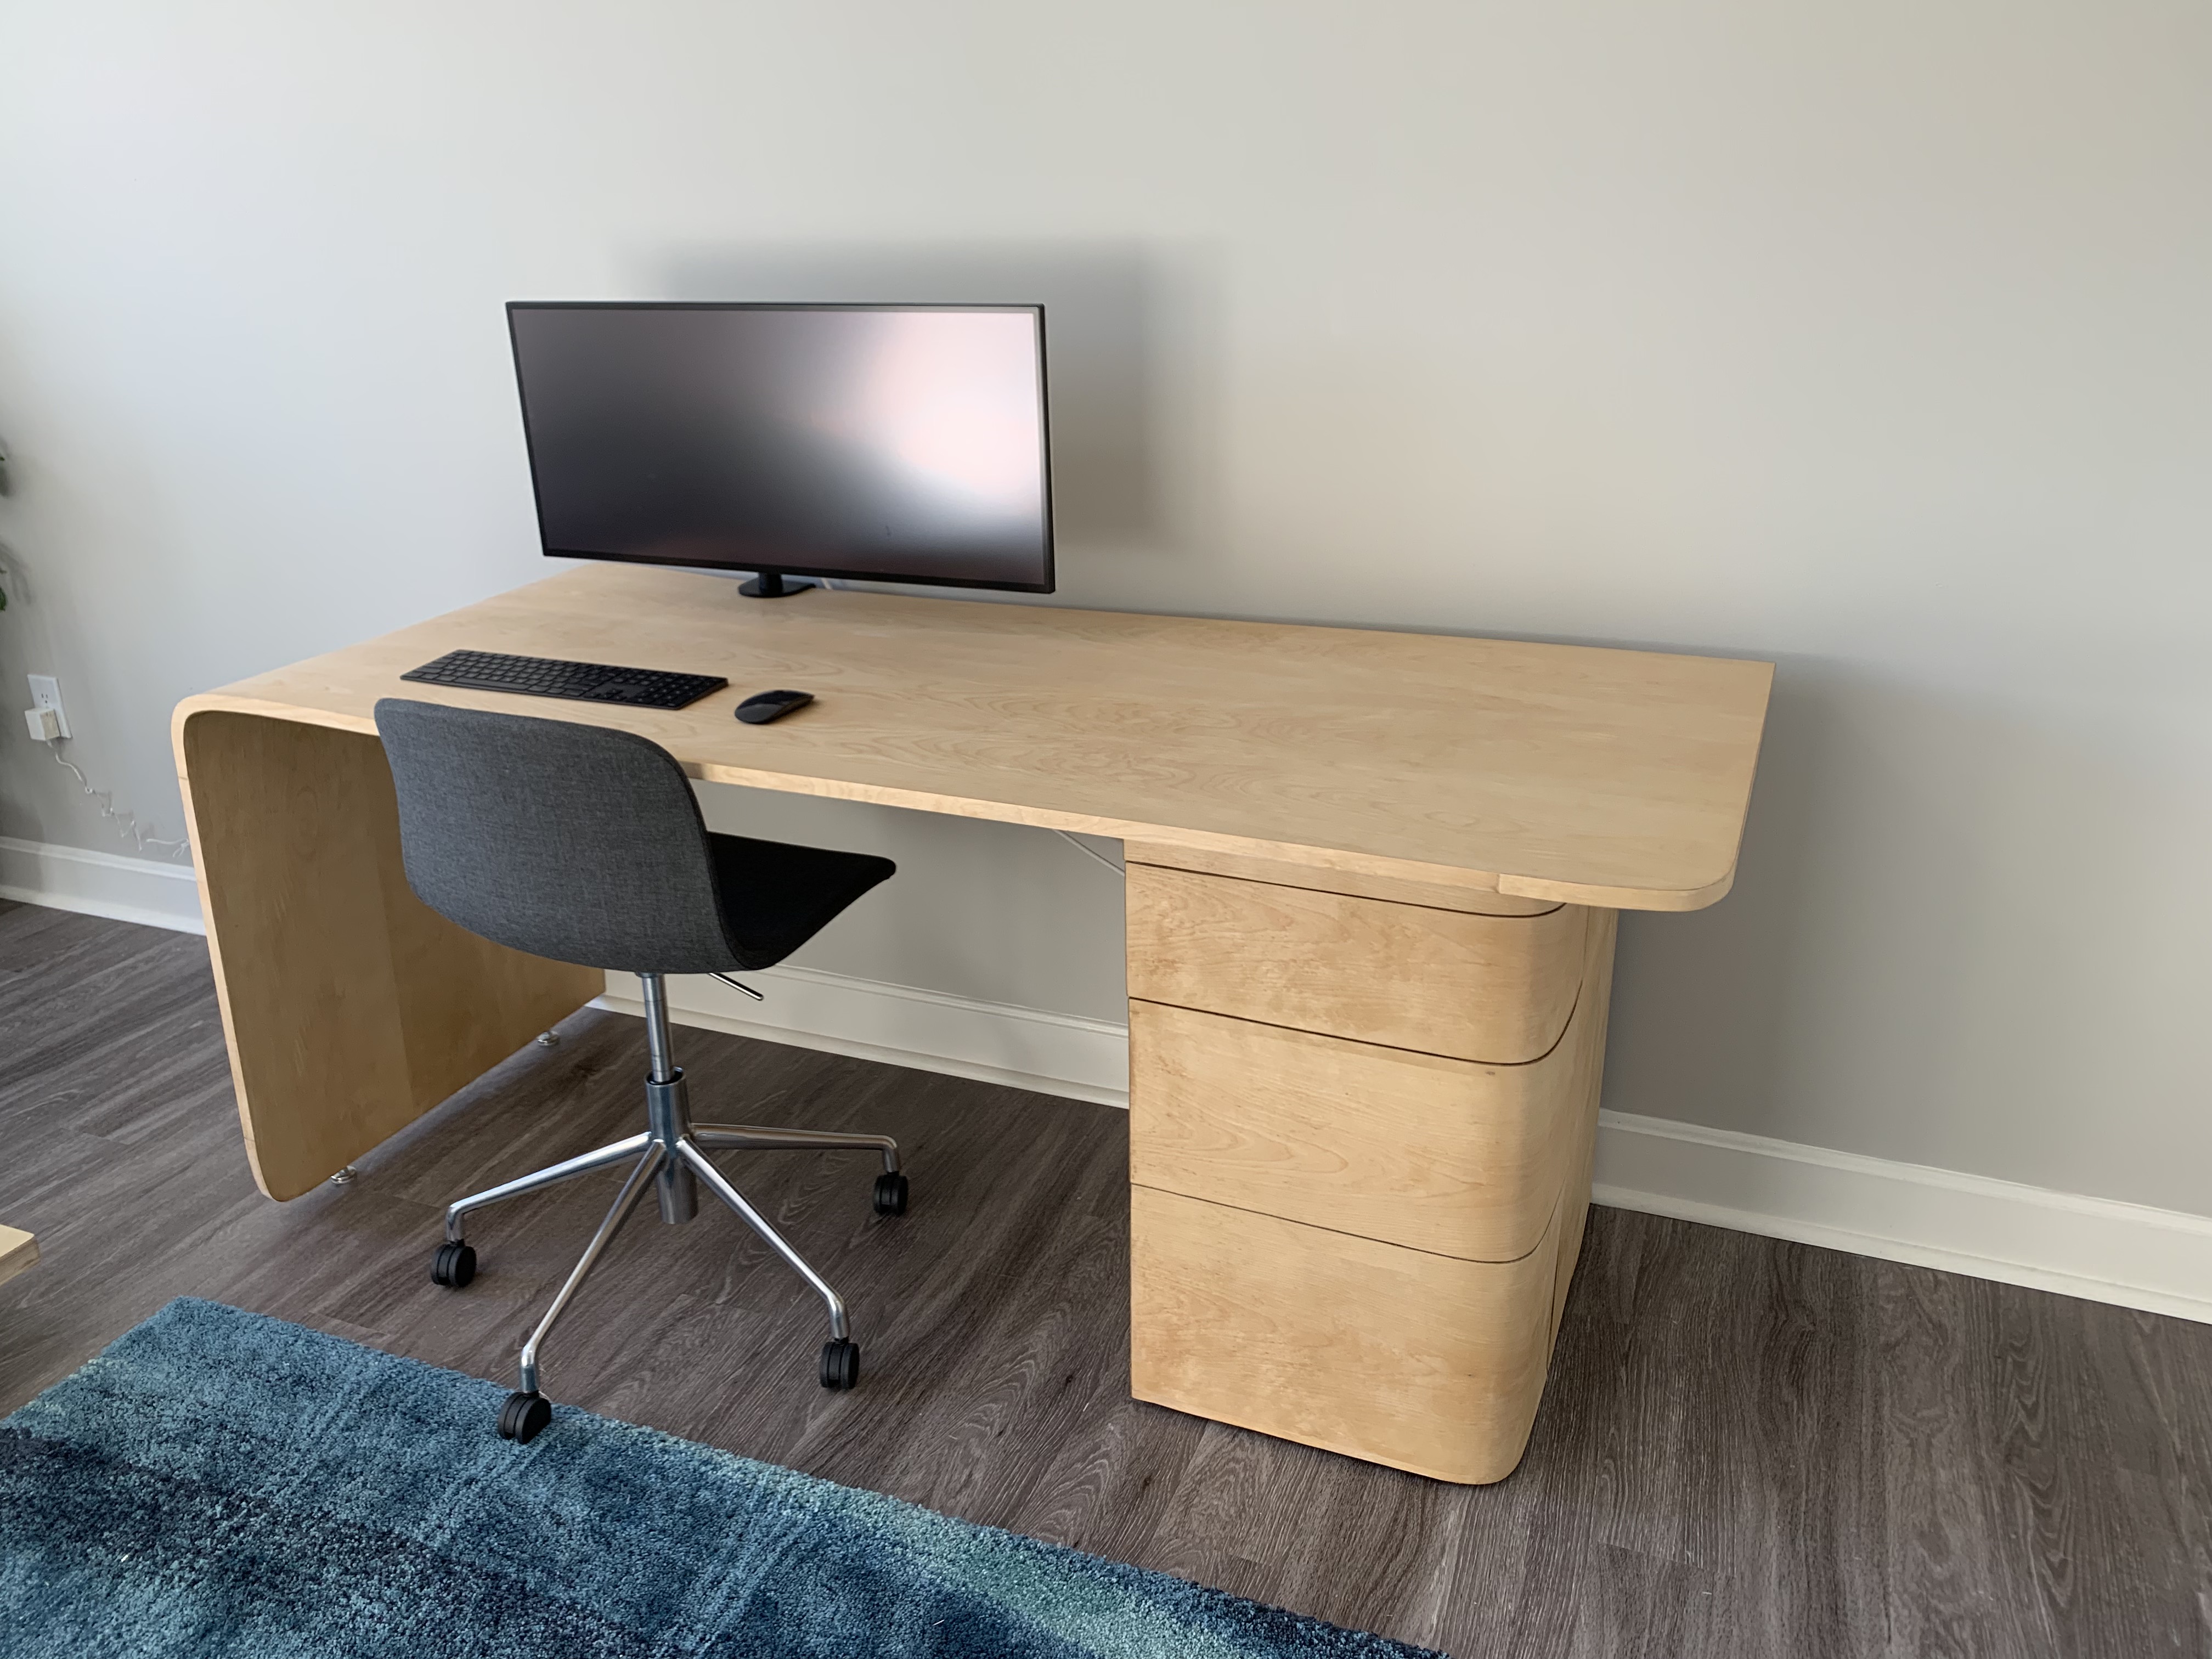
This desk is my most ambitious project yet. The overall goal was to have a desk that feels friendly. Generally, desks seem to fit into two categories: strictly cold and utilitarian or freighted with symbolic elements of power and status. I envisioned a desk that would be an inviting and pleasant place to spend a work day. I designed a desk with no hard edges. From every point of view, the desk has at least one curve. These curves are not simple radial curves; rather, they are conic curves. This design provides two benefits. First, the shape of the curve can reflect the proportion of the surface. Second, the conic curve can transition to a straight line without an obvious transition. These design features give the desk a soft, flowing appearance.
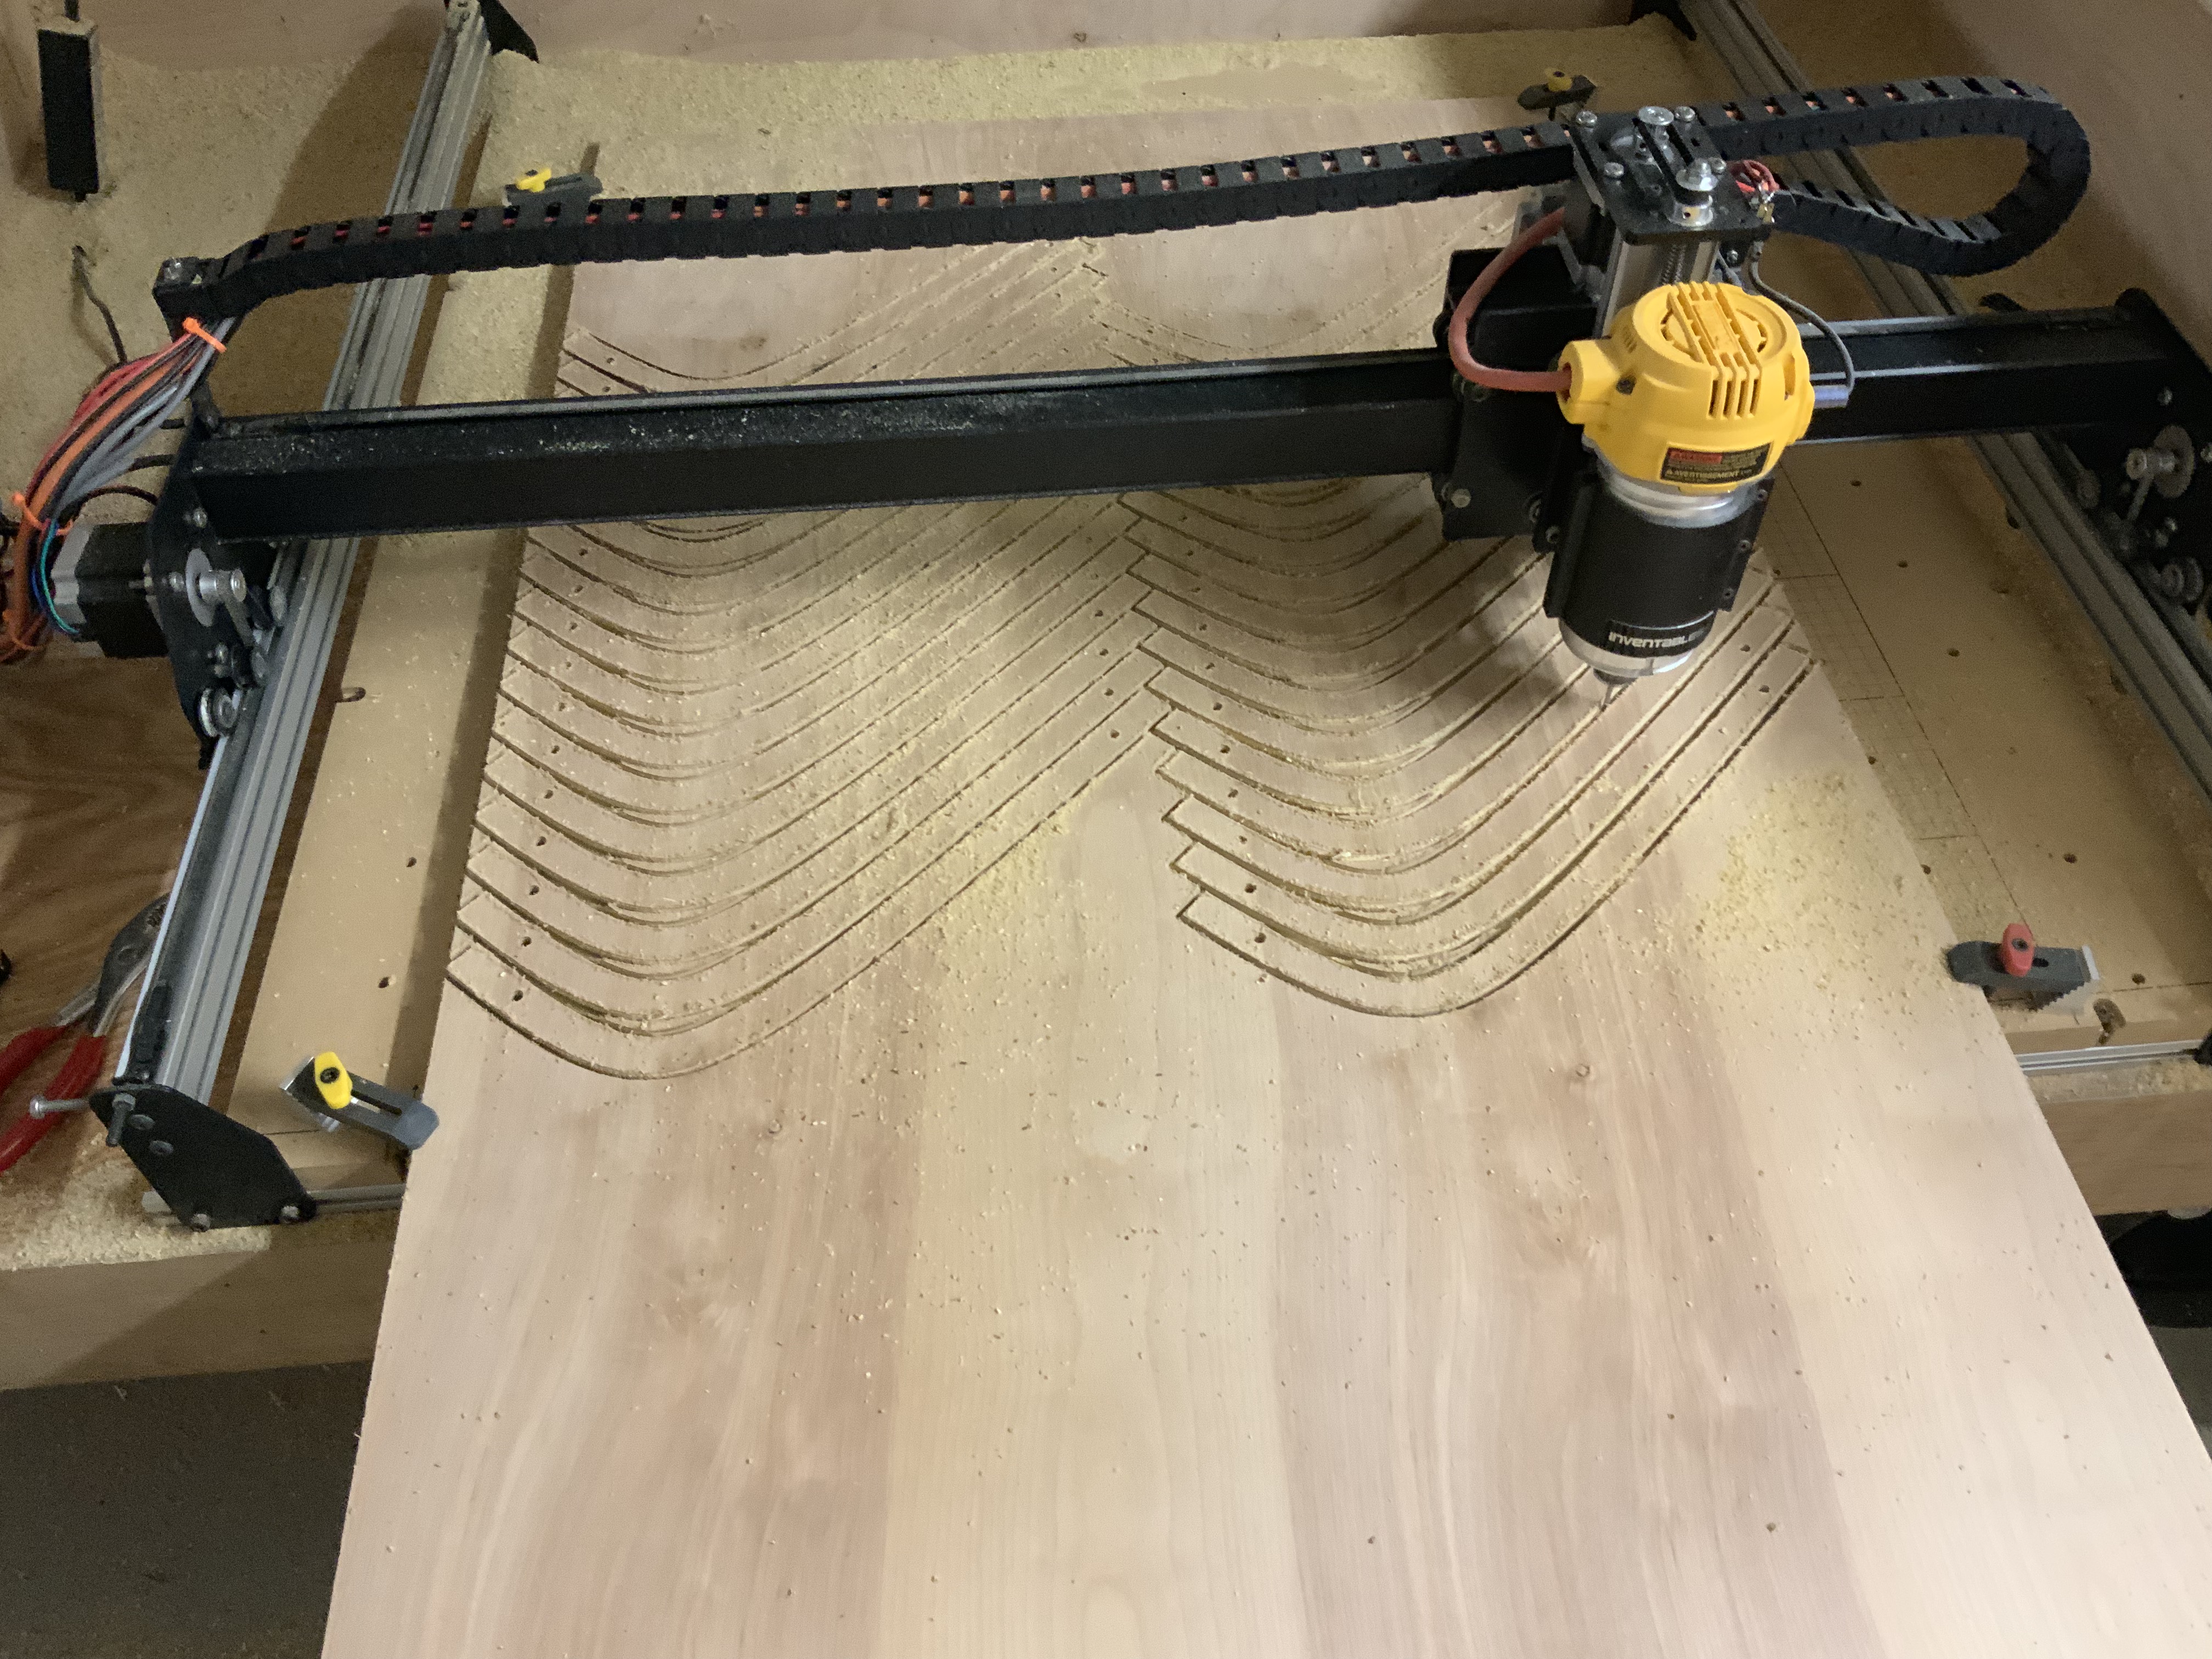
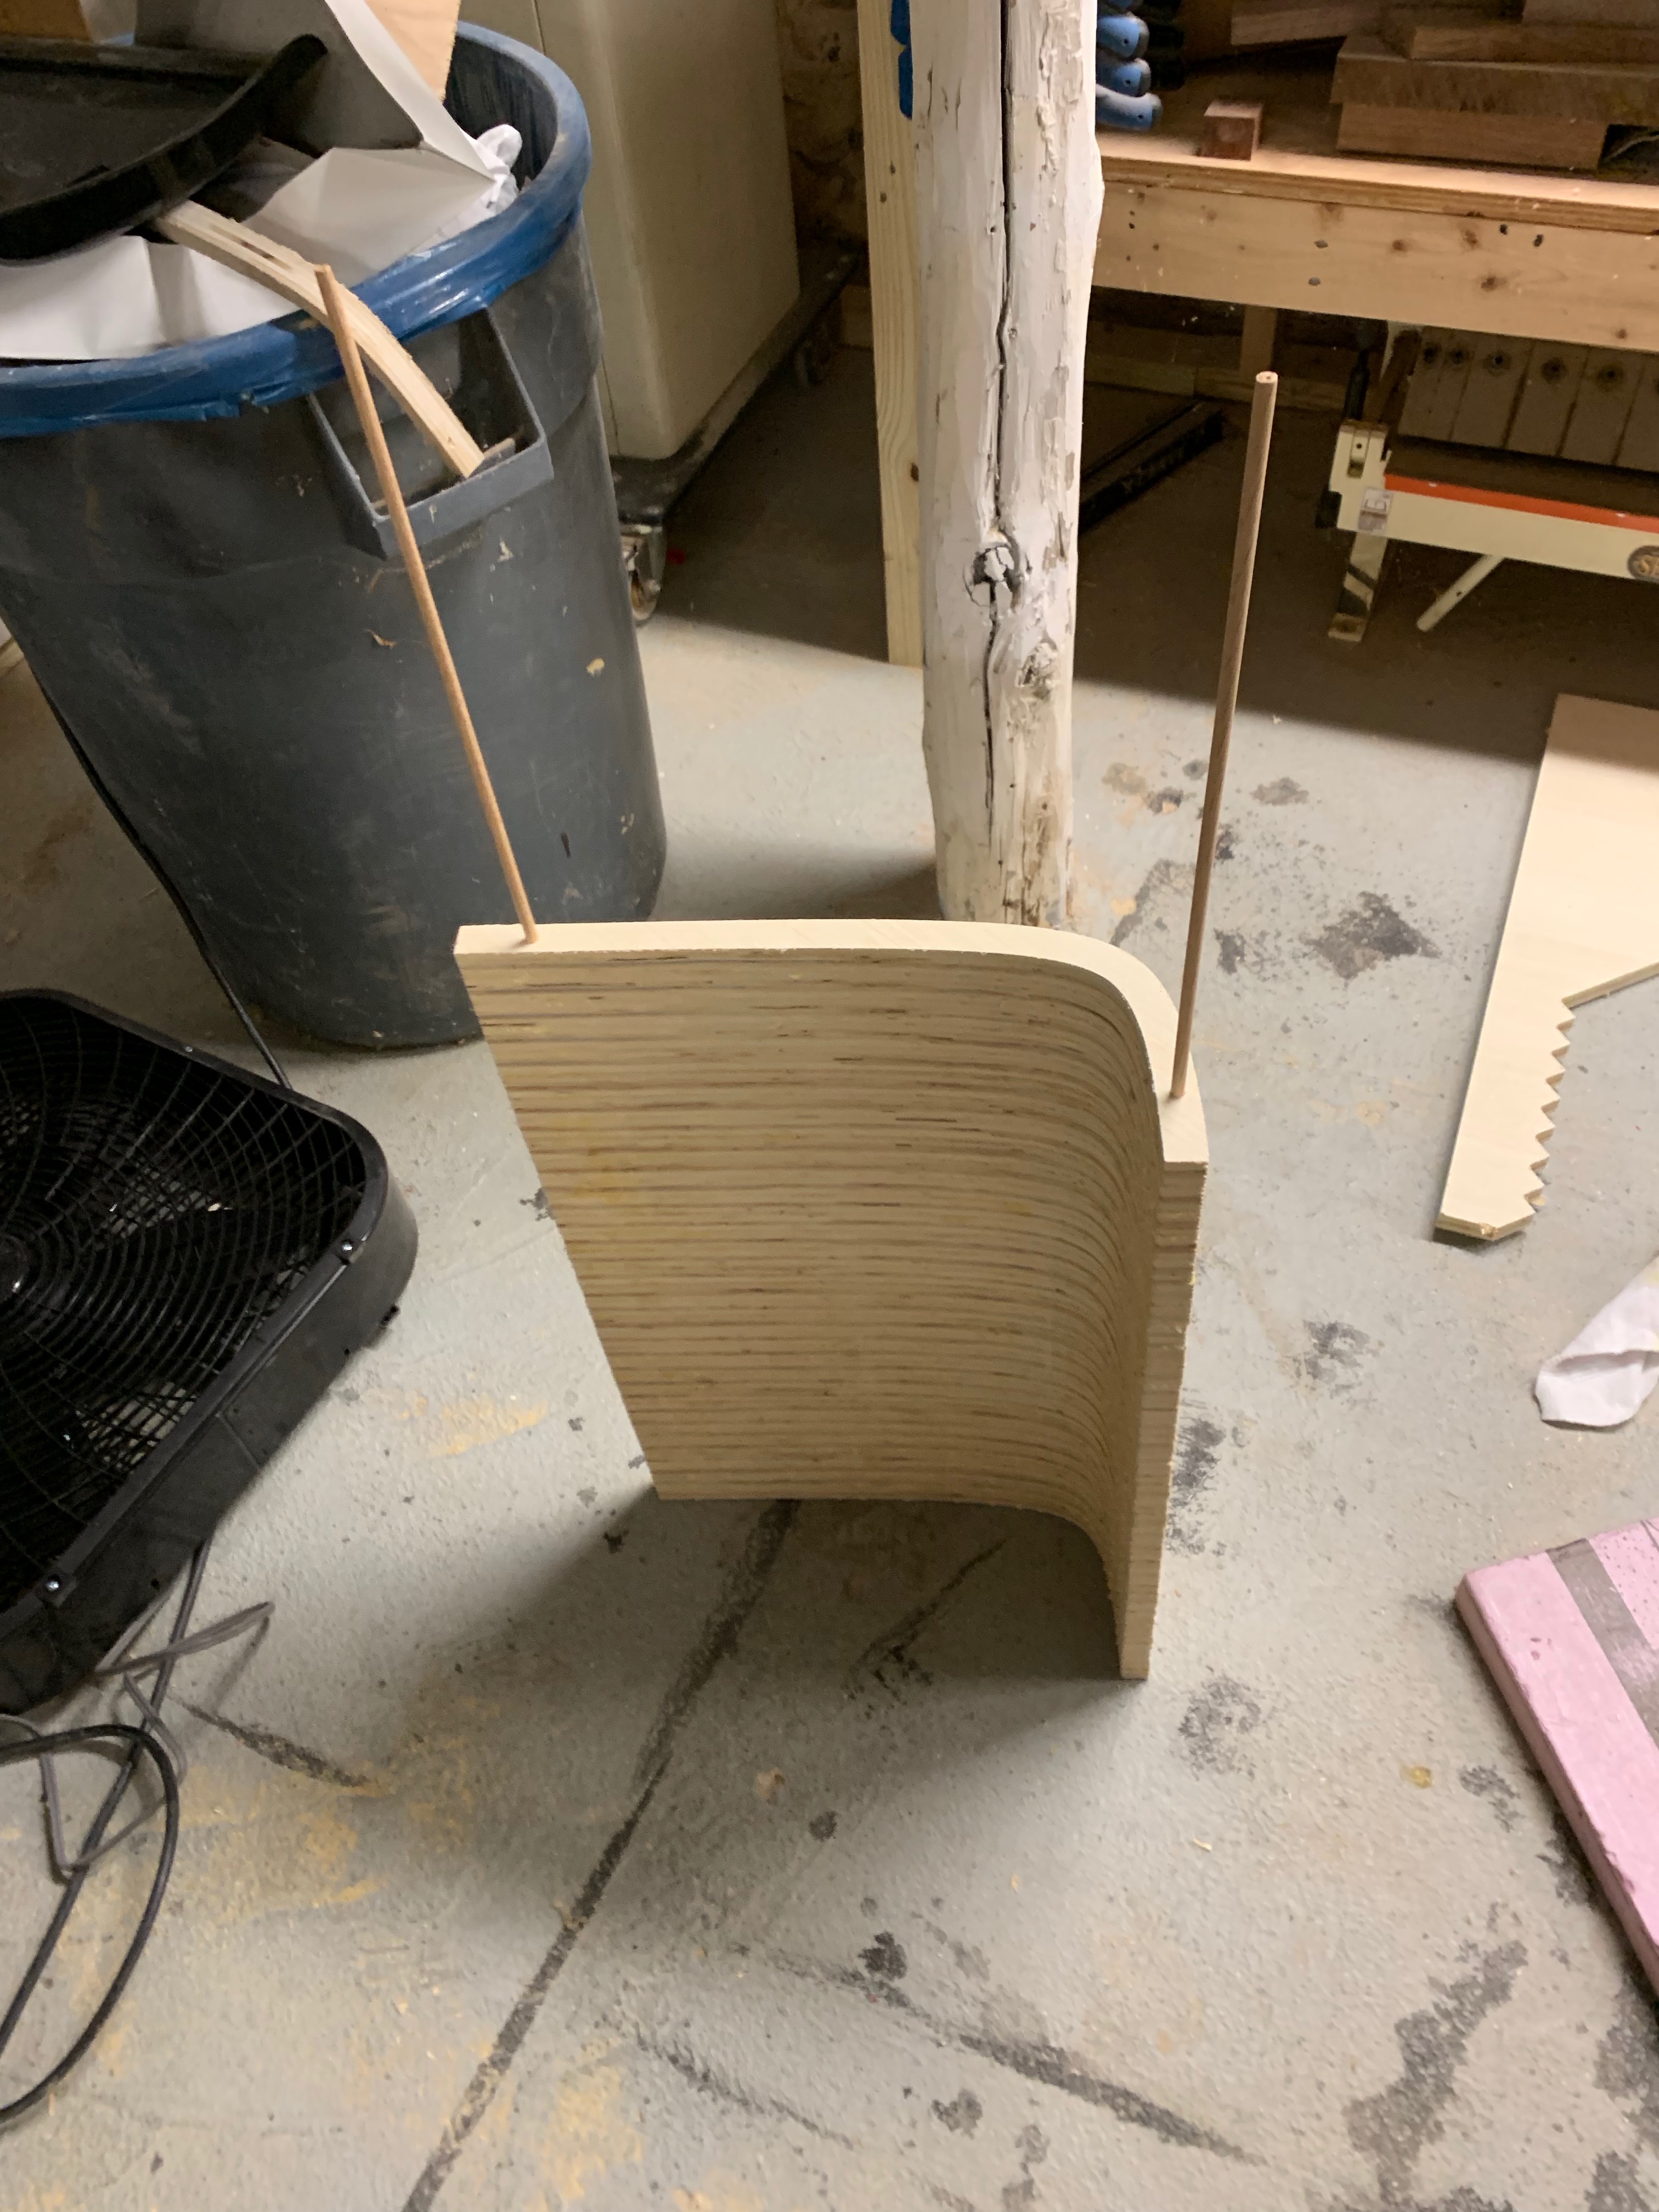
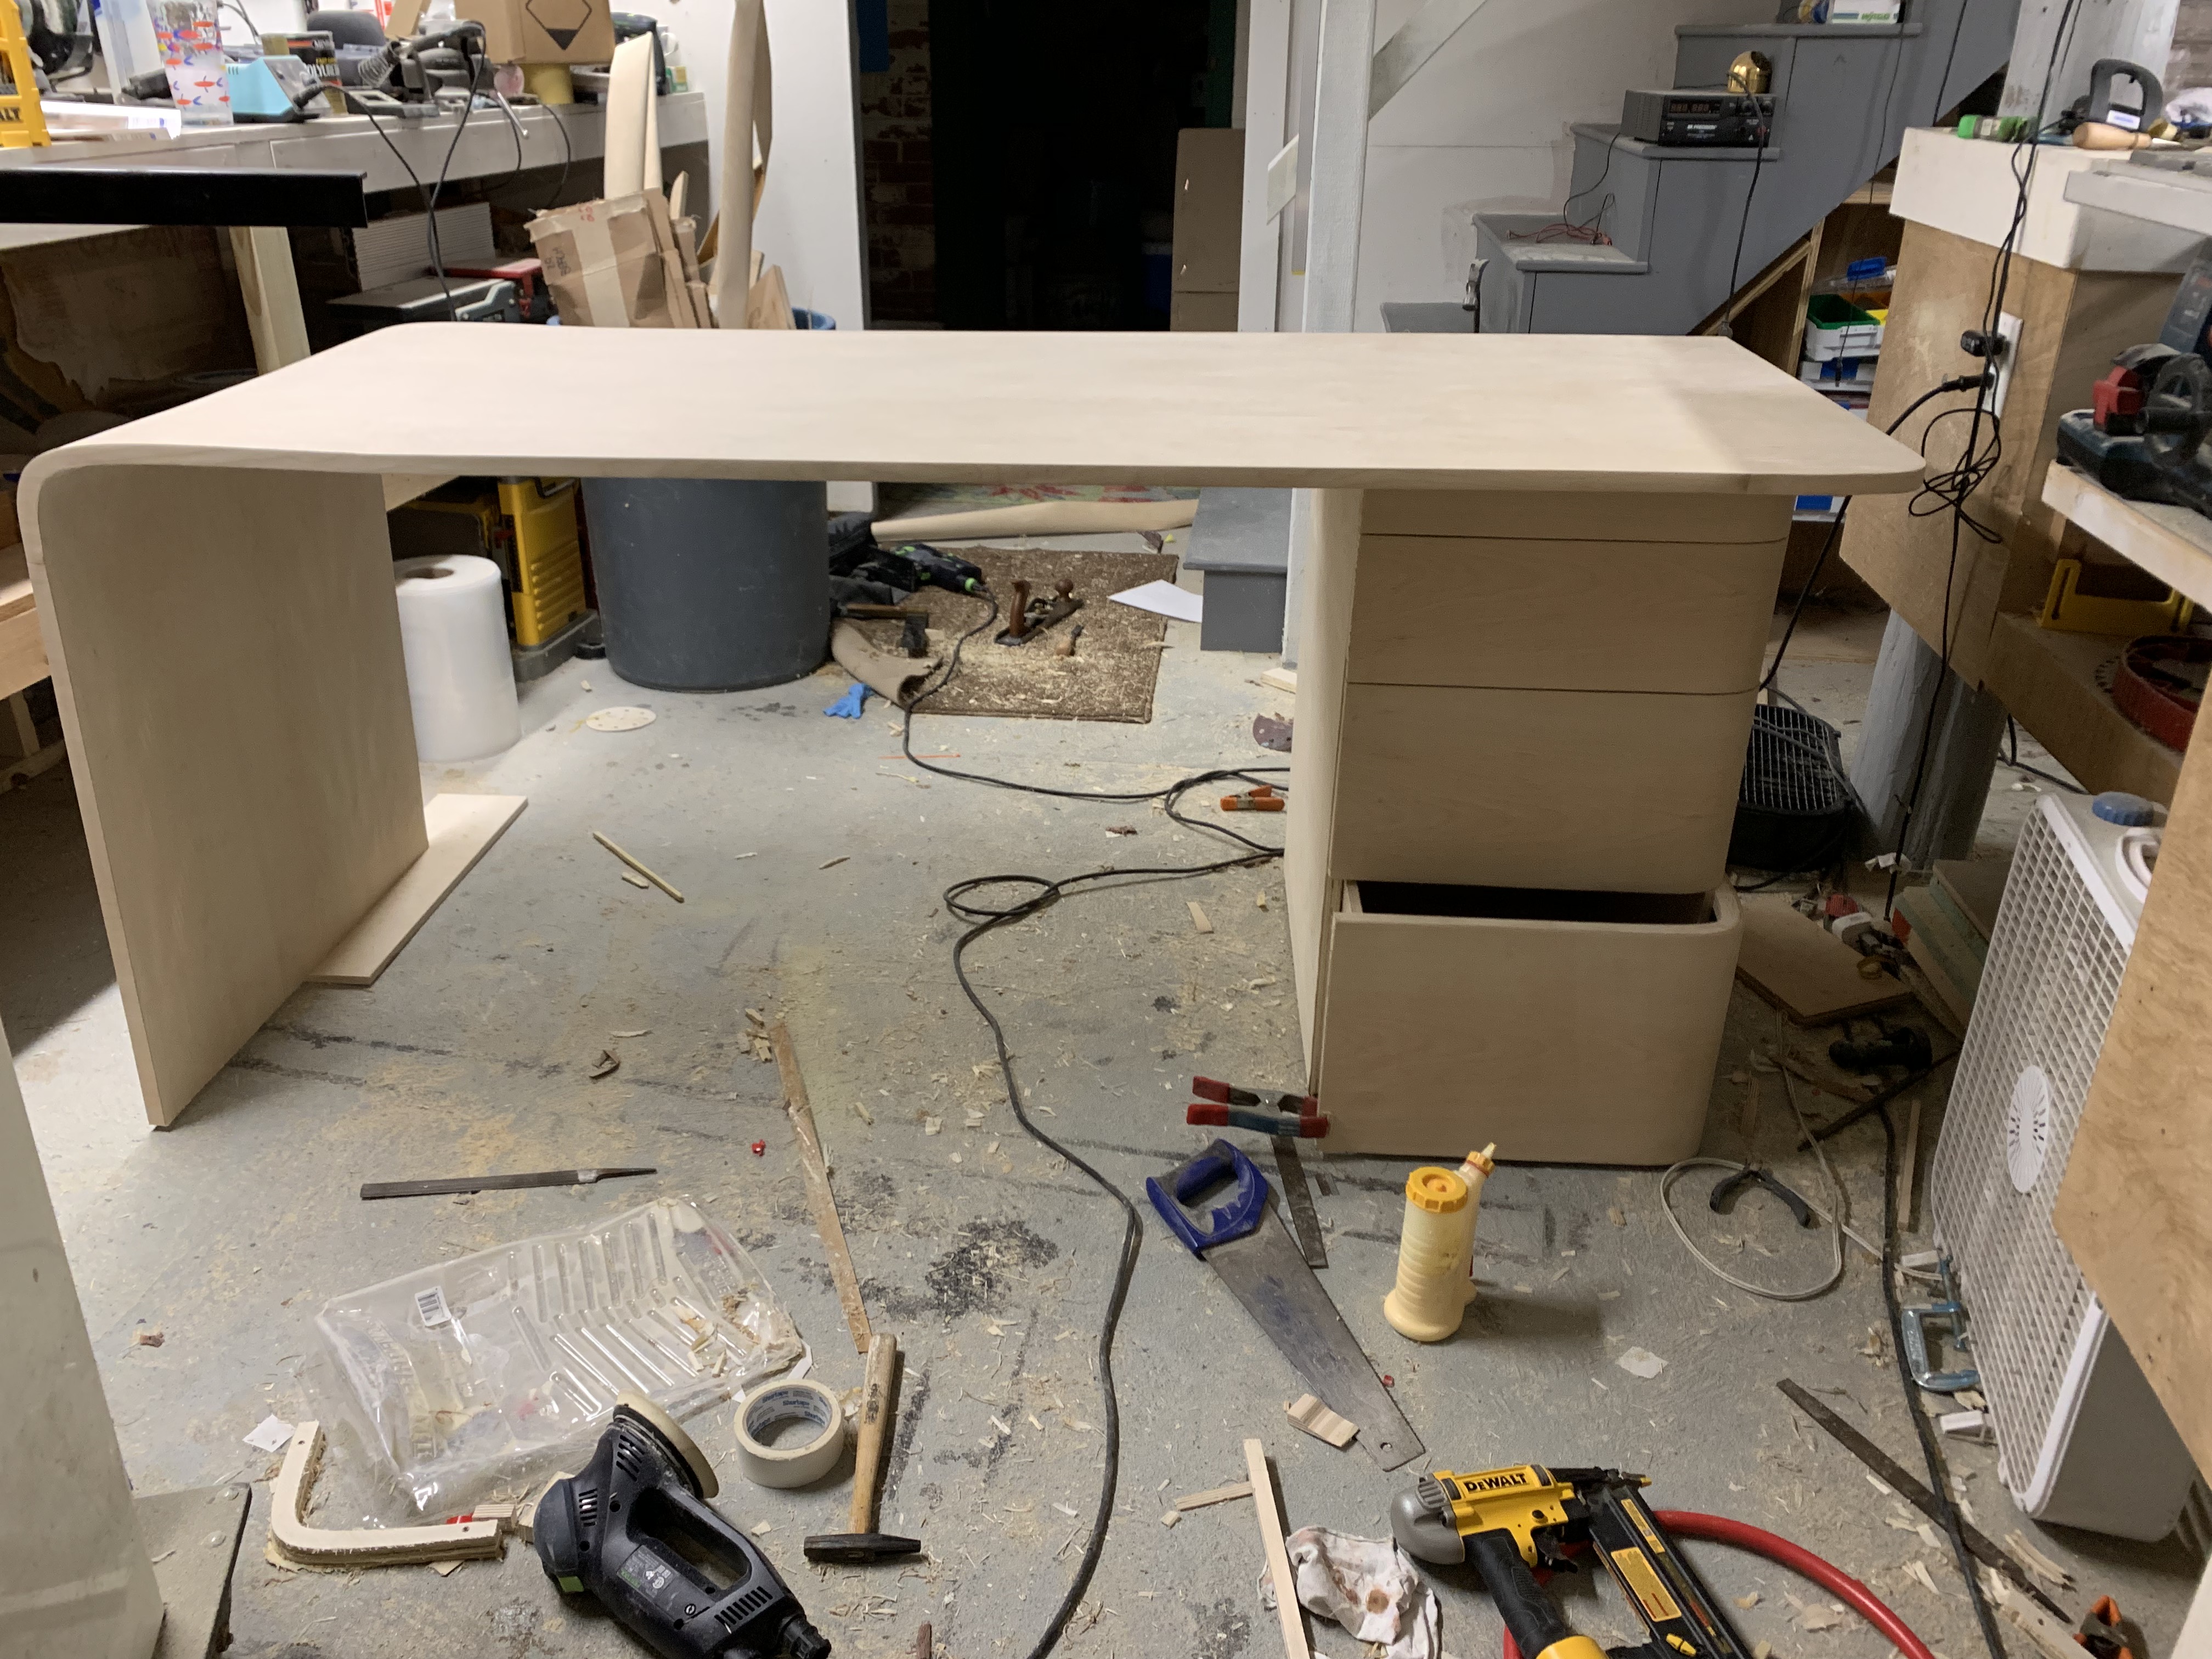
As usual, these design choices were simple on paper; however, in reality they created tremendous construction challenges. The most challenging element was the curve of the top surface as it dropped down to become a leg of the desk. Wood does not naturally bend into such a shape, and the leg had to be structurally supportive. I achieved the shape and the strength of this curve by cutting the profile of the curve out of three quarter inch plywood on a CNC machine. I made about forty curve shapes and then laminated them together. This curve was then joined to two ordinary sheets of plywood to create the main piece of the desk. Finally, I wrapped the desk in a real birch veneer to simulate the look and feel of solid wood. This veneer work posed its own challenges. The veneer must be bonded to the plywood with an industrial contact cement. There was no room for error because once the veneer and the wood touch, they are permanently bonded. I used a technique used for laminate counter tops where the veneer is suspended above the piece on dowels. The dowels were removed one at a time to allow control over the bond process.
This project took me the better part of four months. At times, I found the construction both challenging and nerve wracking. Now, I find the use of the desk immensely satisfying.
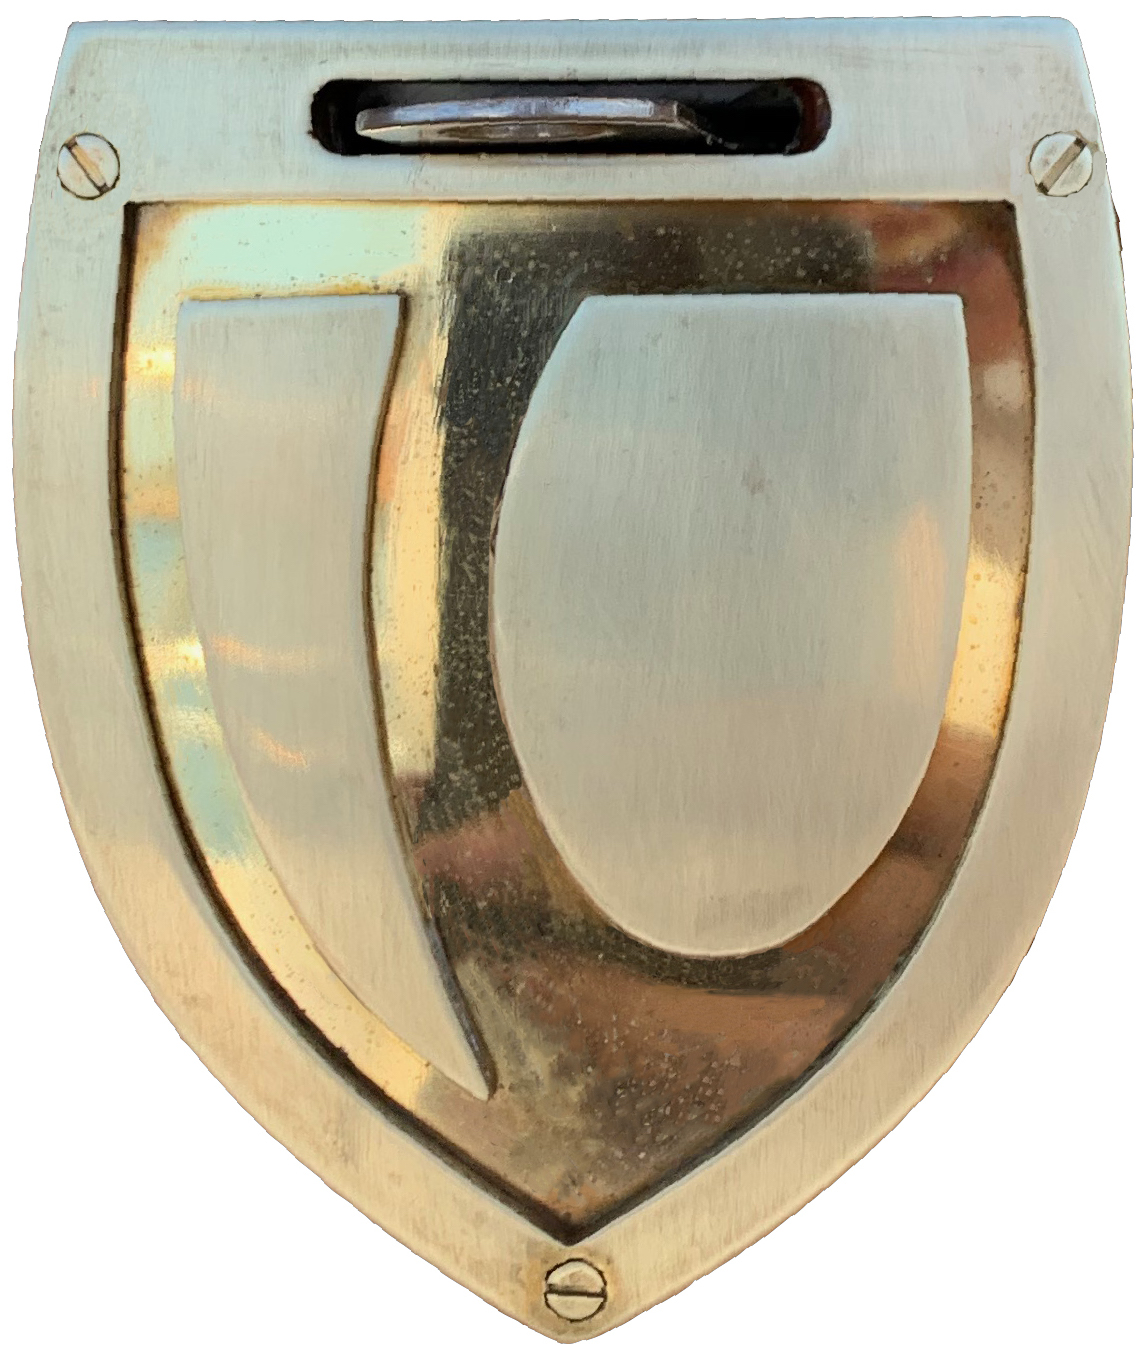
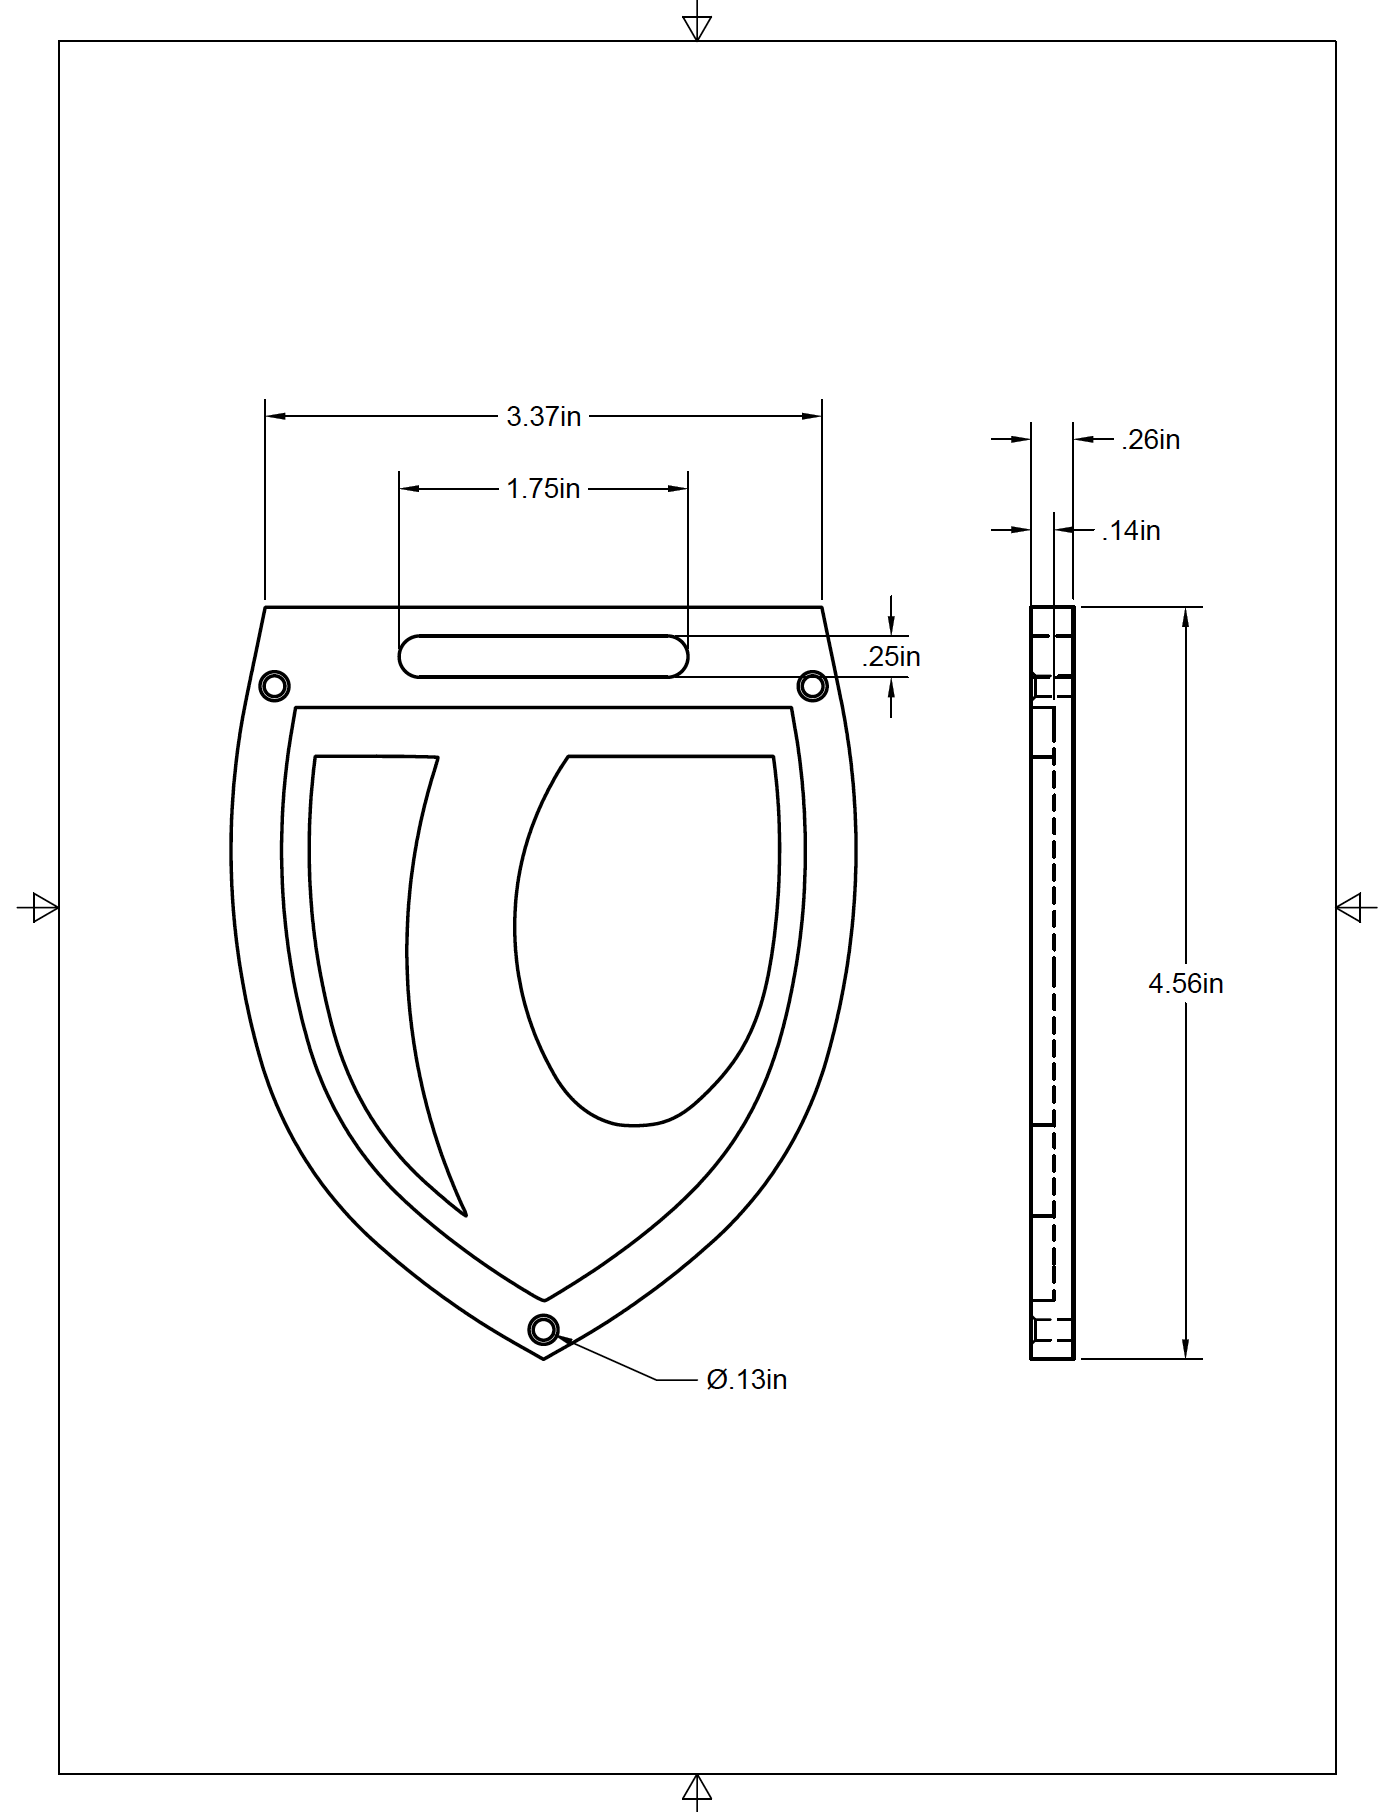
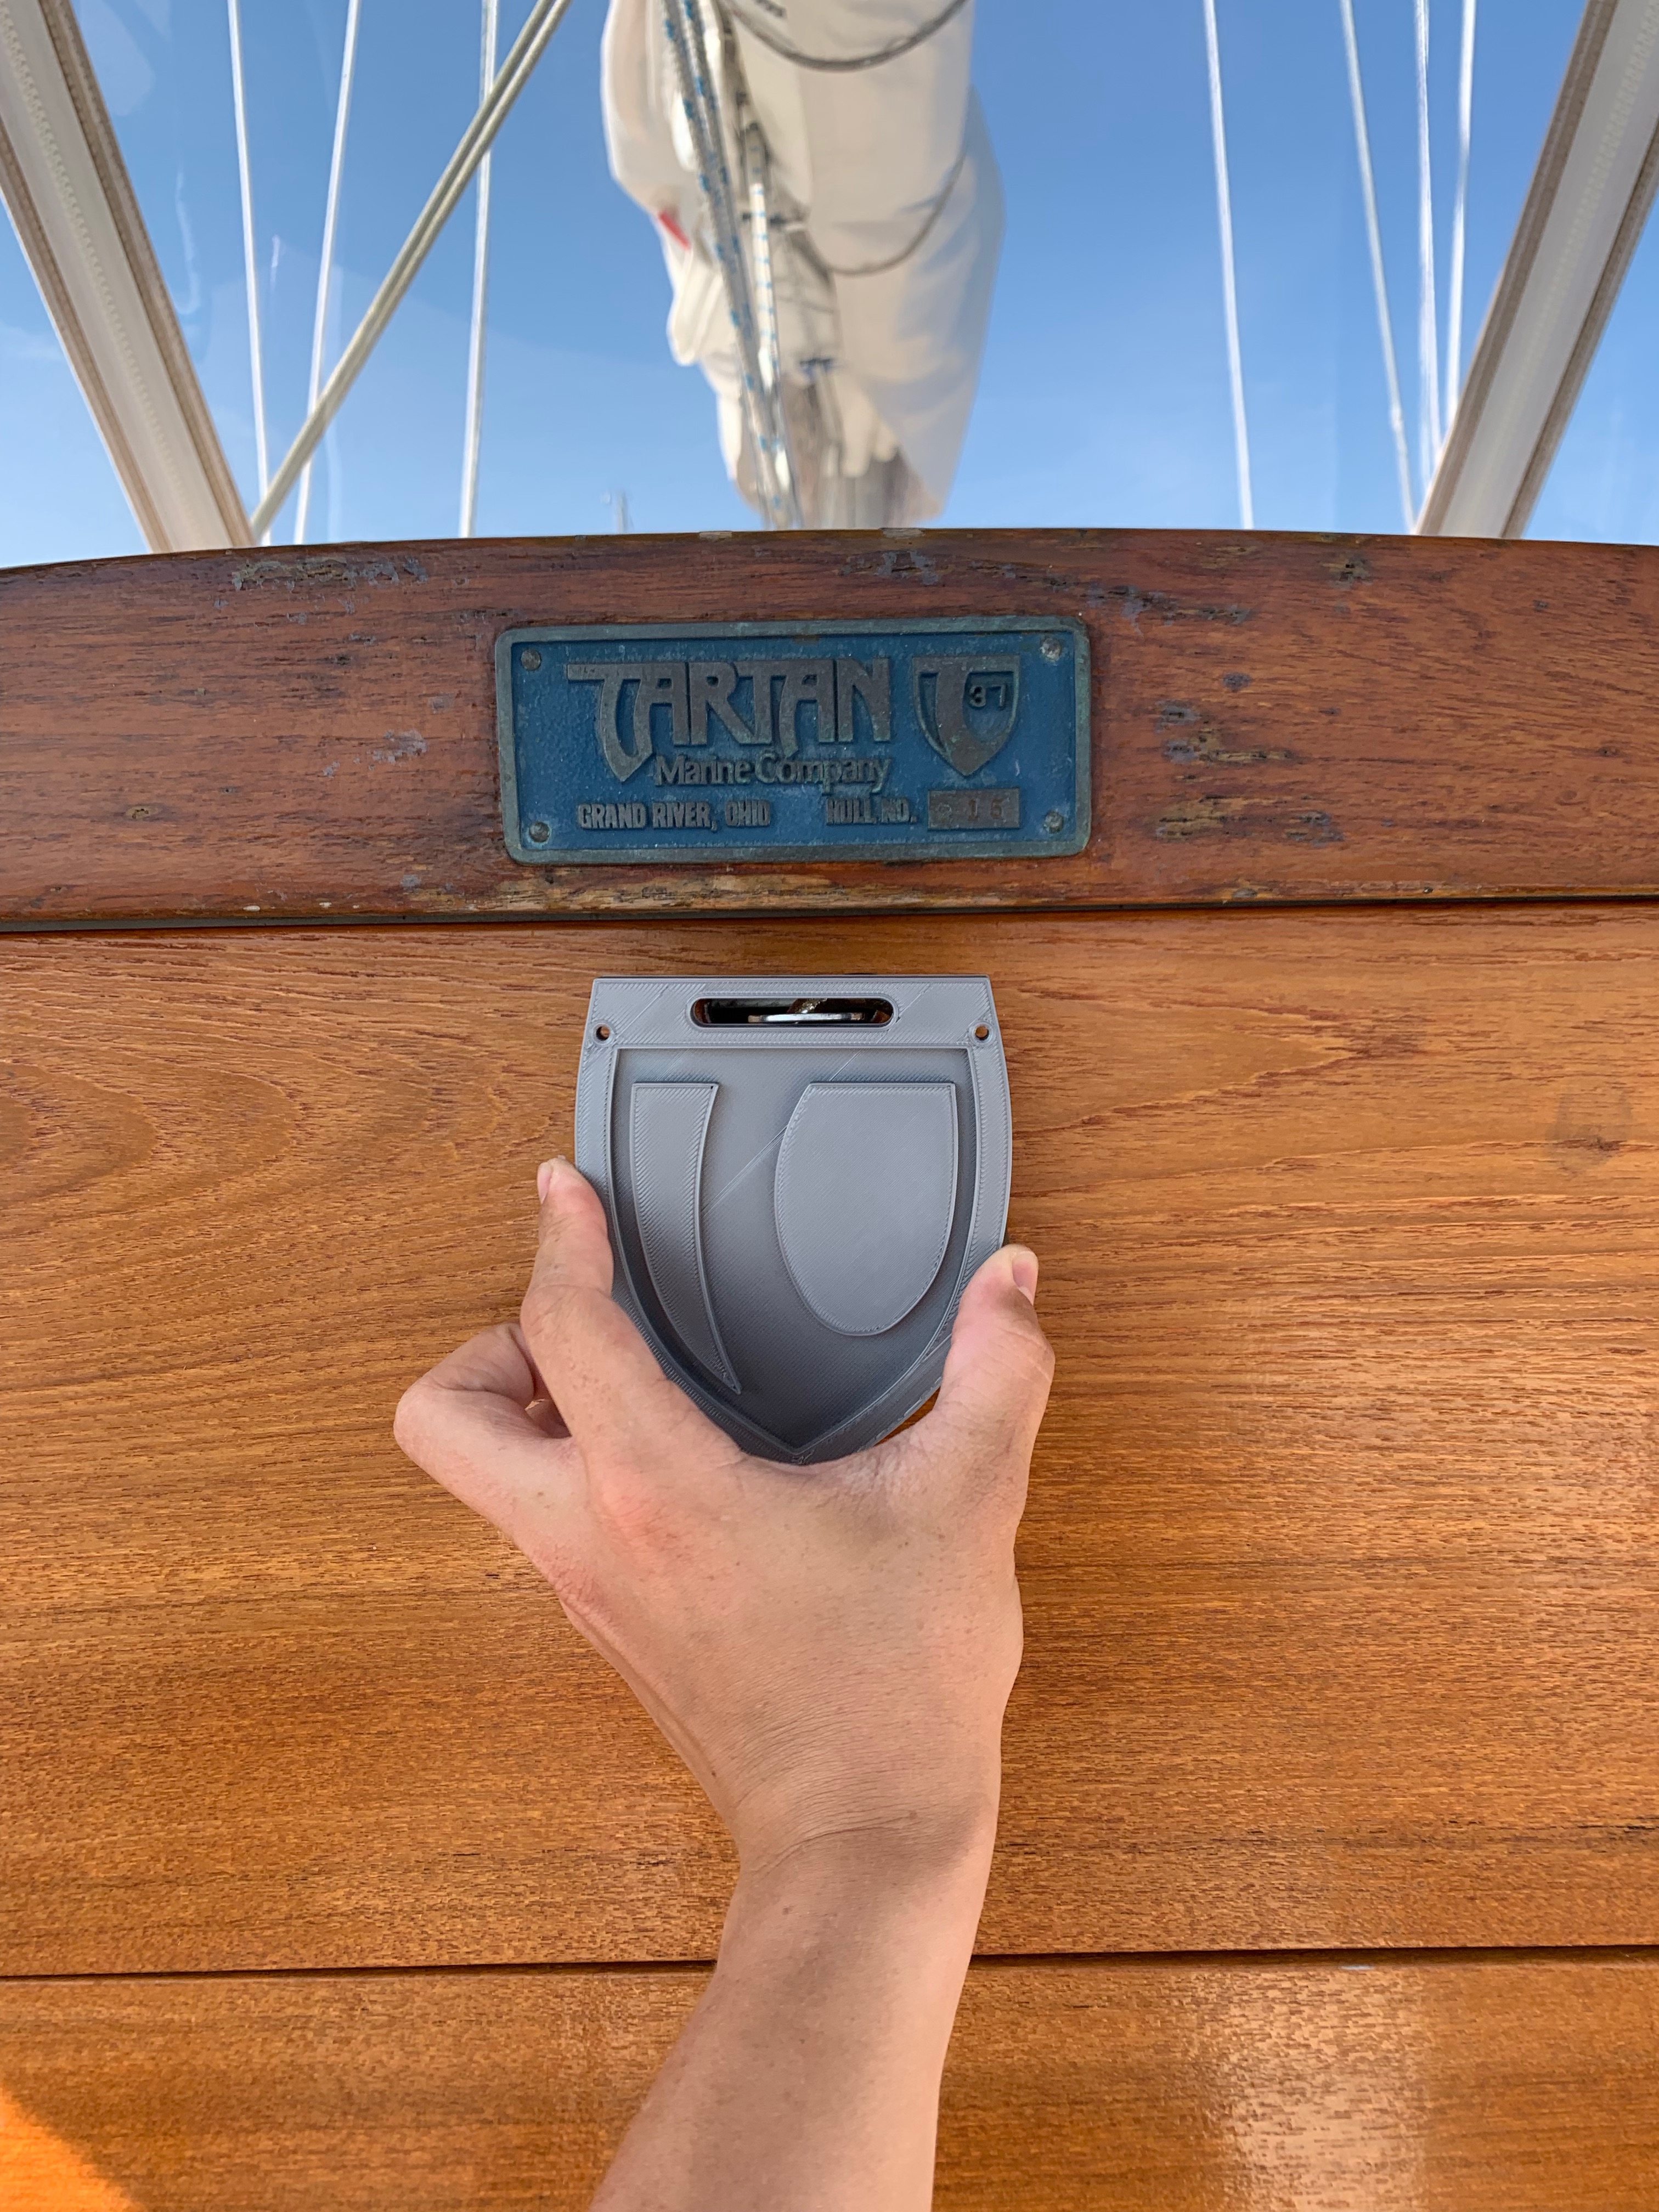
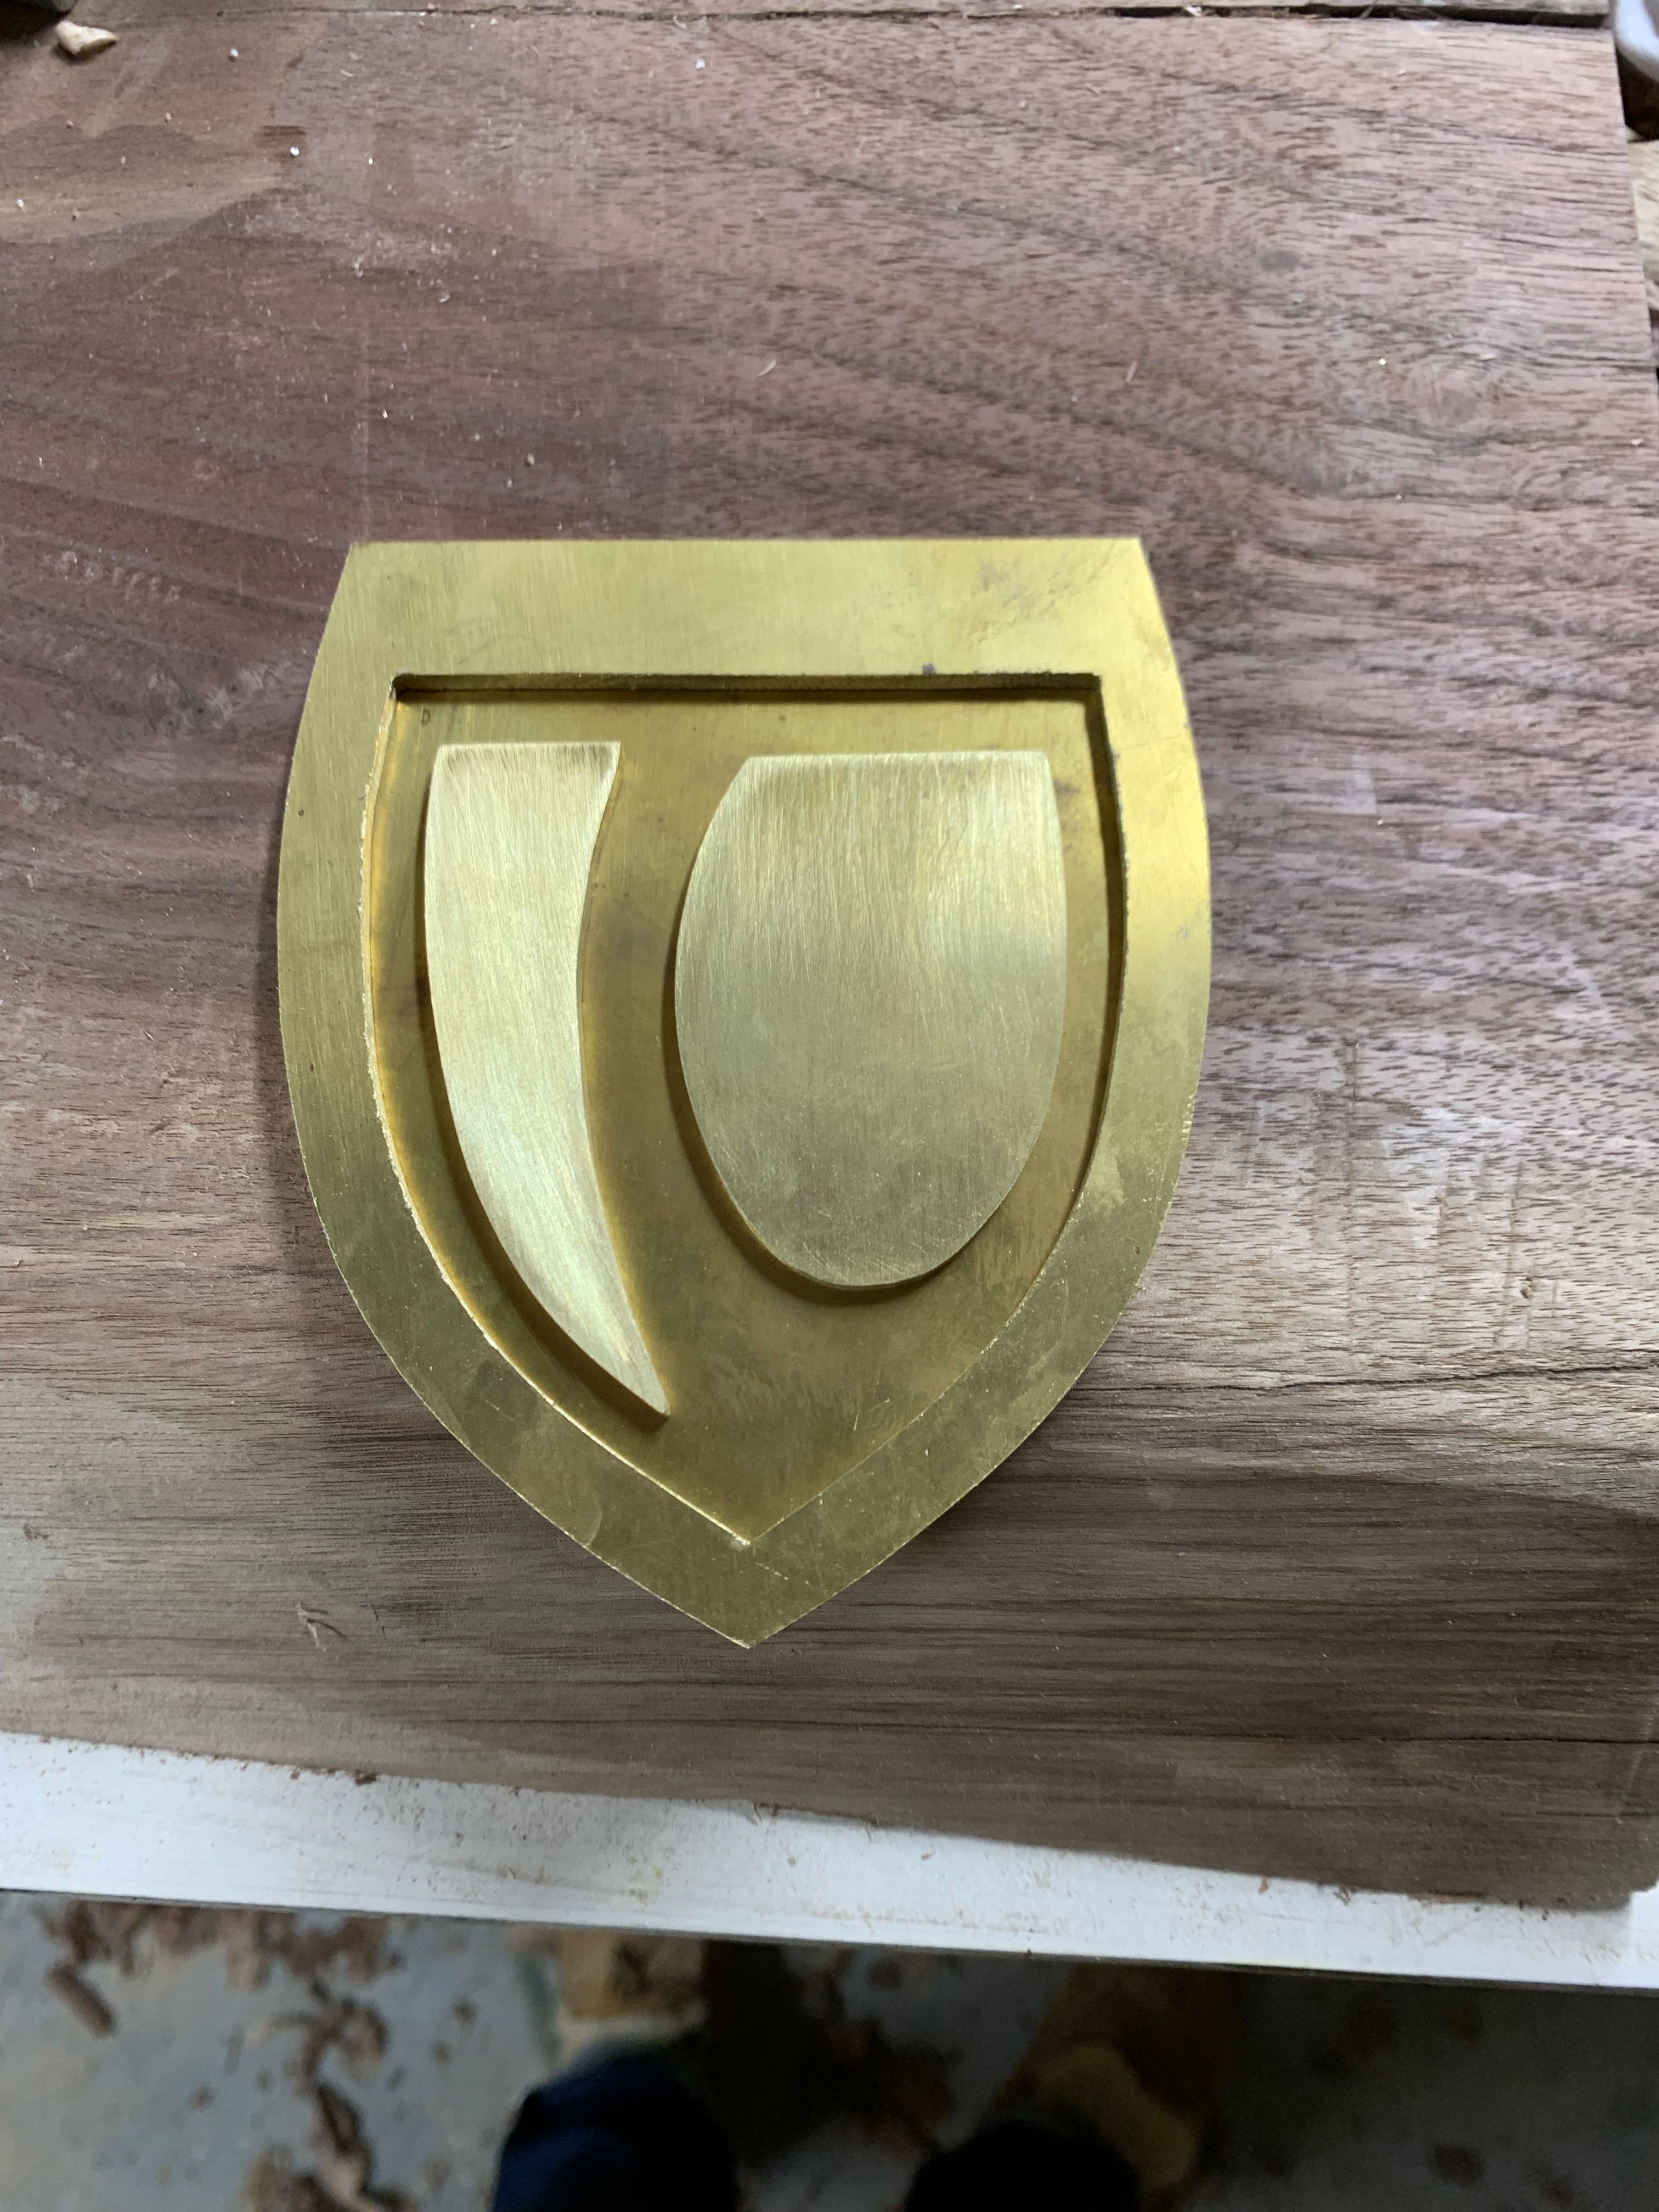
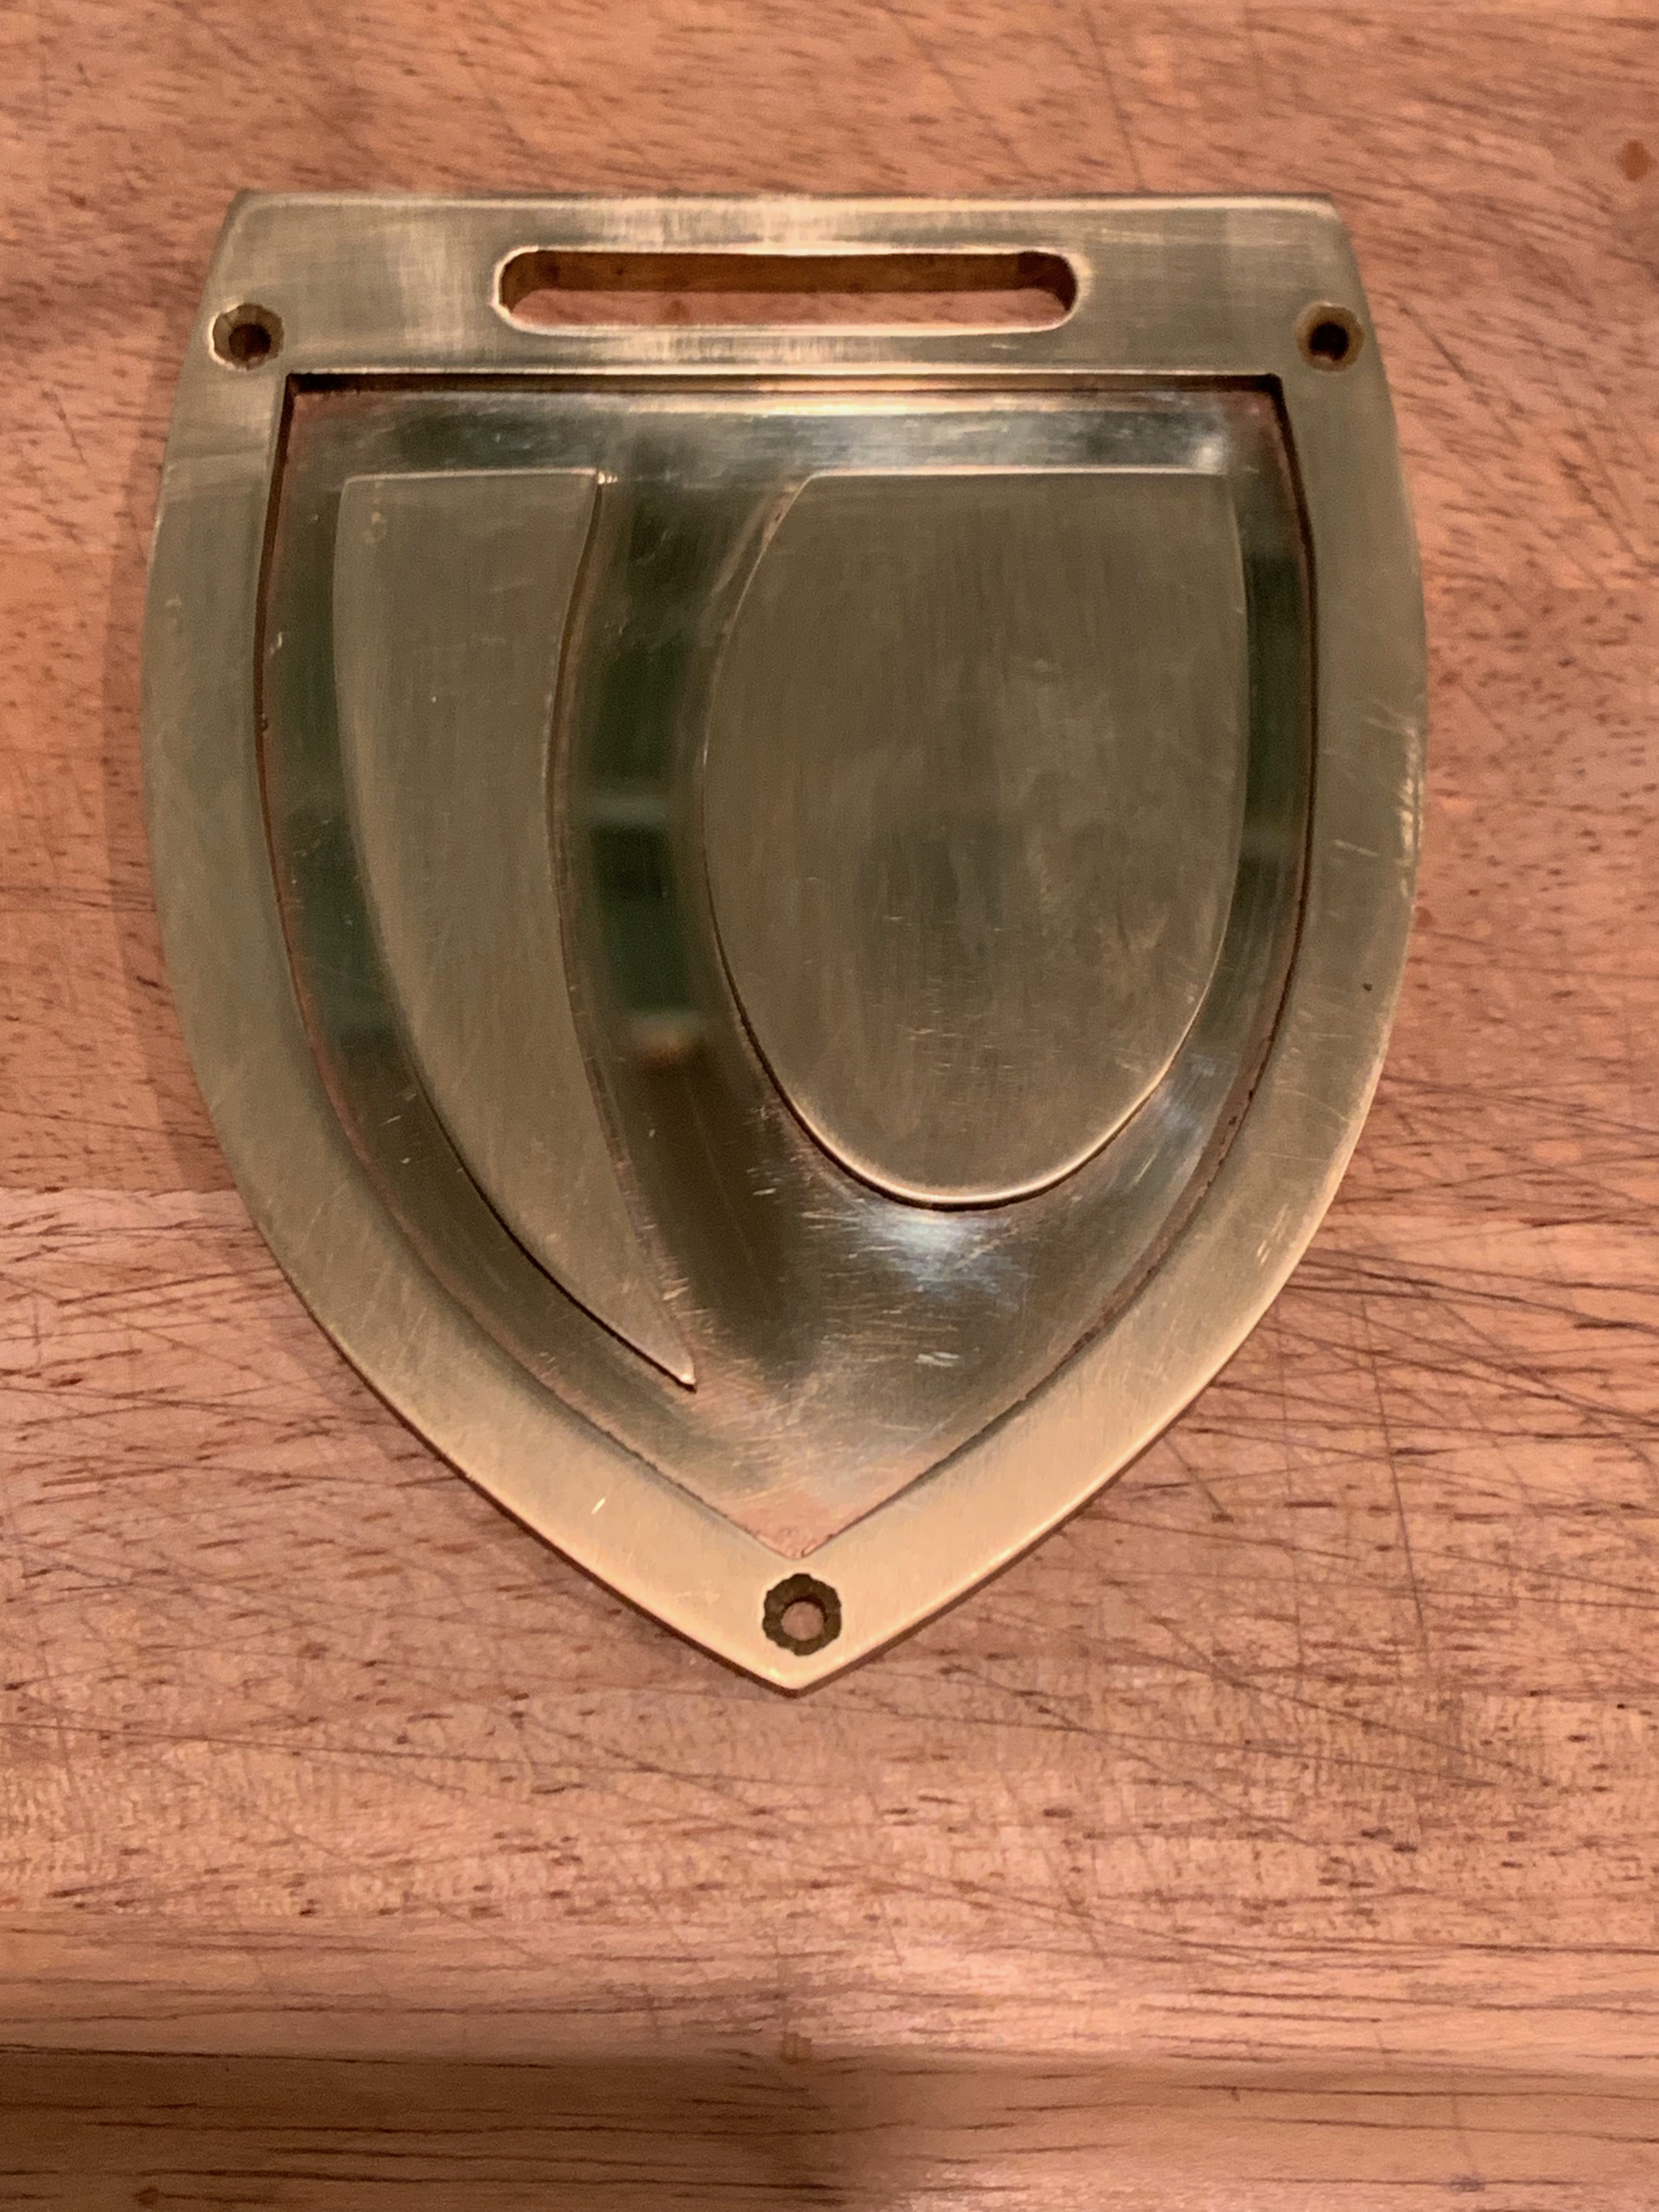
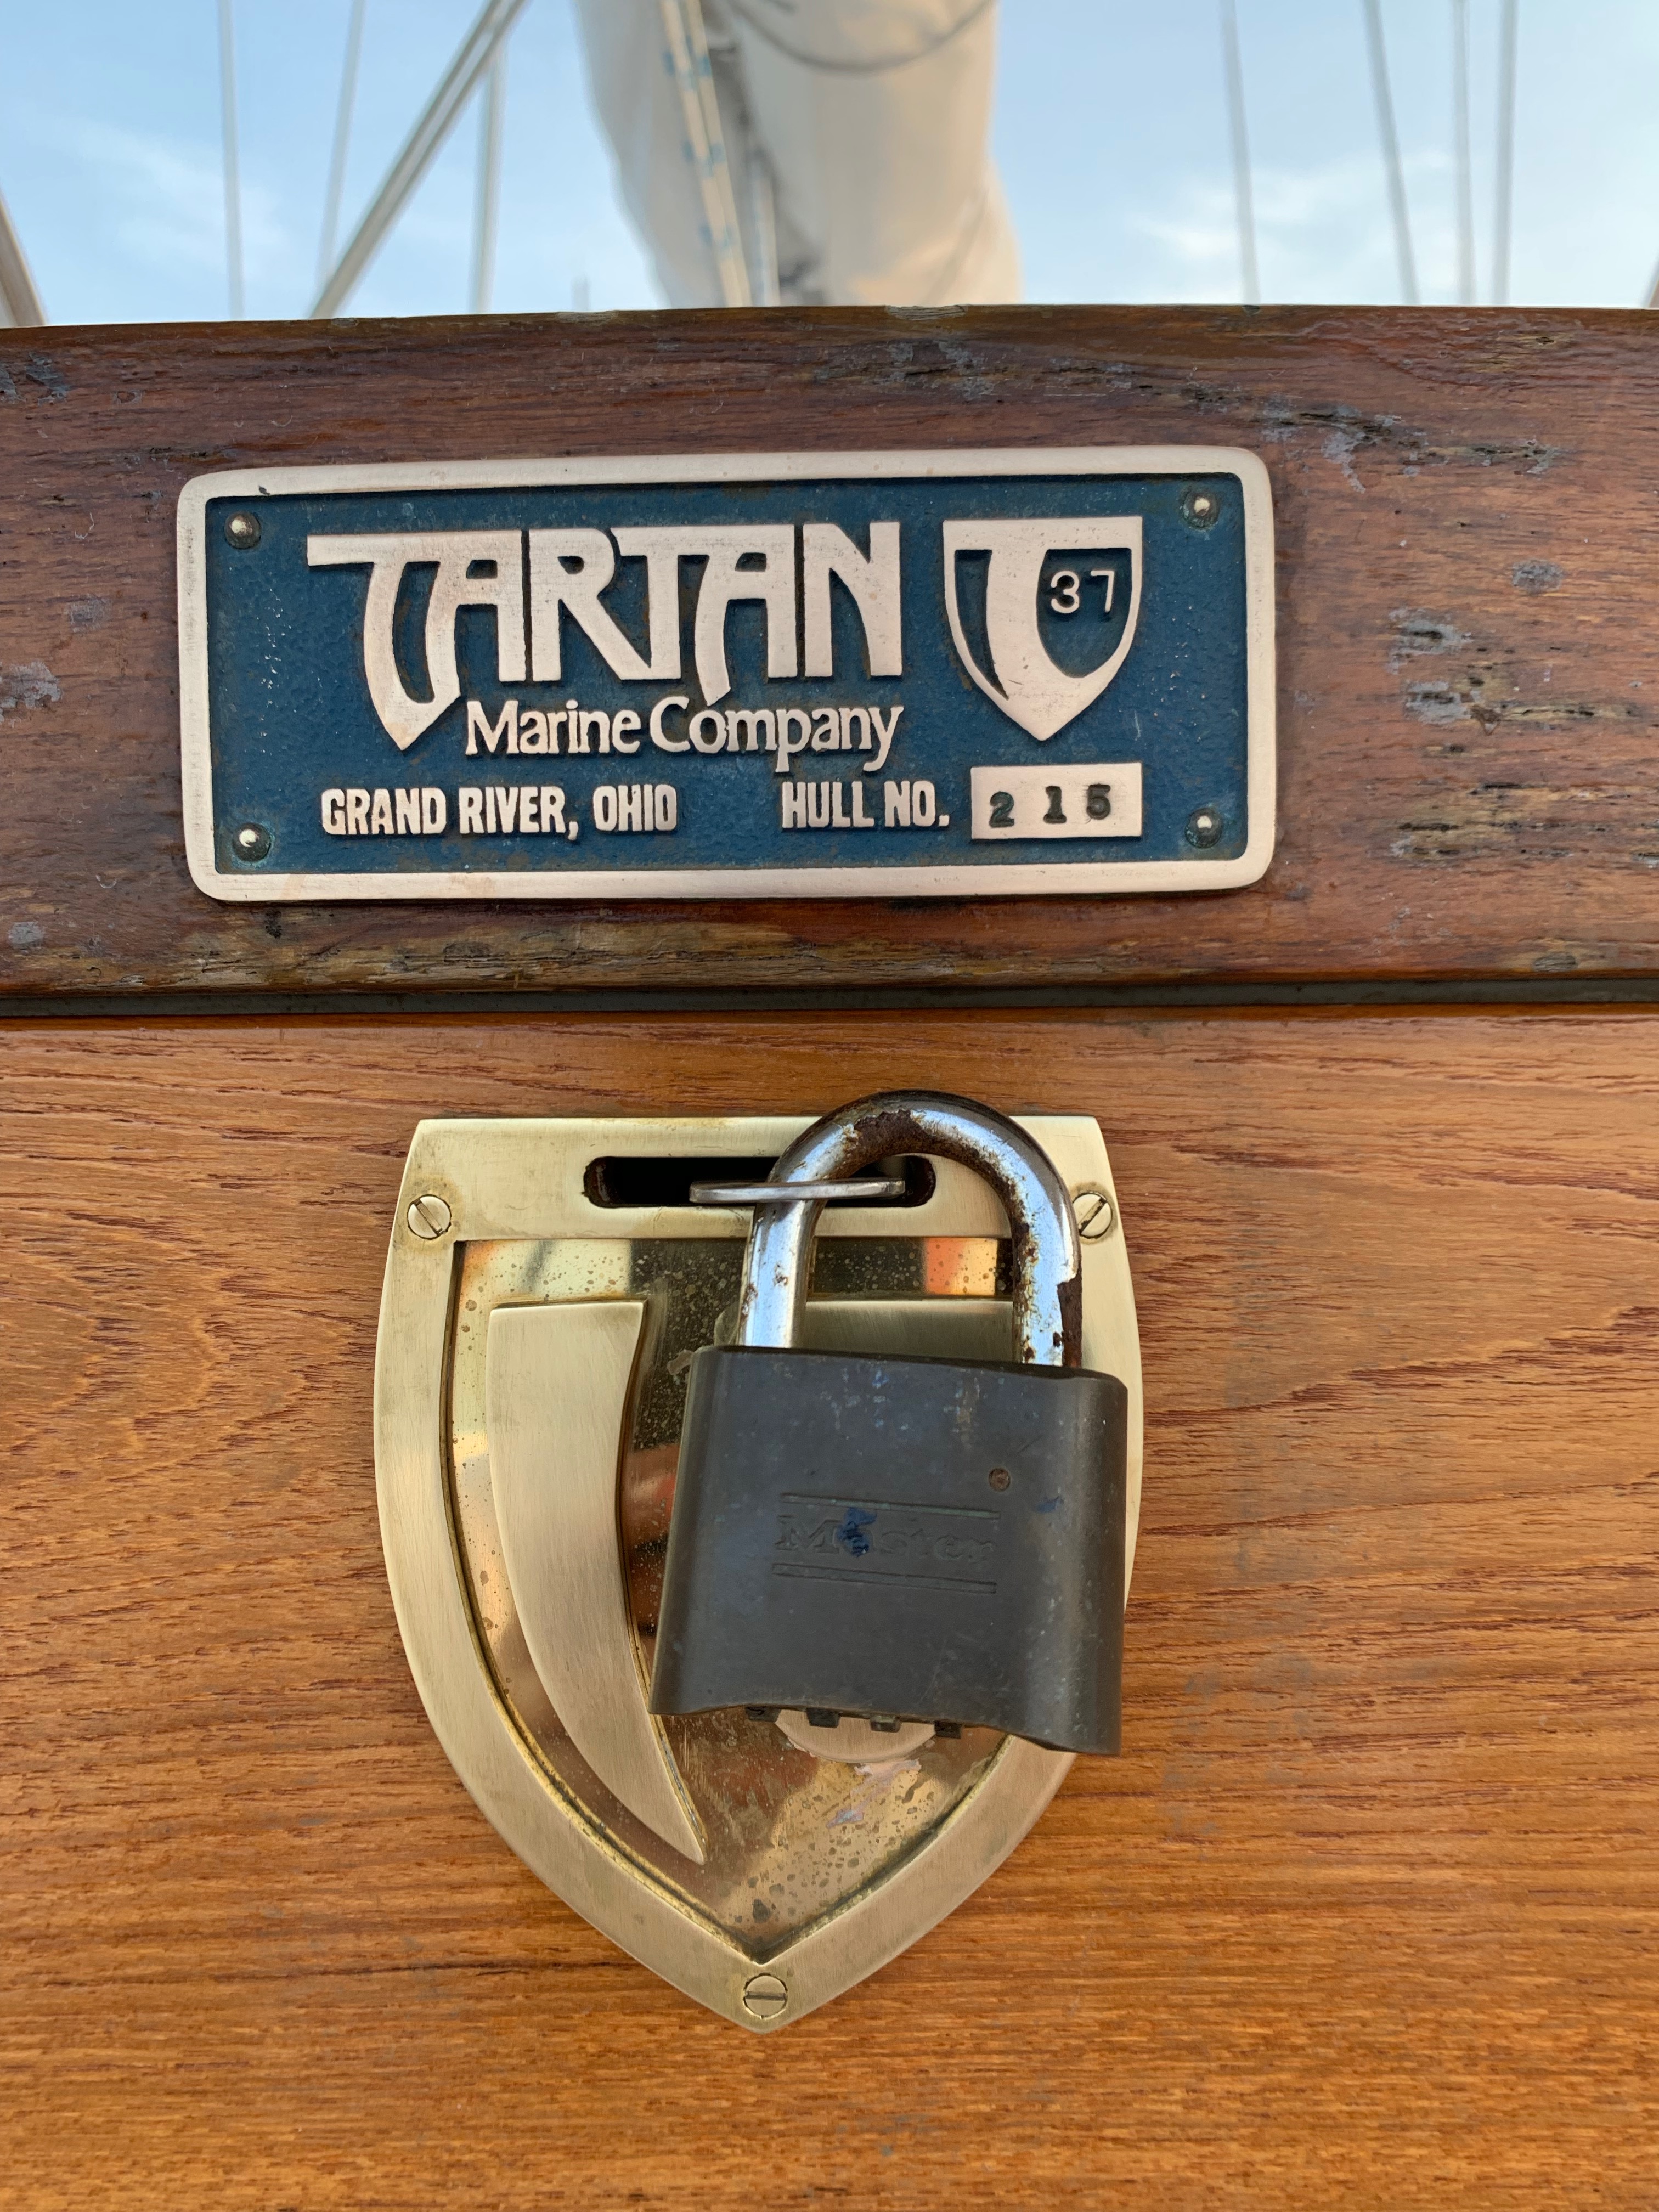
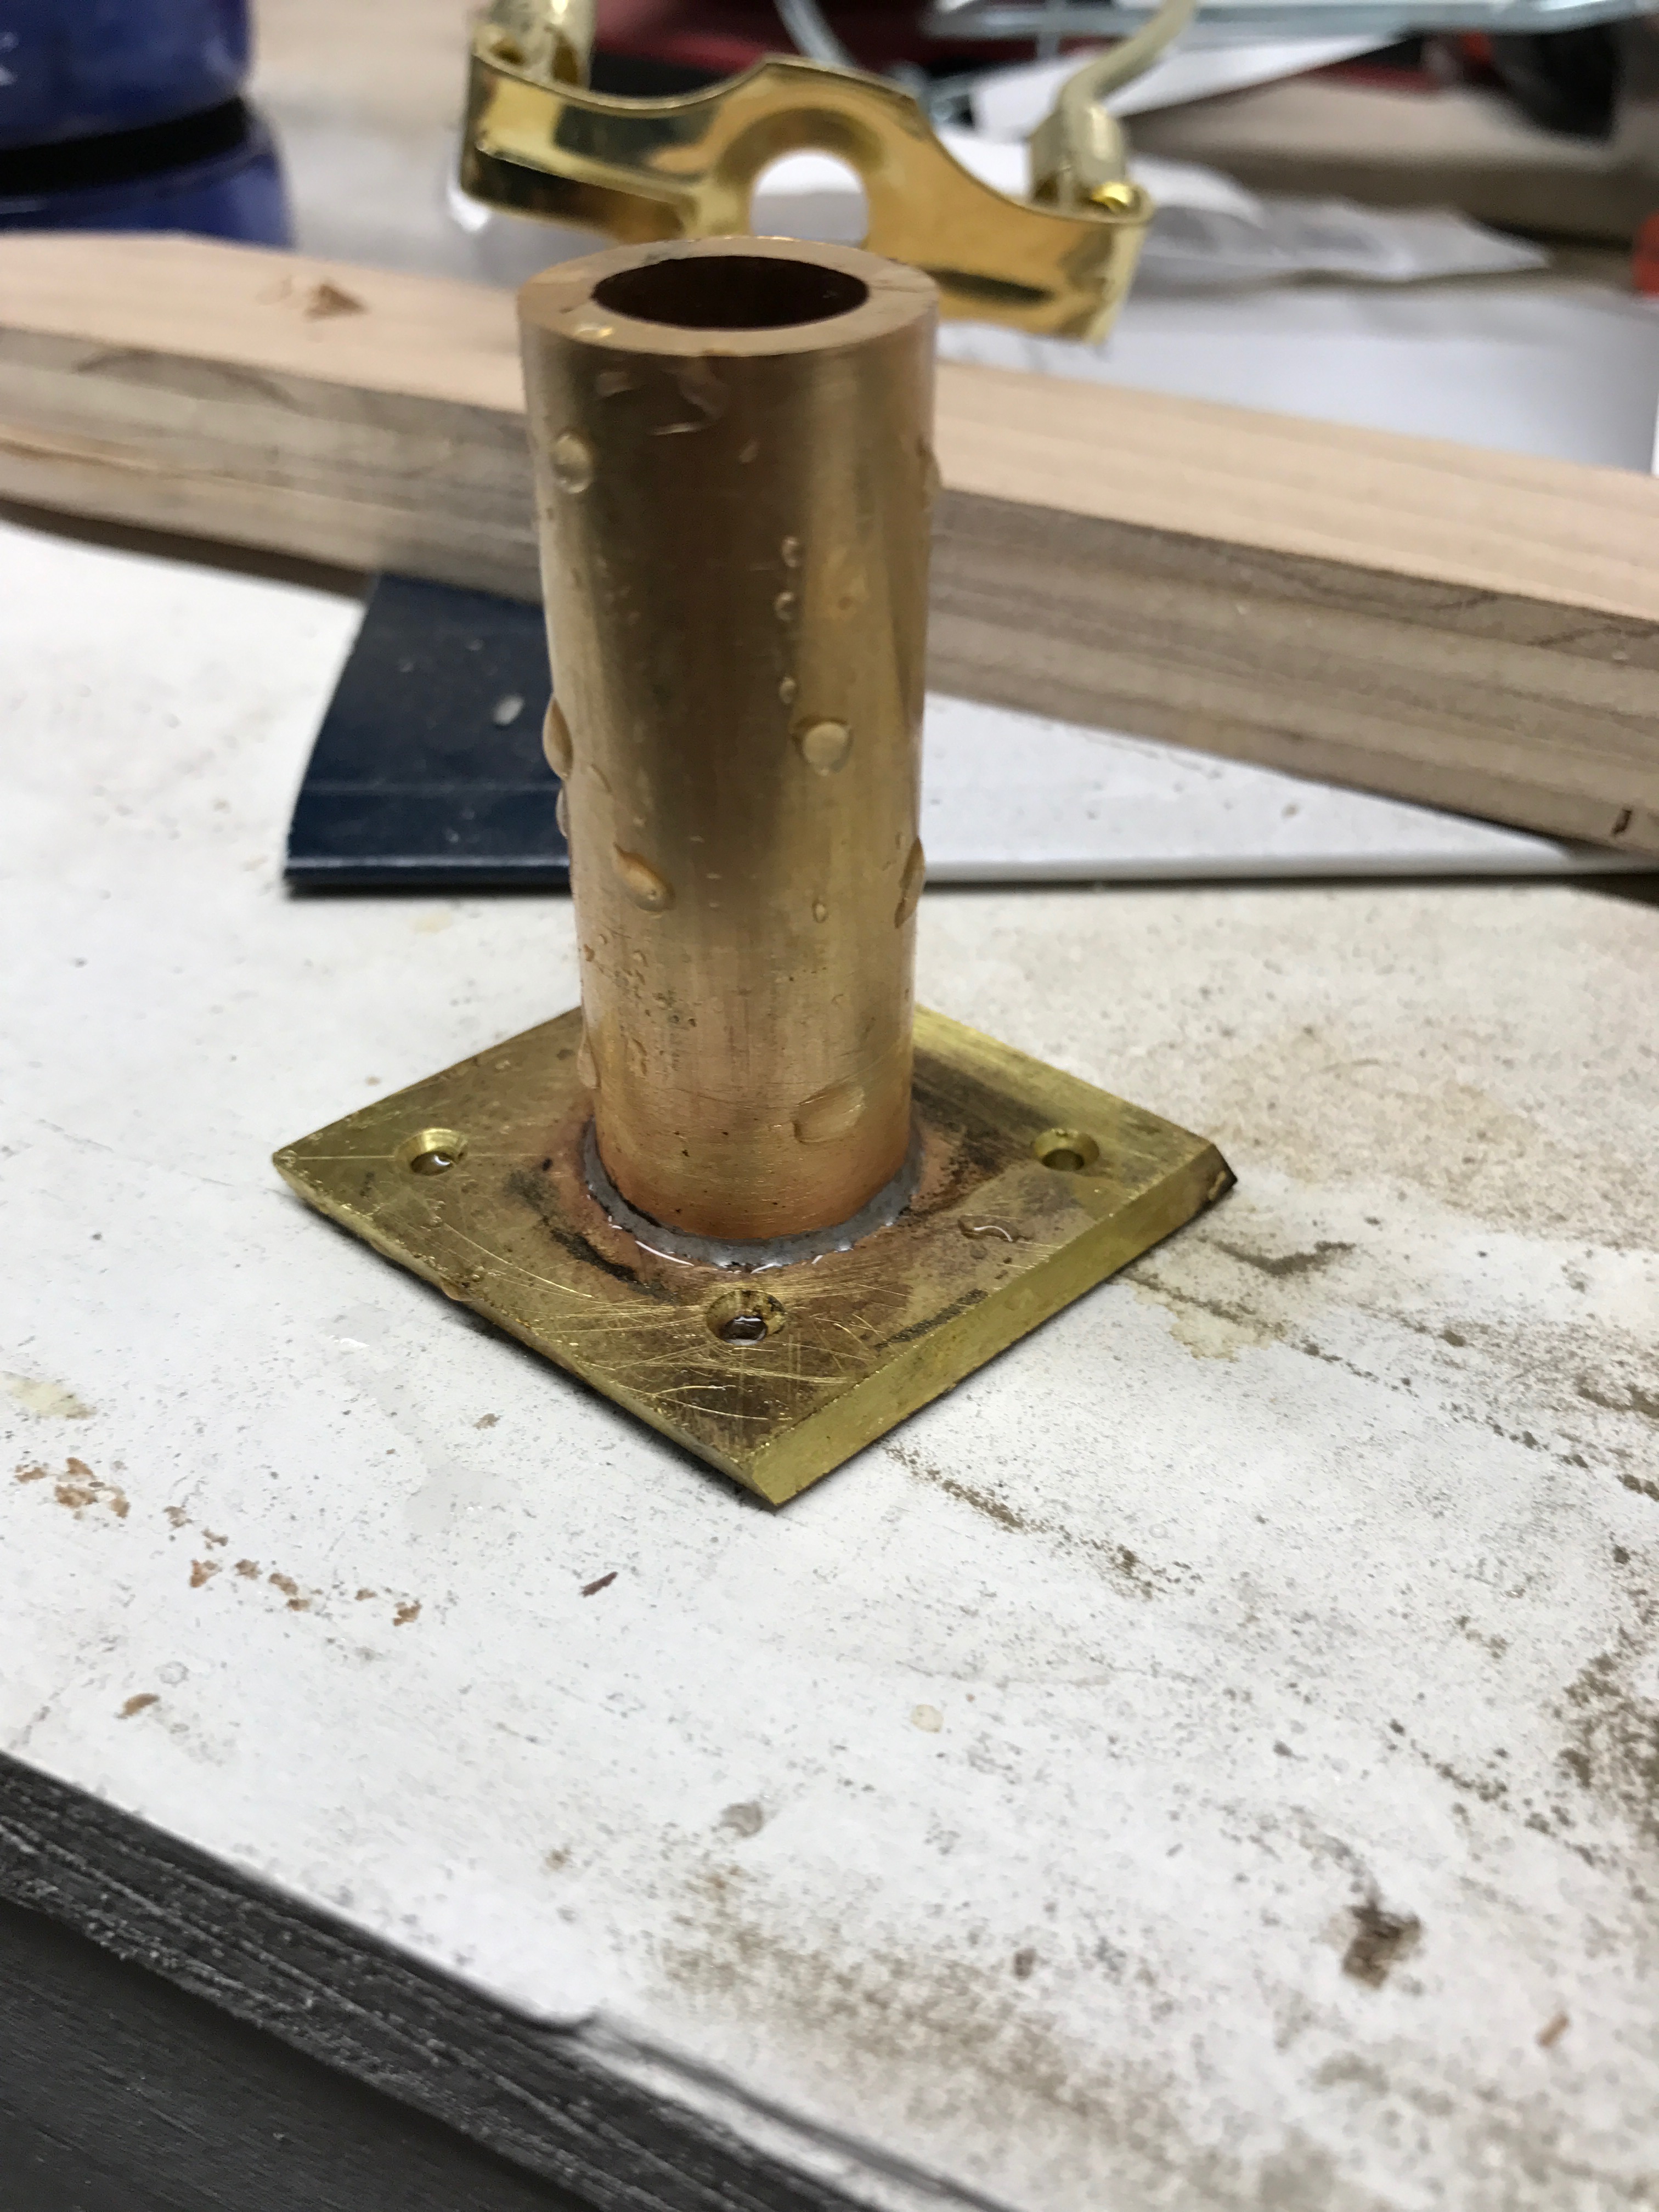
decorative plate
This brass plate was commissioned by a man with a very specific problem. He owned a sailboat with a companionway hatch that is secured by a padlock. The motion of the boat as it rocked on its mooring caused the padlock to rub up against the teak batten. The lock was slowly damaging the wood. I was asked to fabricate a piece of brass to sit between the lock and the wood. He also wanted the boat manufacturer’s logo included. After settling on a concept, I verified the fix with a 3D printed mockup and moved onto fabrication. The construction was done by sandwiching solder and flux between the two layers of brass. The top layer is the logo and the bottom layer is the ground. To accentuate the difference between the layers, the whole piece was polished to a mirror finish and then the top layer was knocked down to a brushed finished. I then clamped the two pieces together and heated them until the solder fused the two layers together. Since the installation, the piece has weathered in the salty environment and works perfectly.
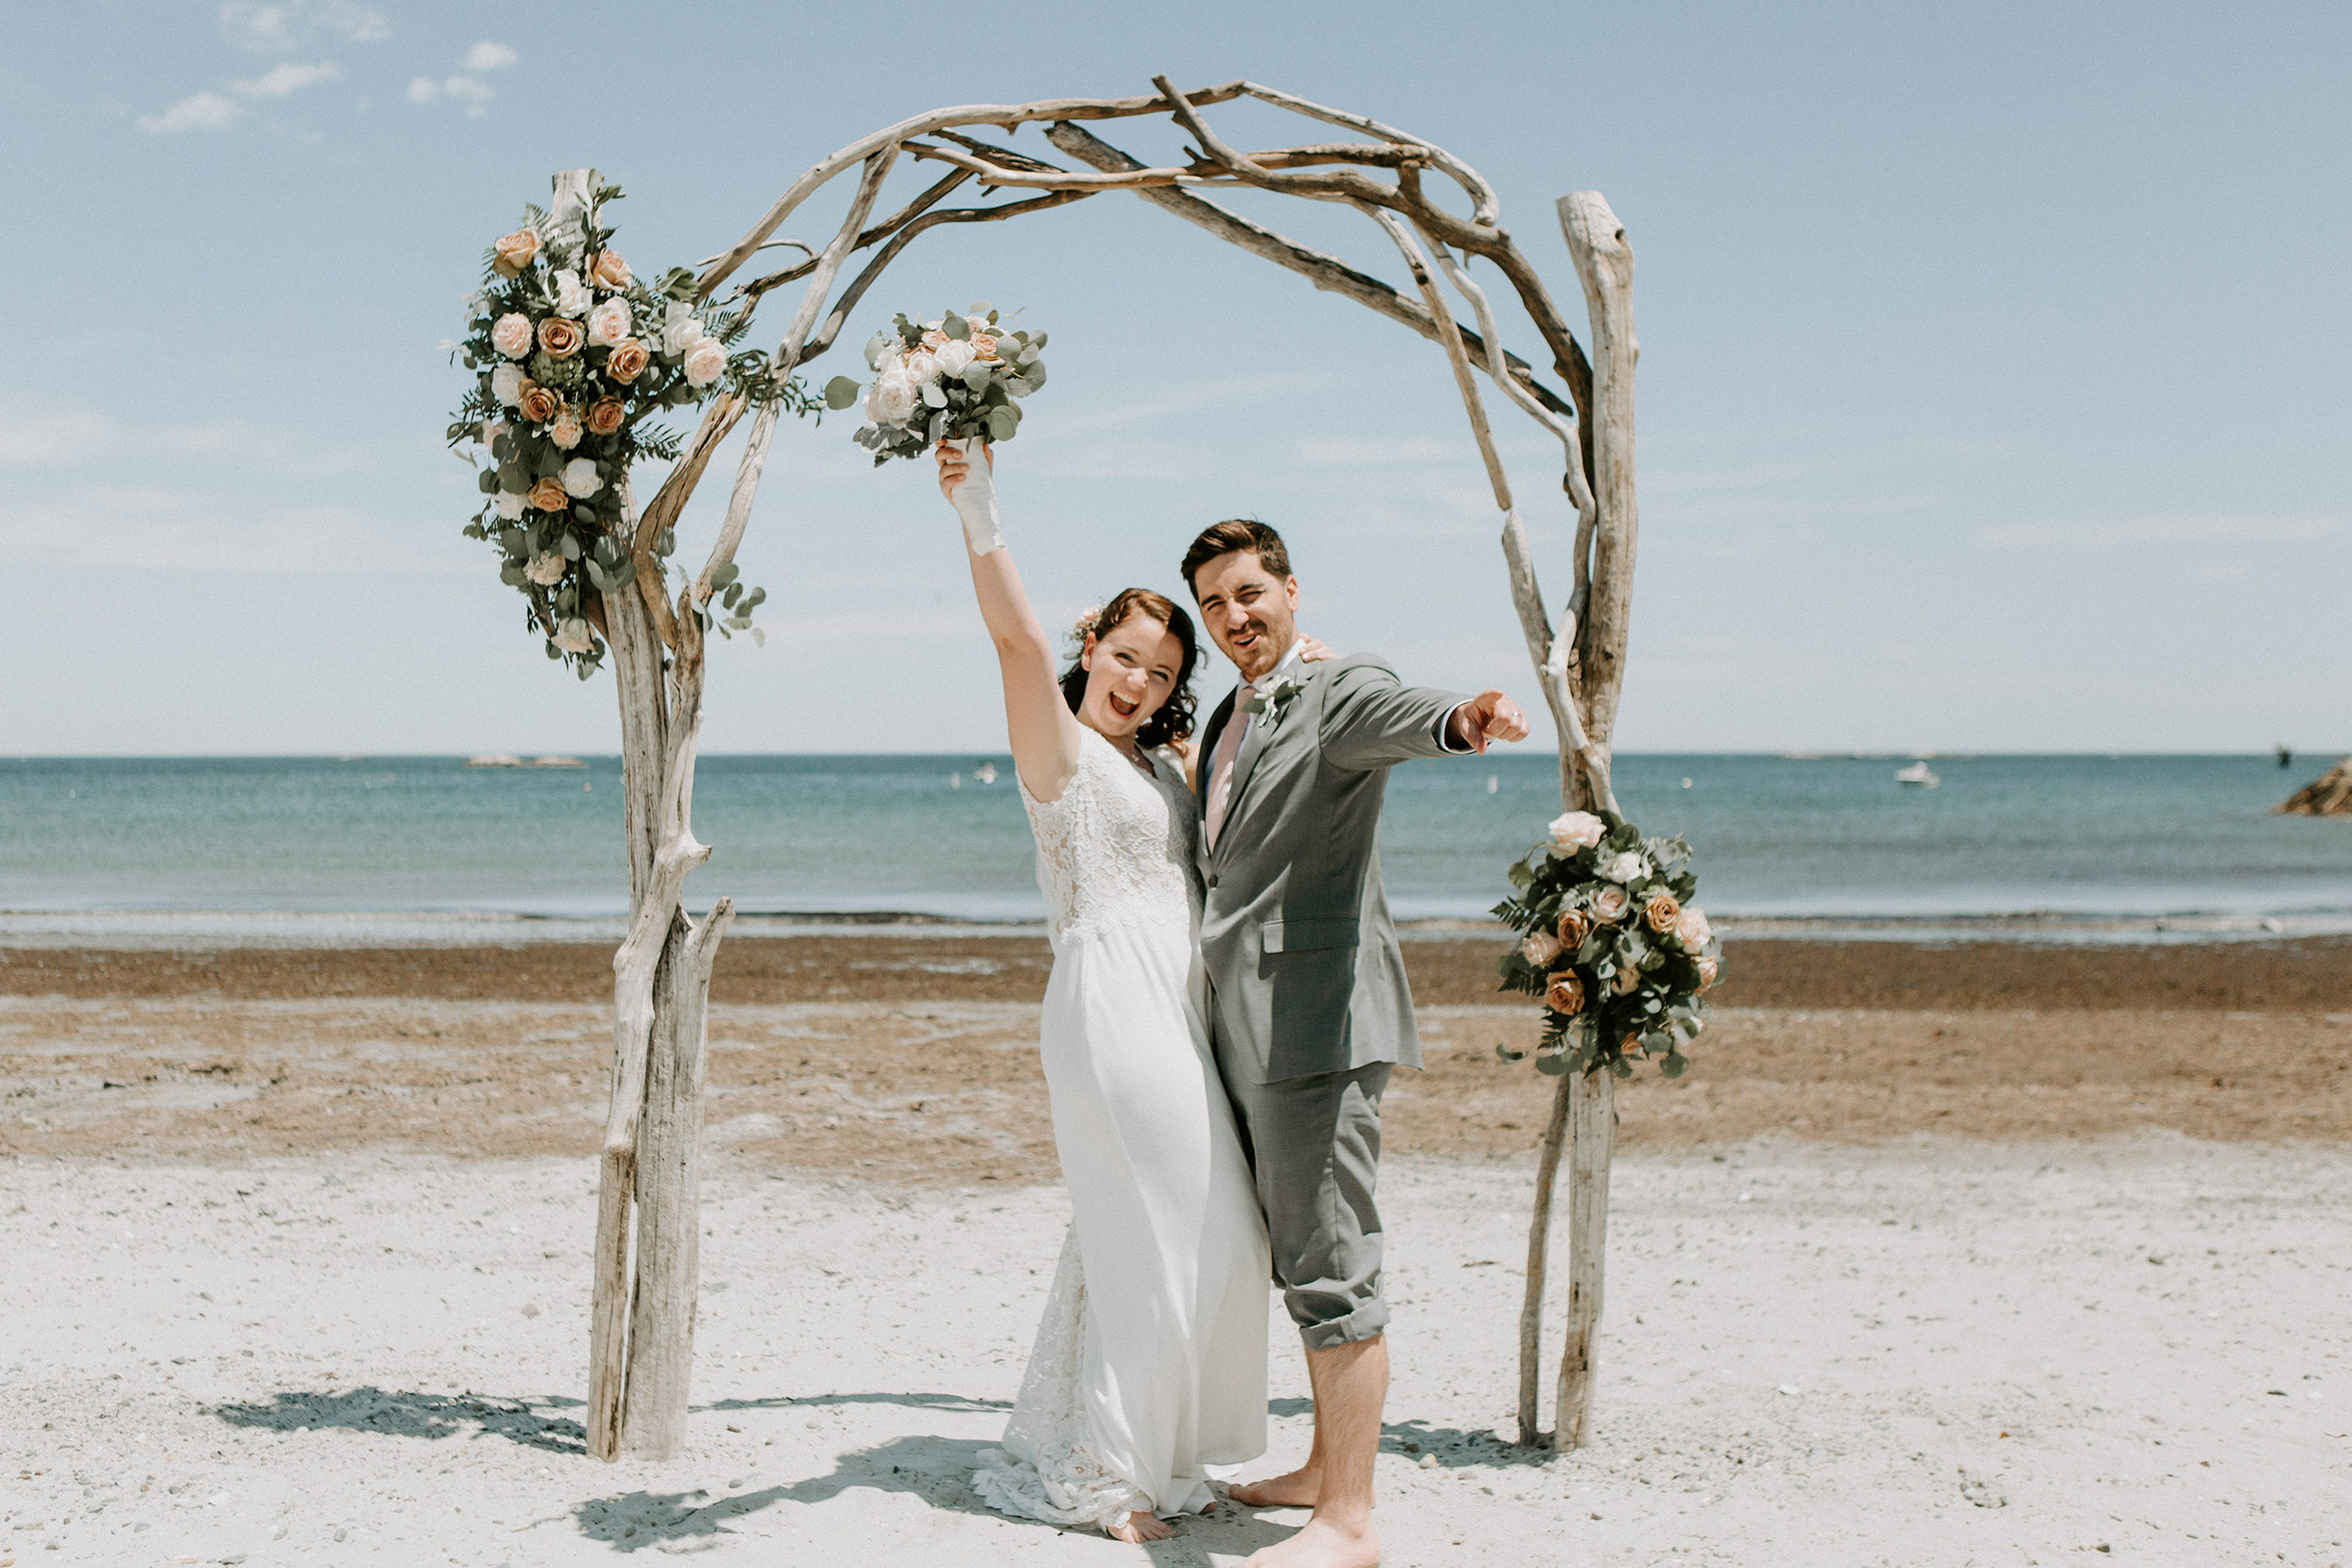
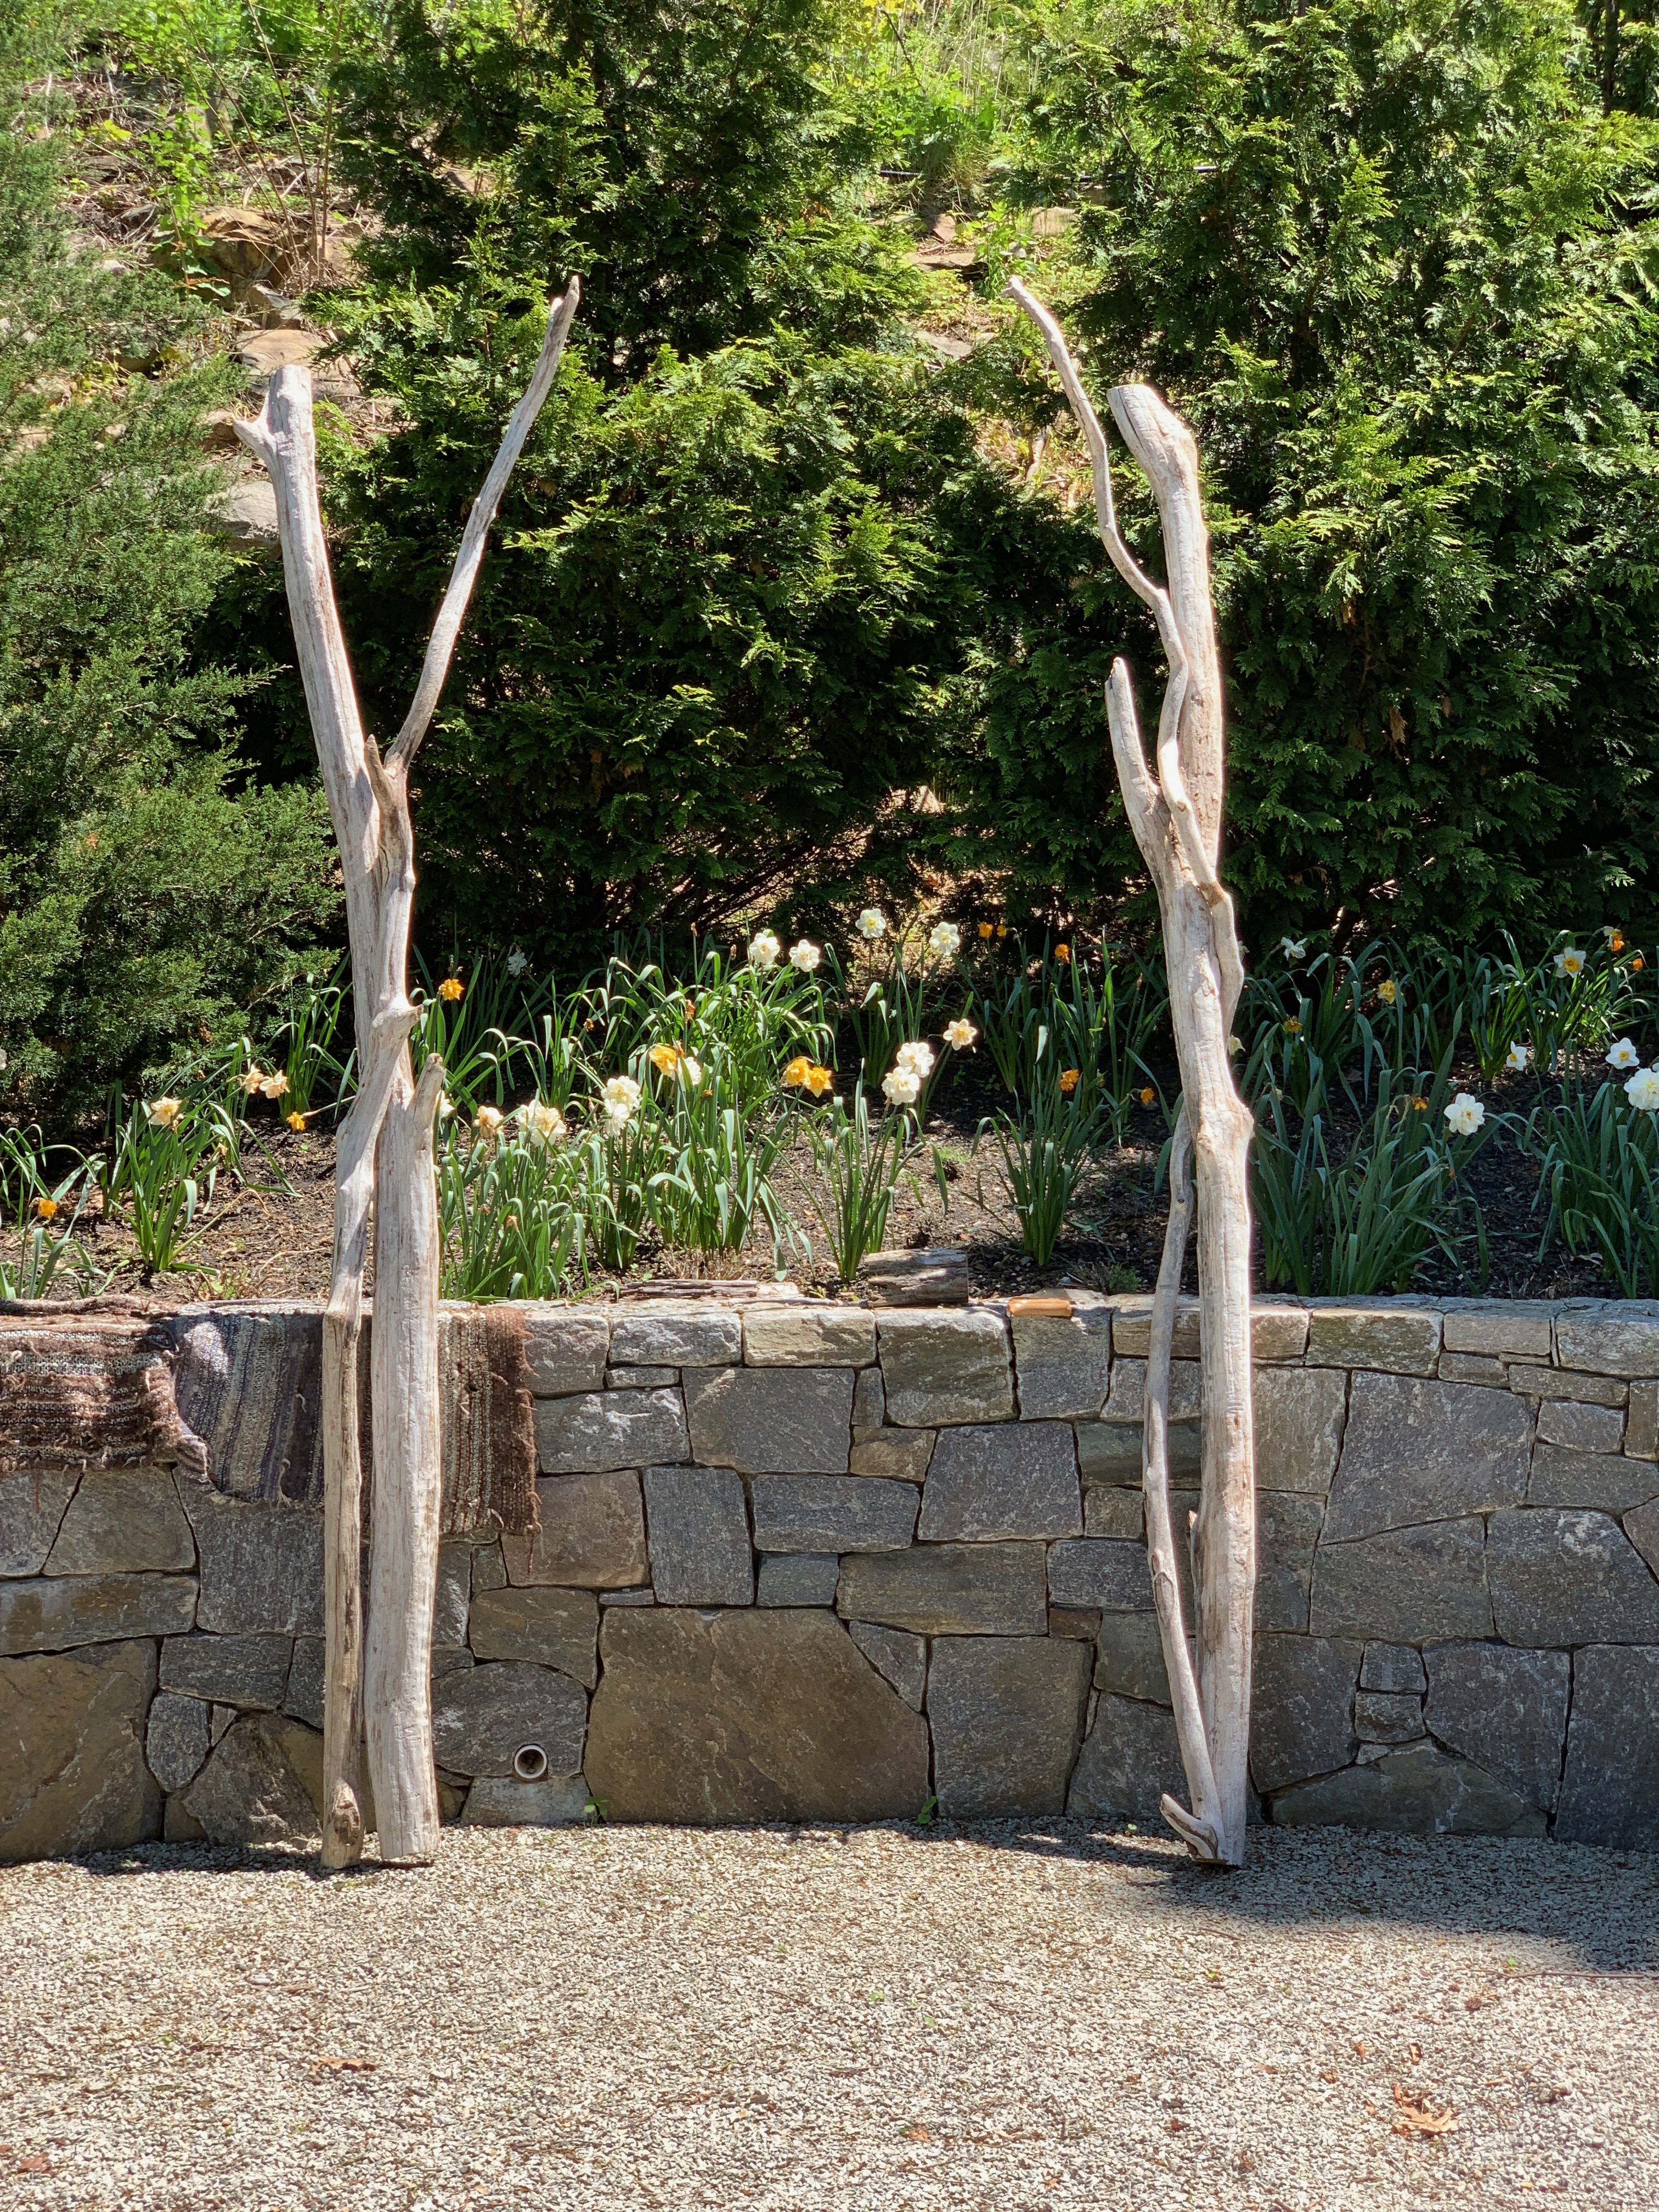
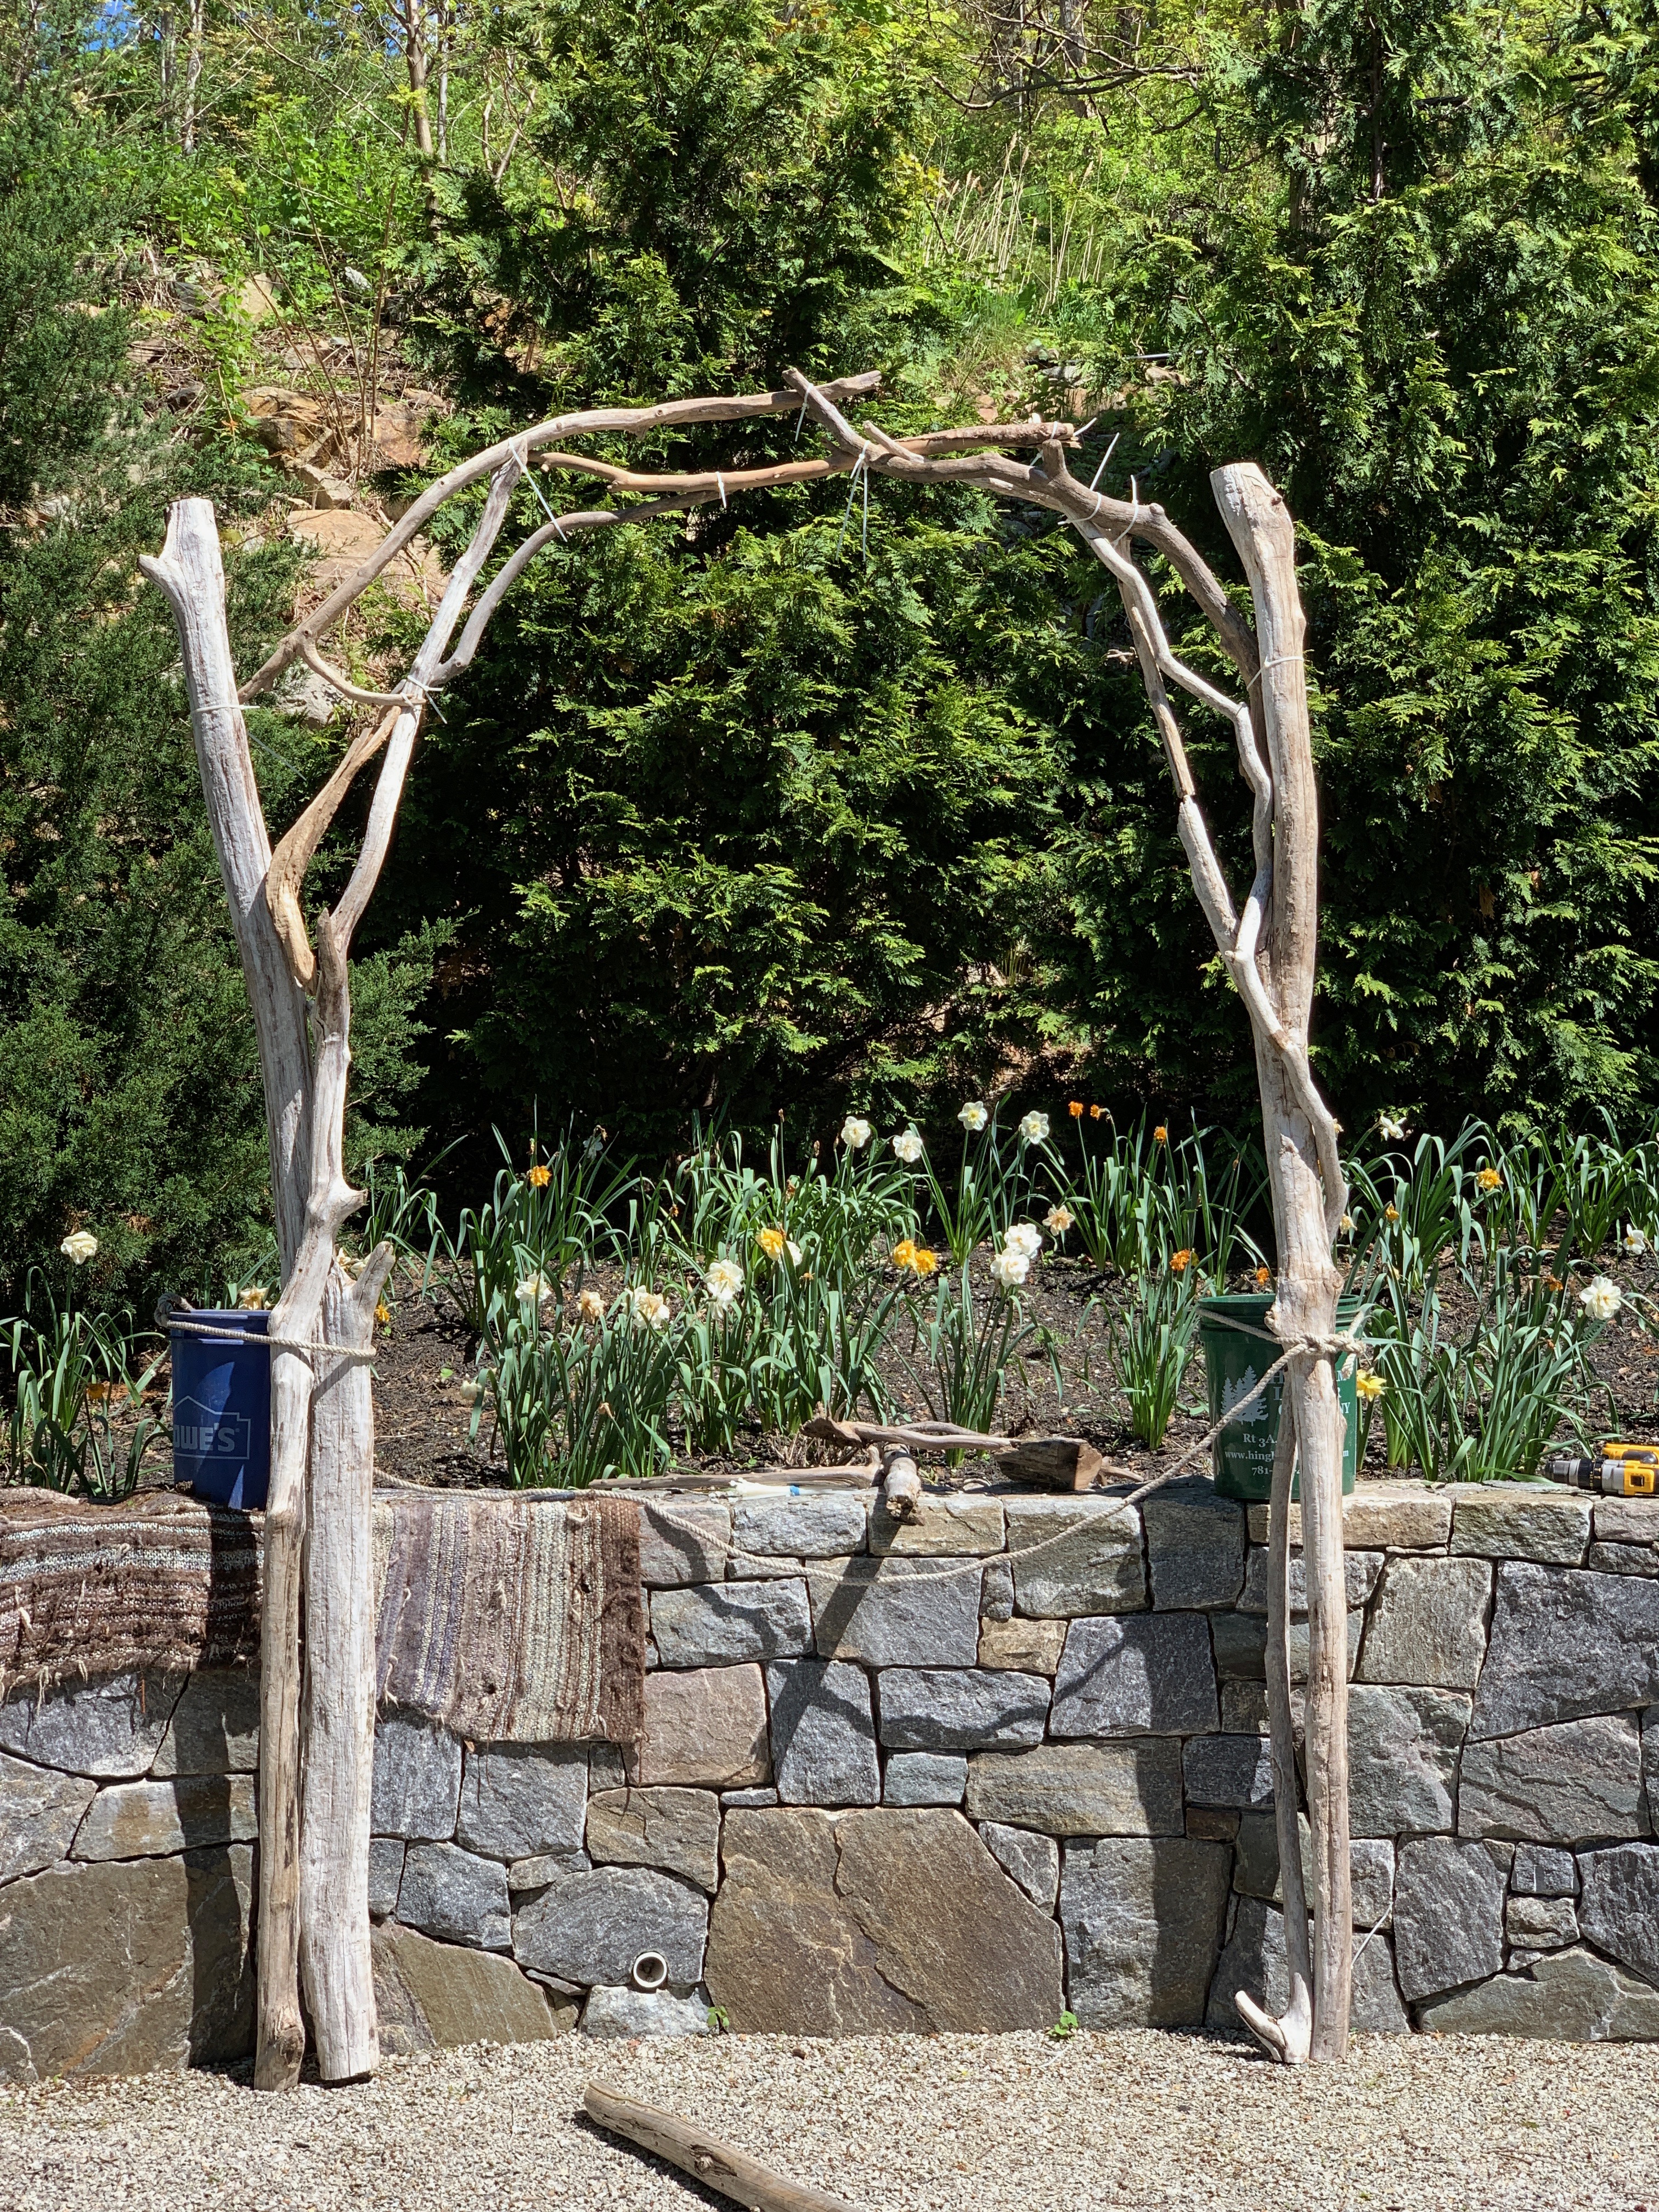
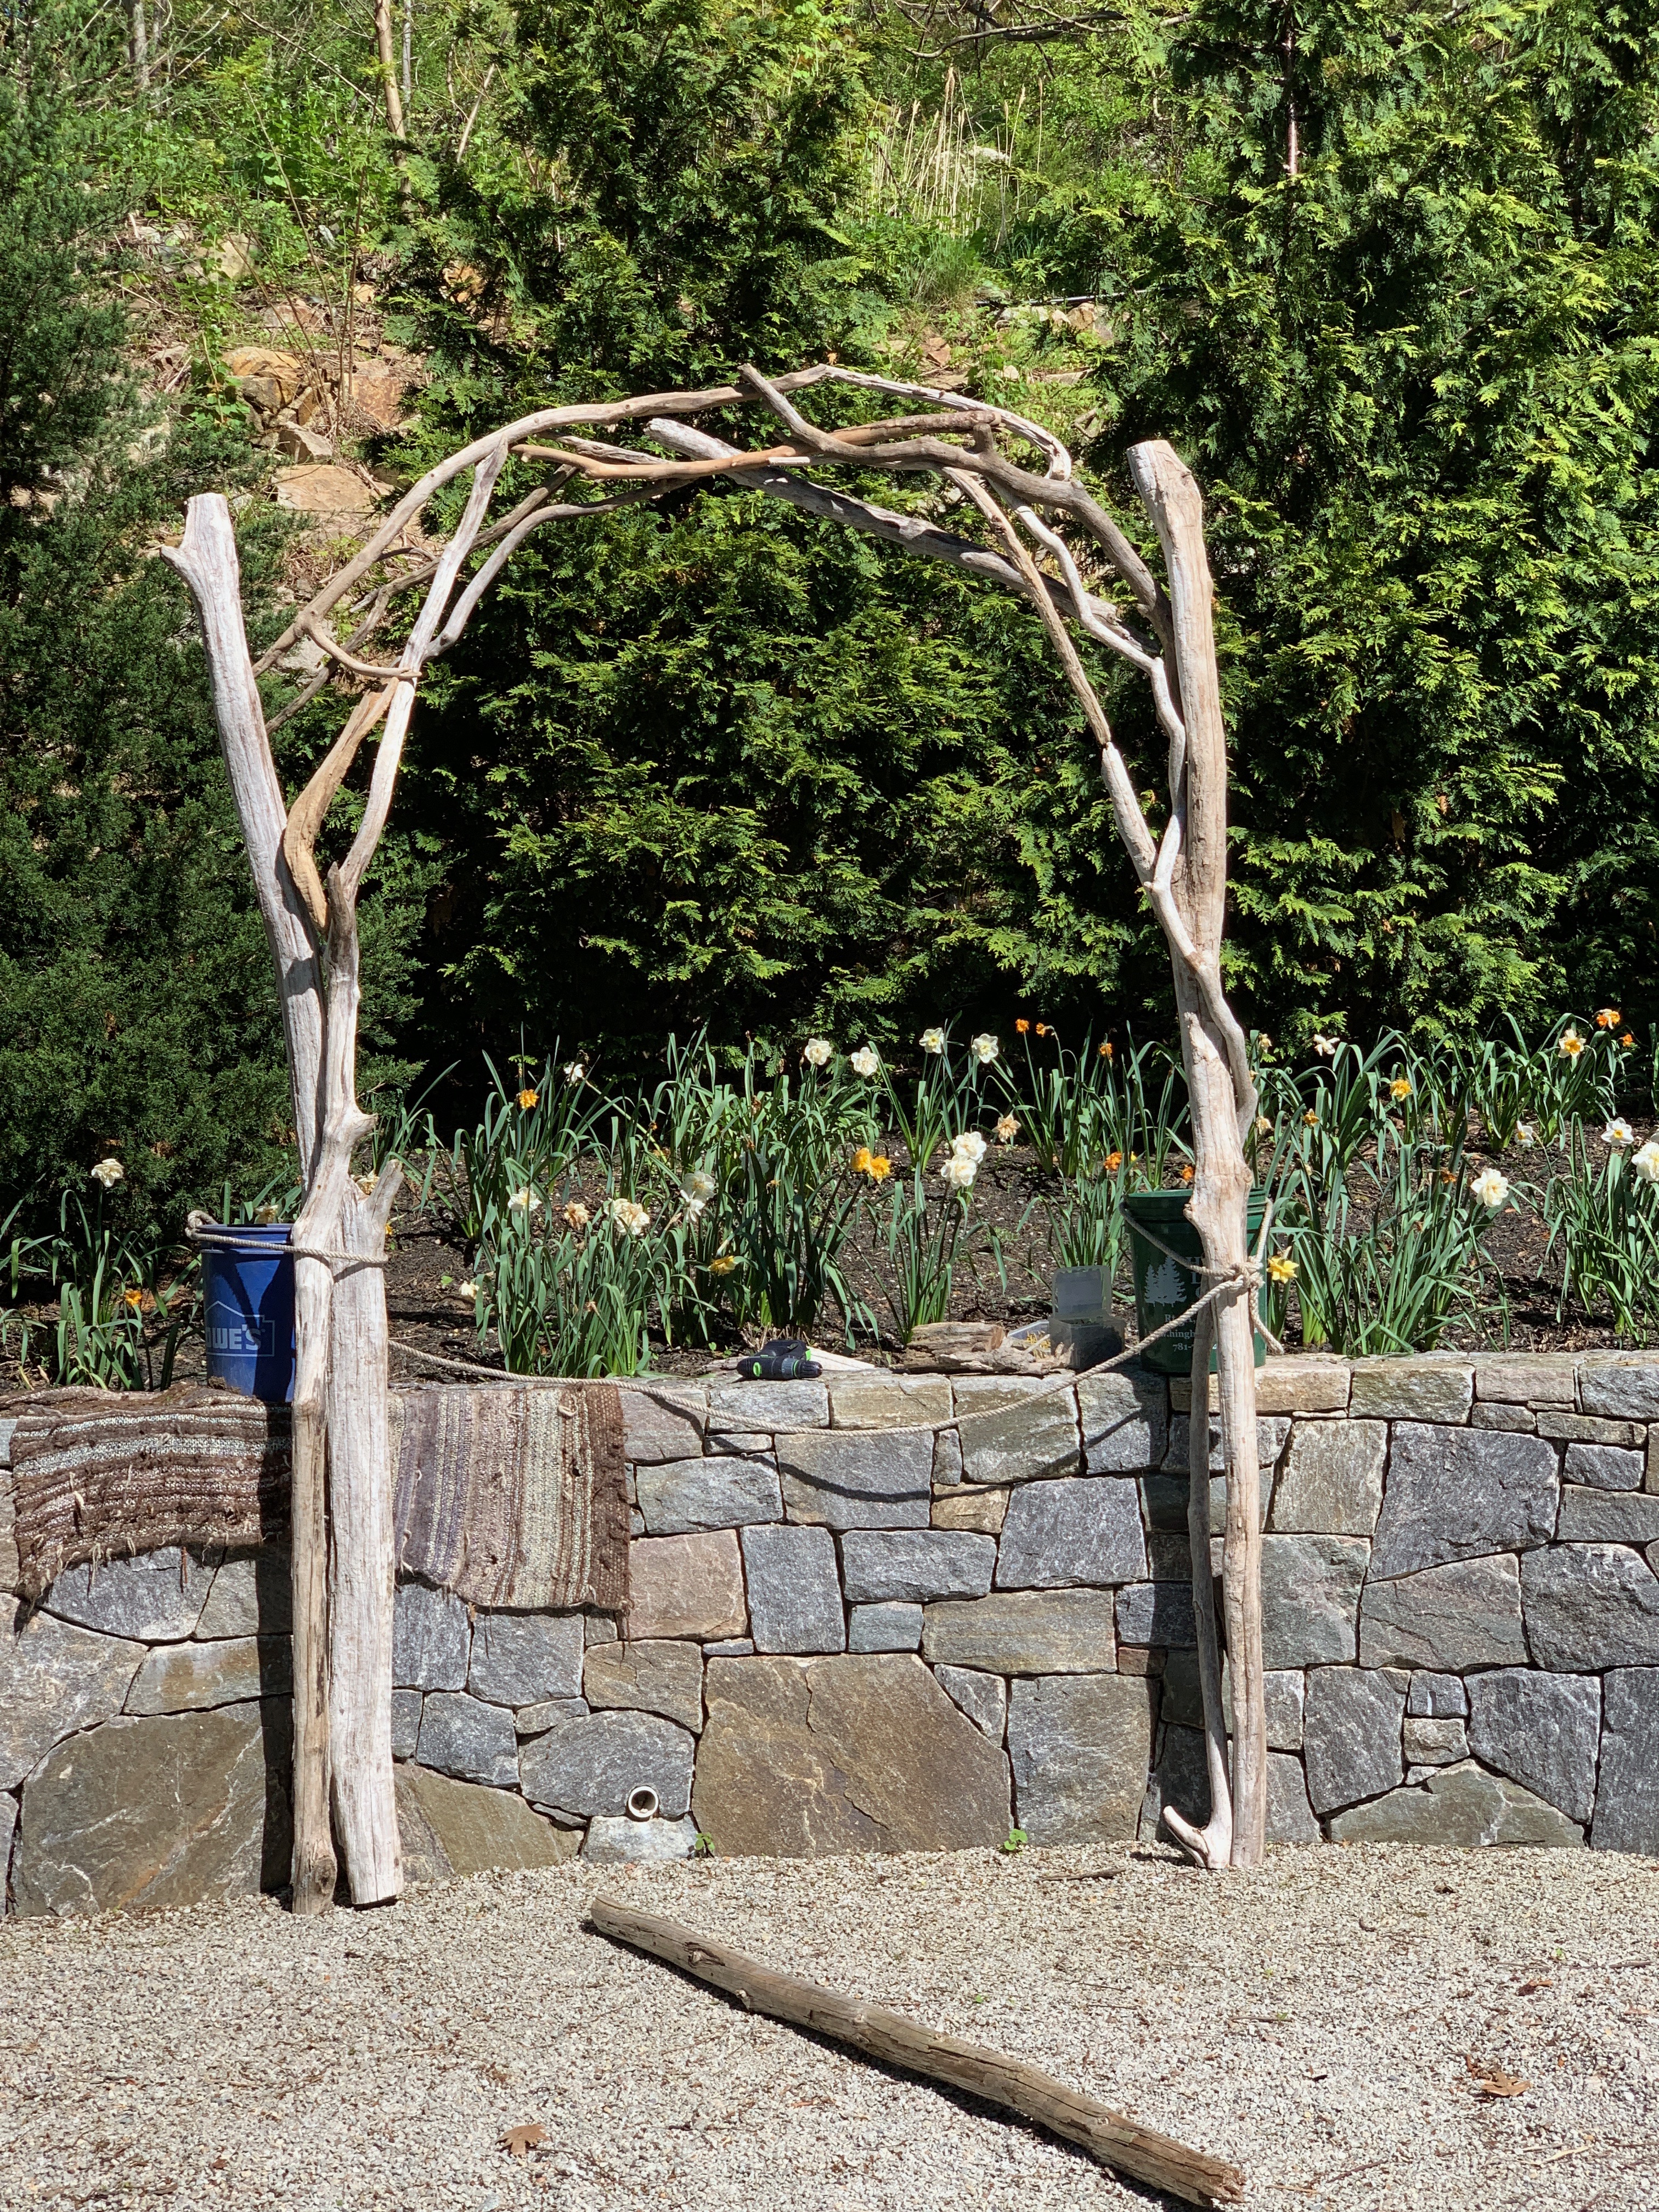
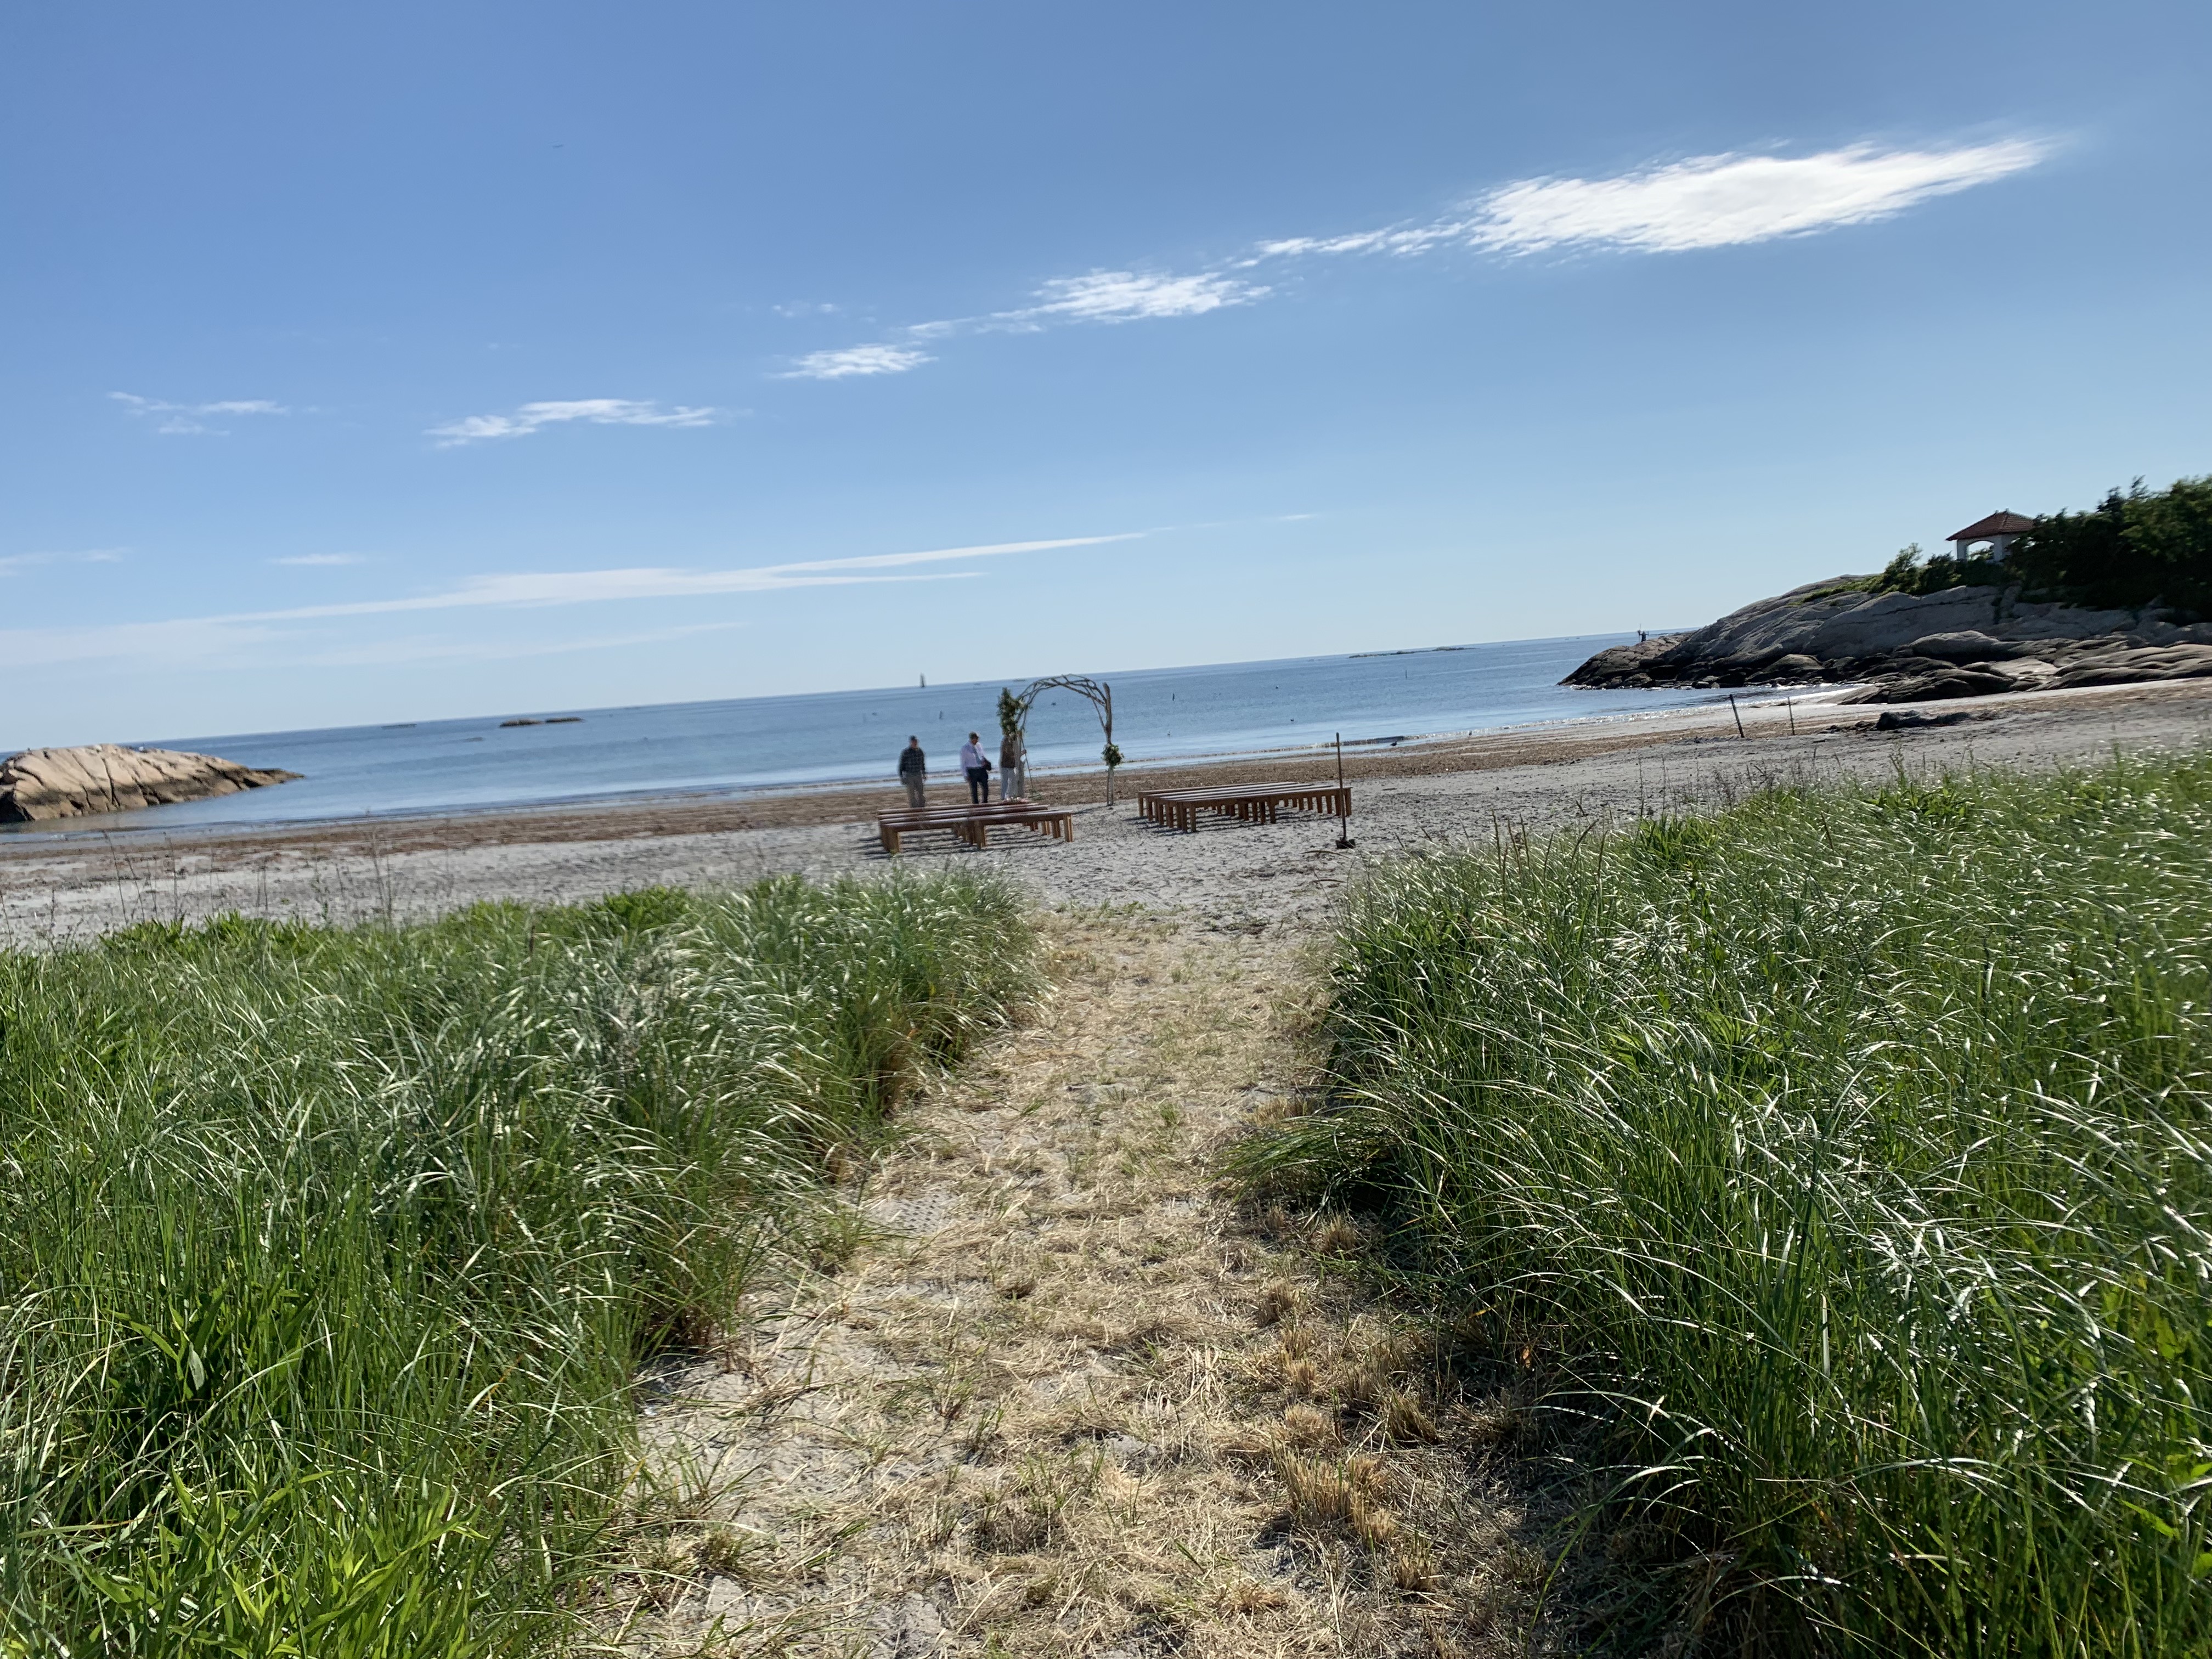
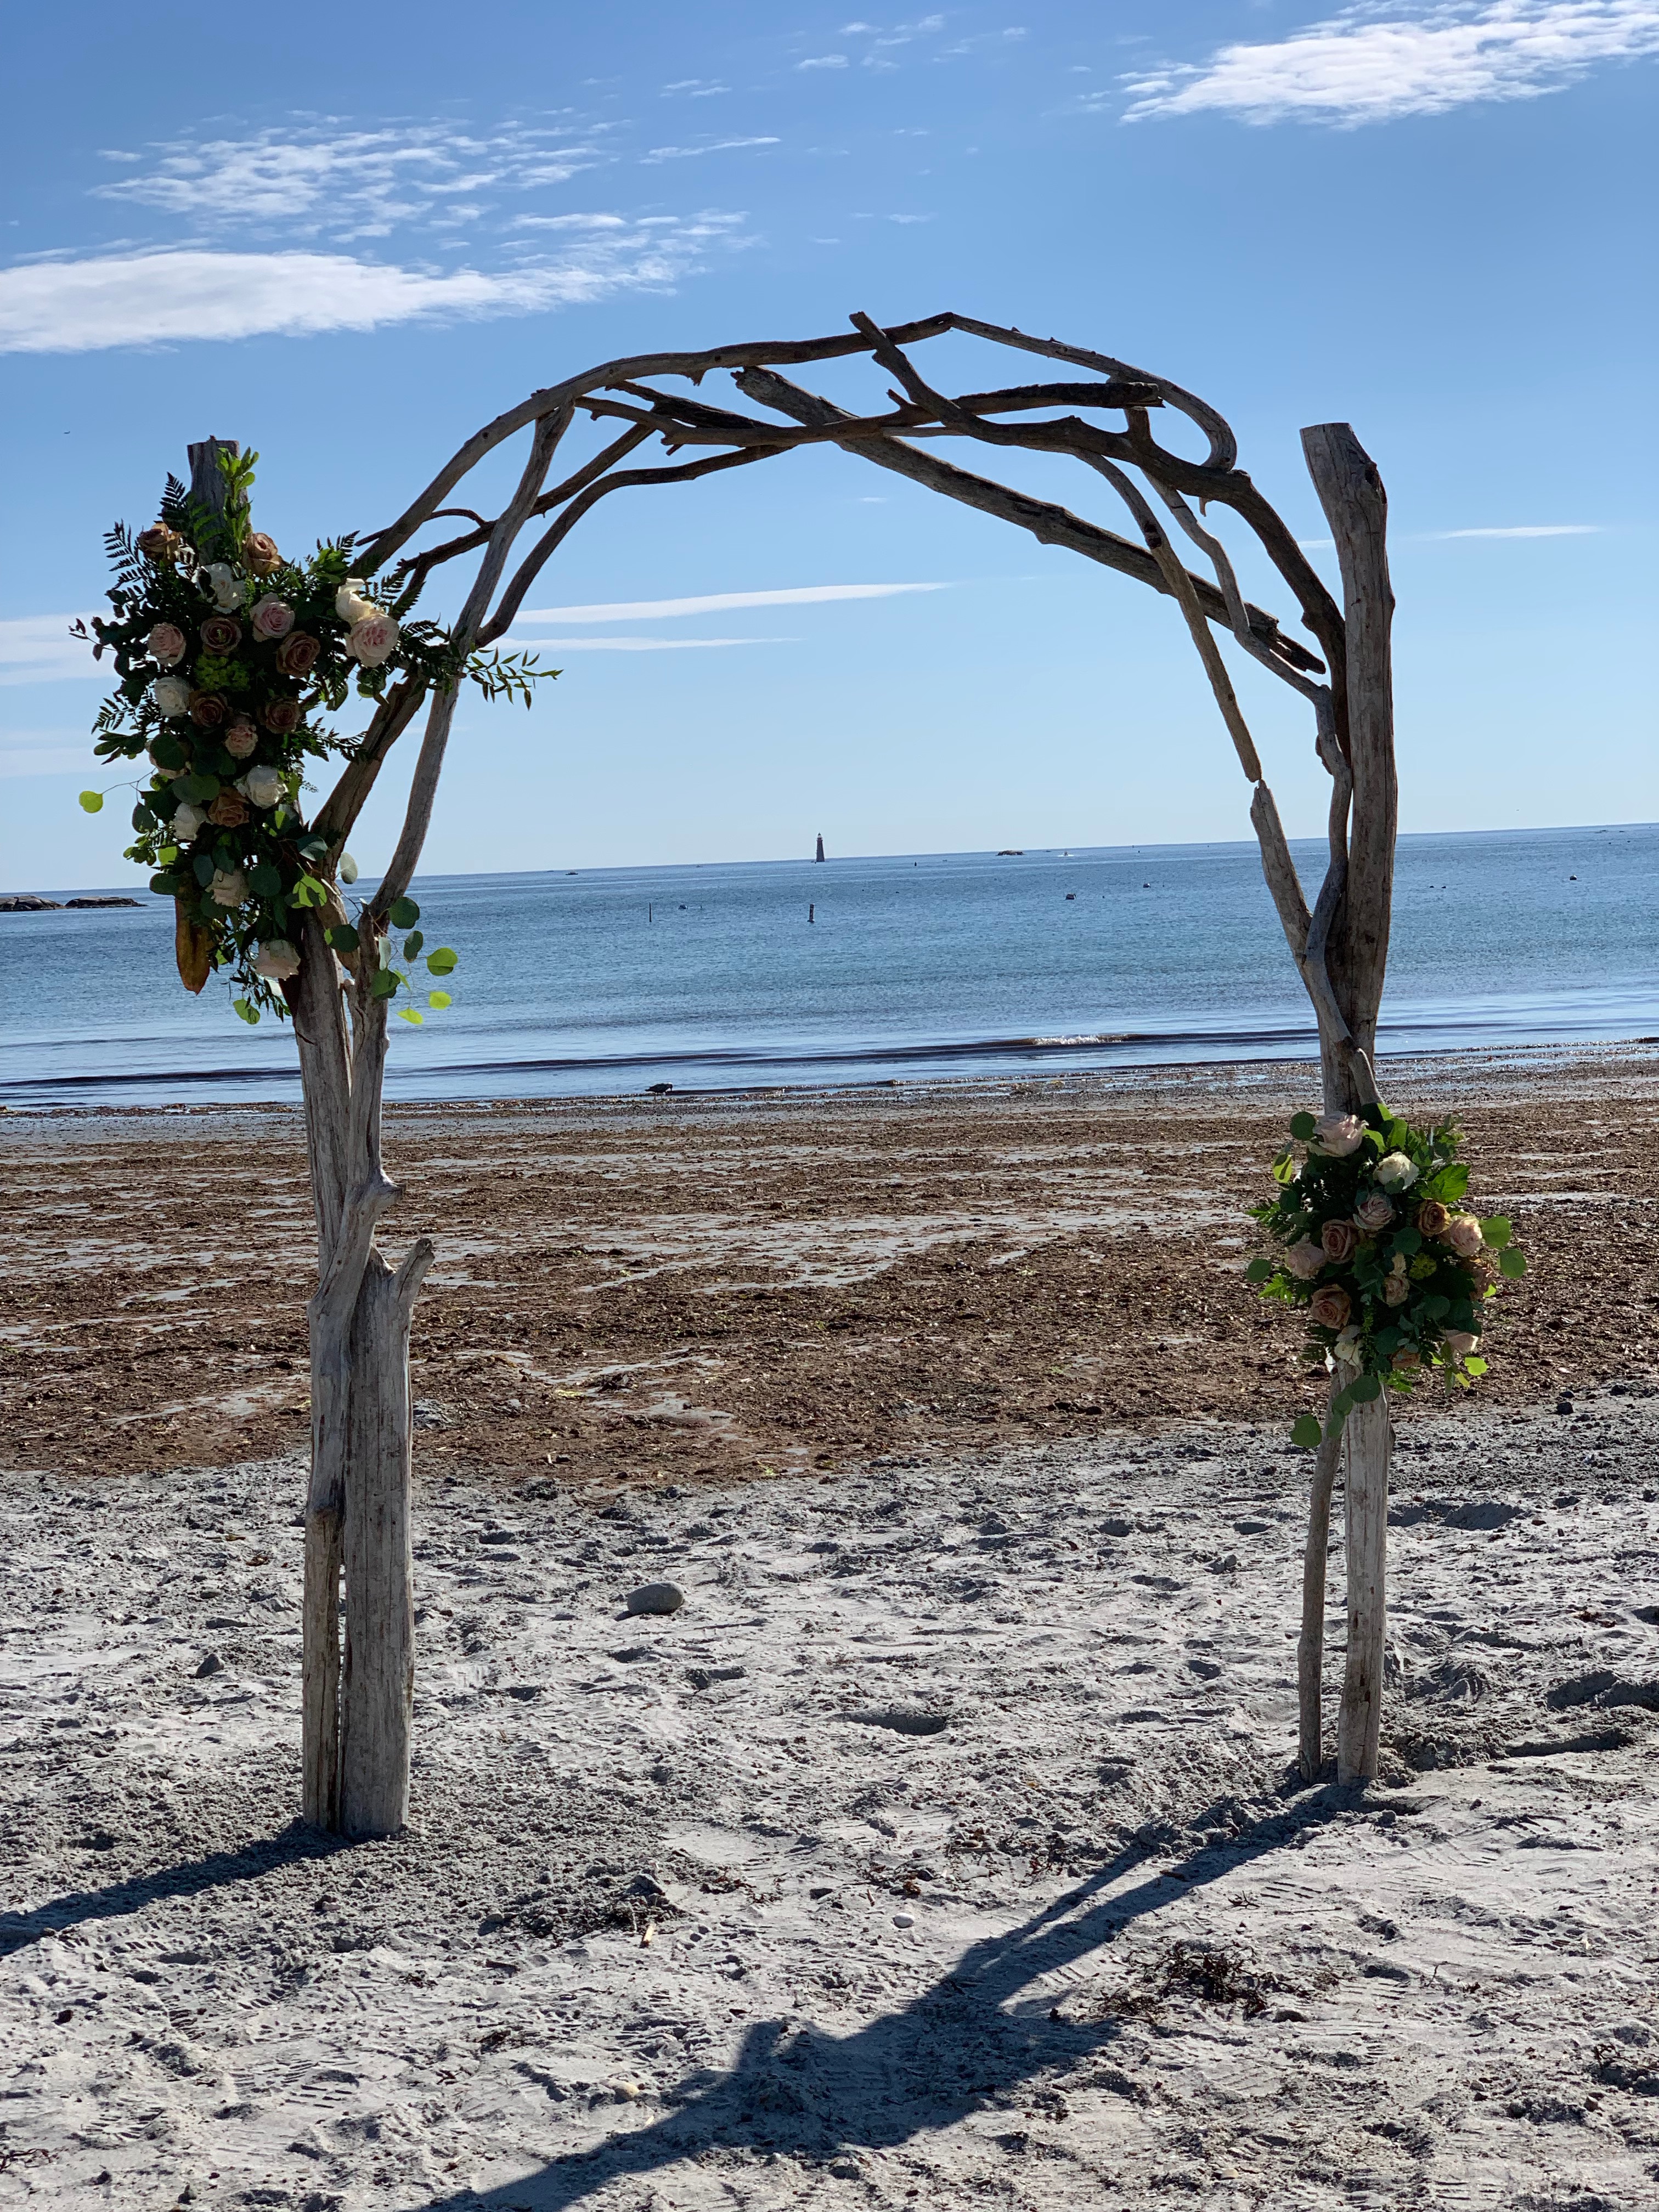
wedding arch
I built this arch for a 2018 summer wedding. Over the course of the year leading up to the wedding, I periodically combed the beach on which the wedding would be held. In fact, the vast majority of the drift wood used in the arch came from the same beach. The design of this piece was free form. The organic shapes did not lend themselves to my usual CAD planning. I started by selecting the sturdiest pieces to be the two uprights. Once these were in place, I zip-tied the upper arch in place. I then zip-tied smaller pieces into place as I fine tuned the visual weight at the top and the curved transitions from the horizontal to the vertical supports. The zip-tying allowed me to make minor adjustments as I built the arch. Later, I replaced the zip-ties with screws.
Of course, there were practical concerns. The arch was reinforced with a two 2x4 cross braces for transportation. An extra two and a half feet was left on the bottom to be buried in the sand. Once the arch was securely rooted in the sand, I removed the cross braces. This process ensured that the arch remained square and intact when it moved from my shop to the beach. .
2018
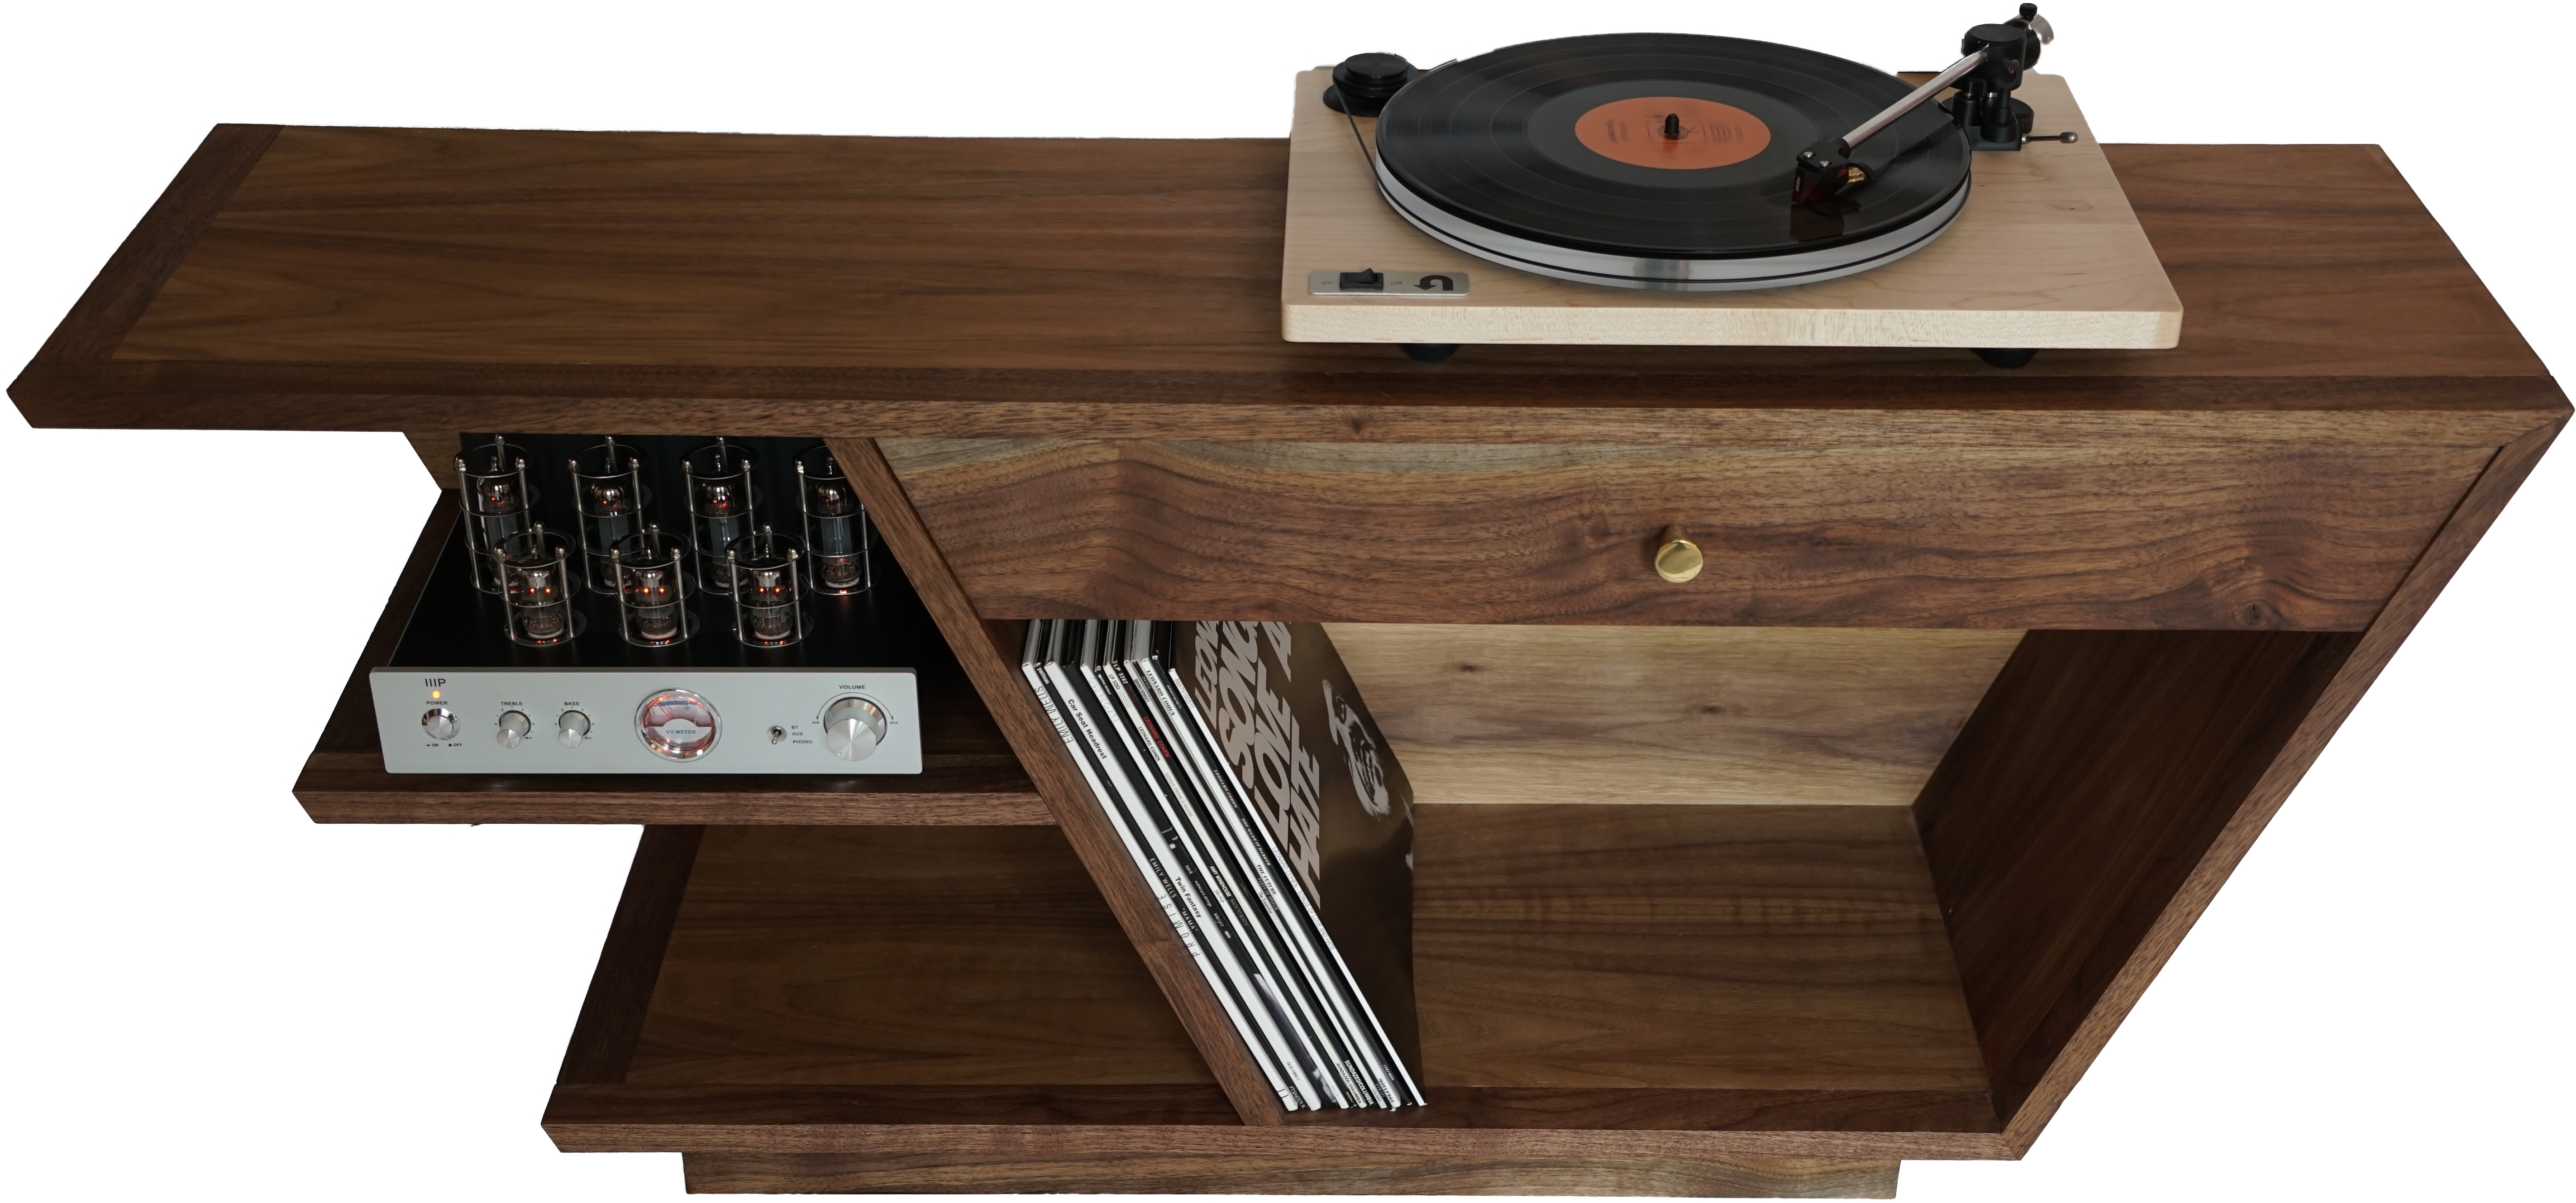
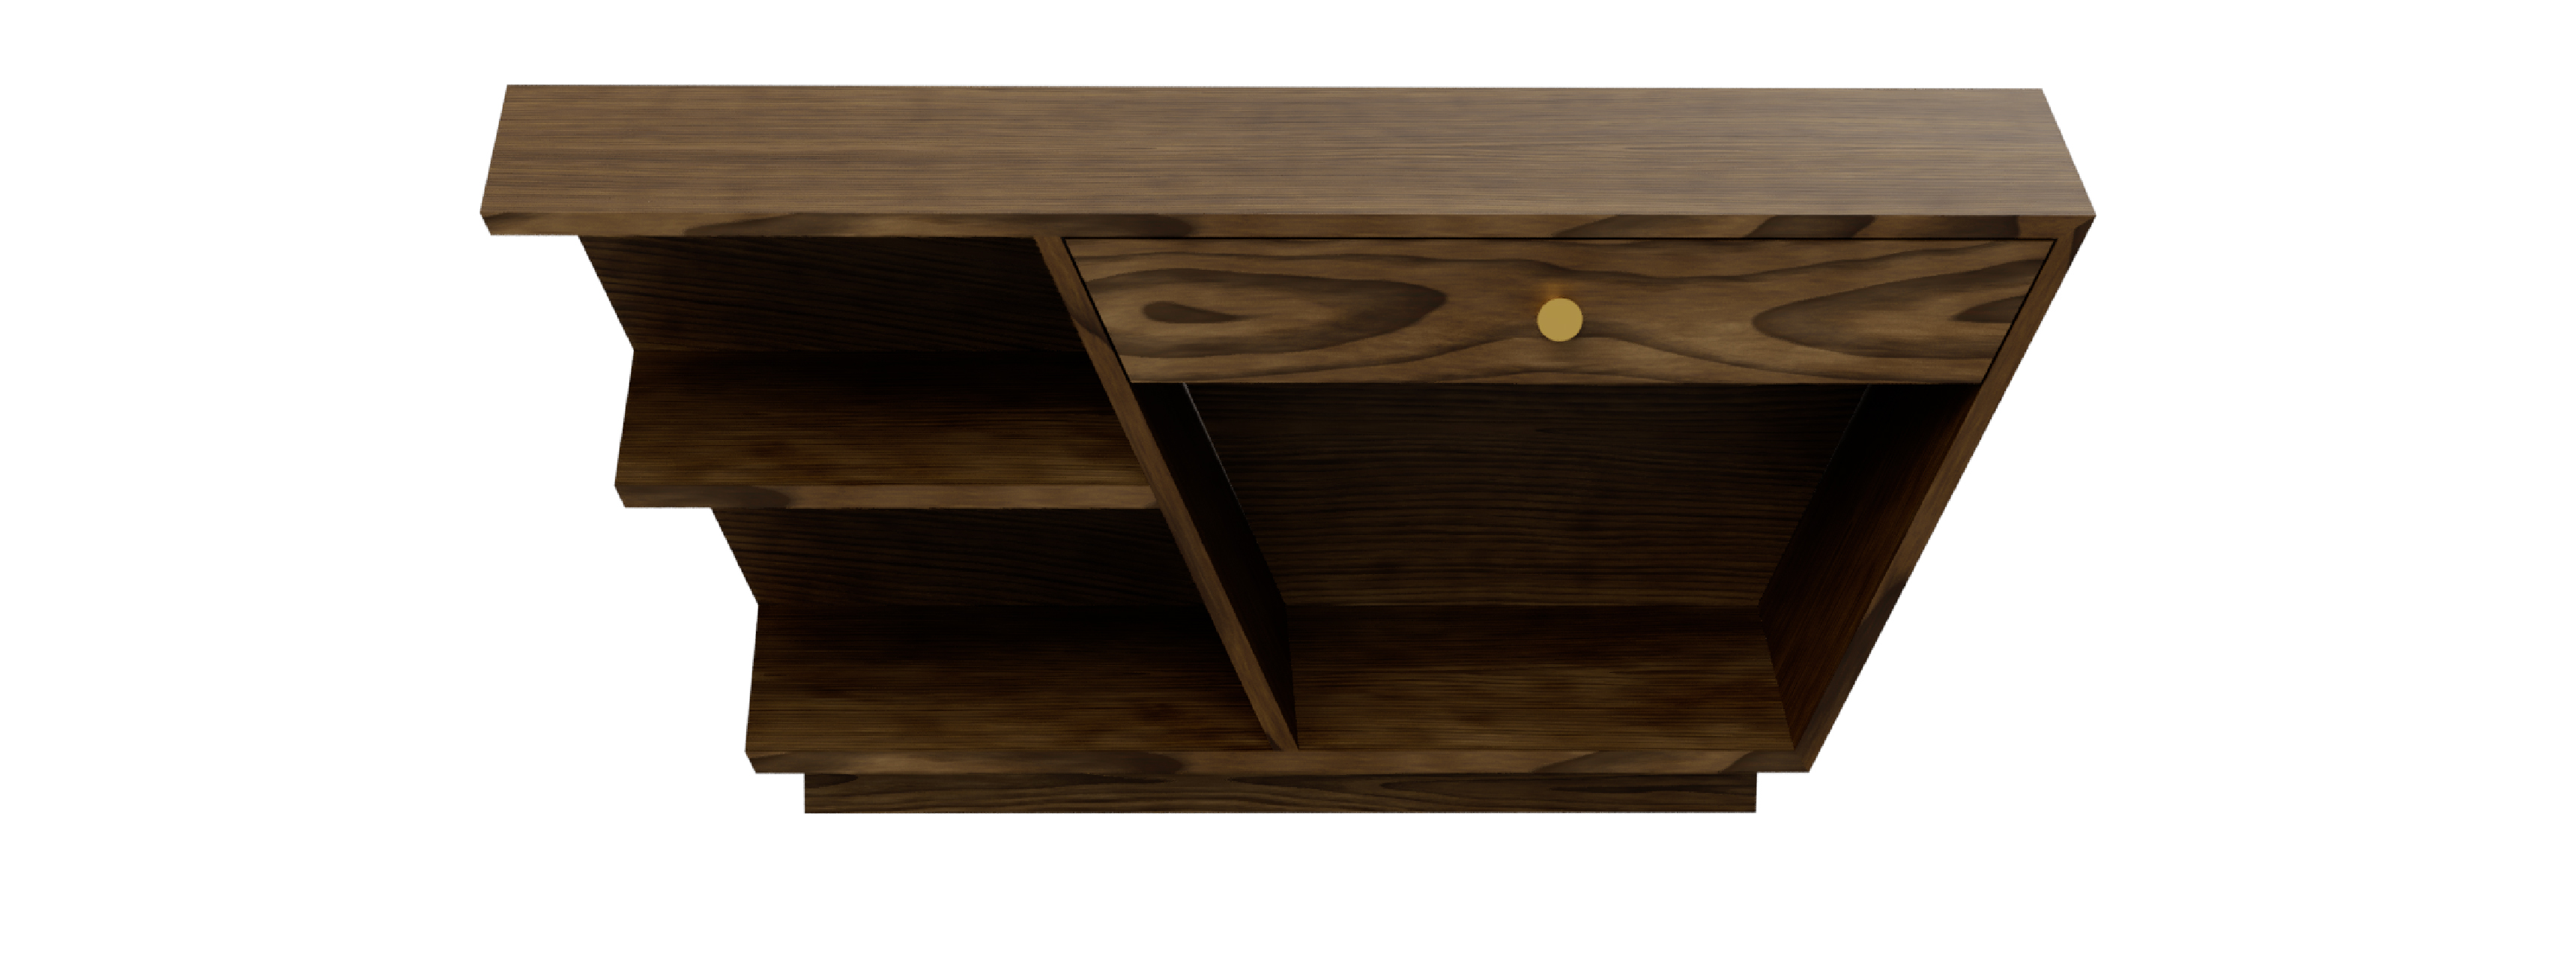
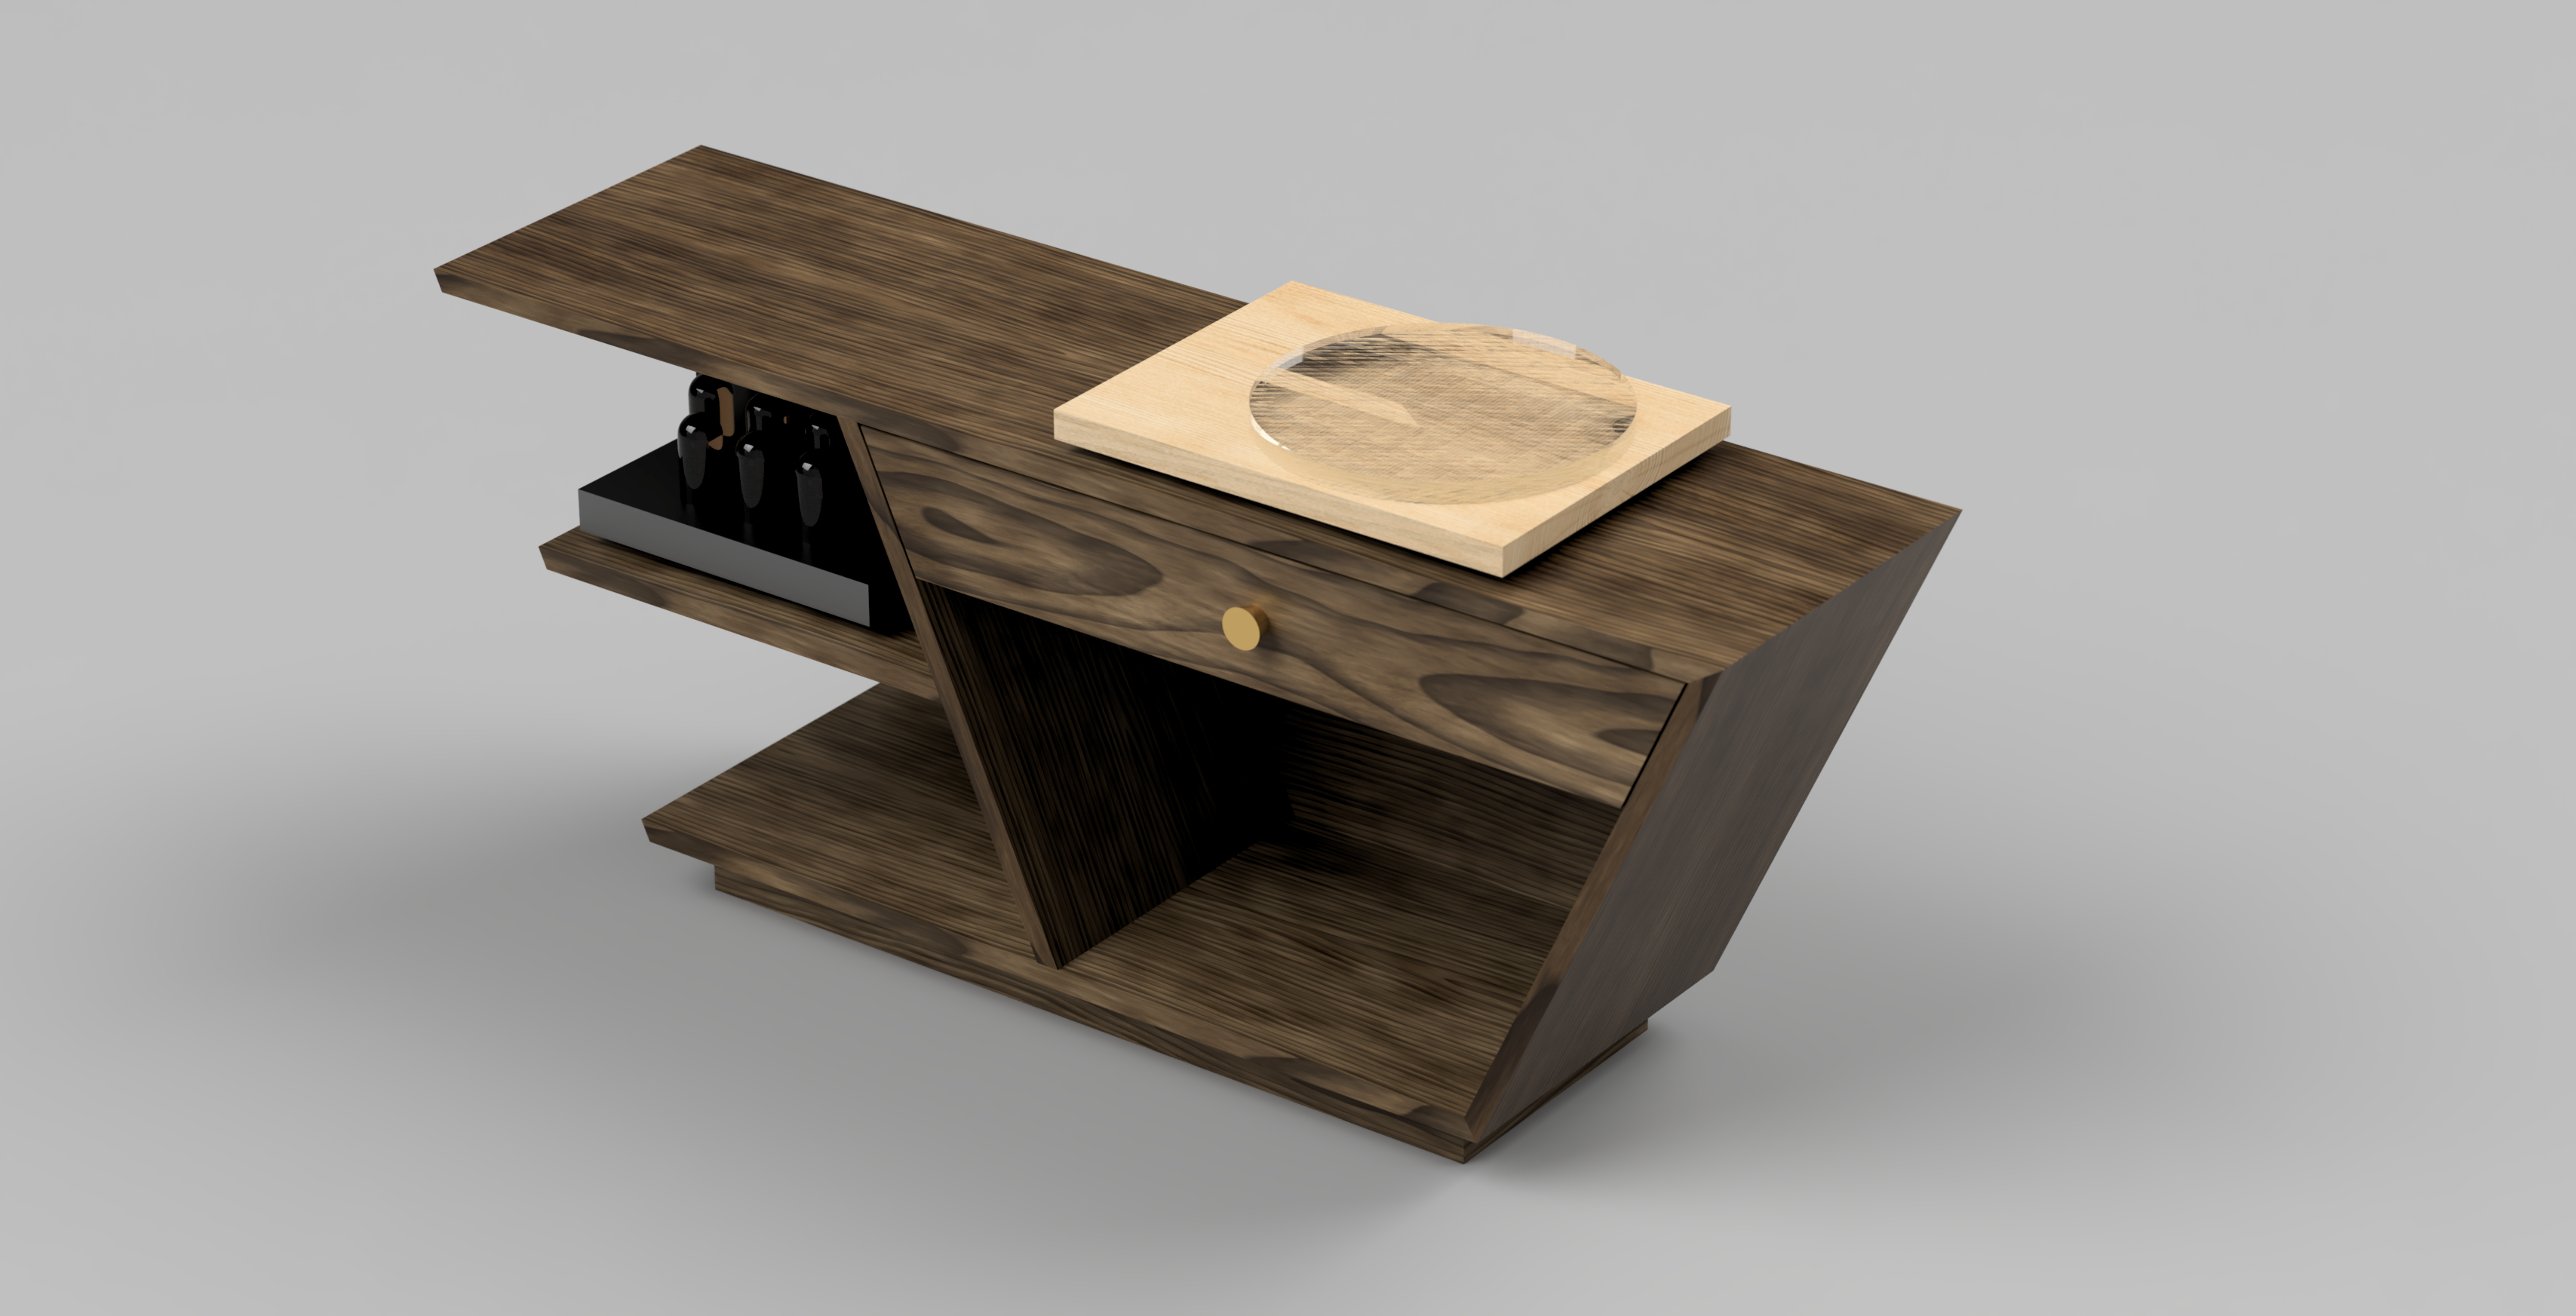
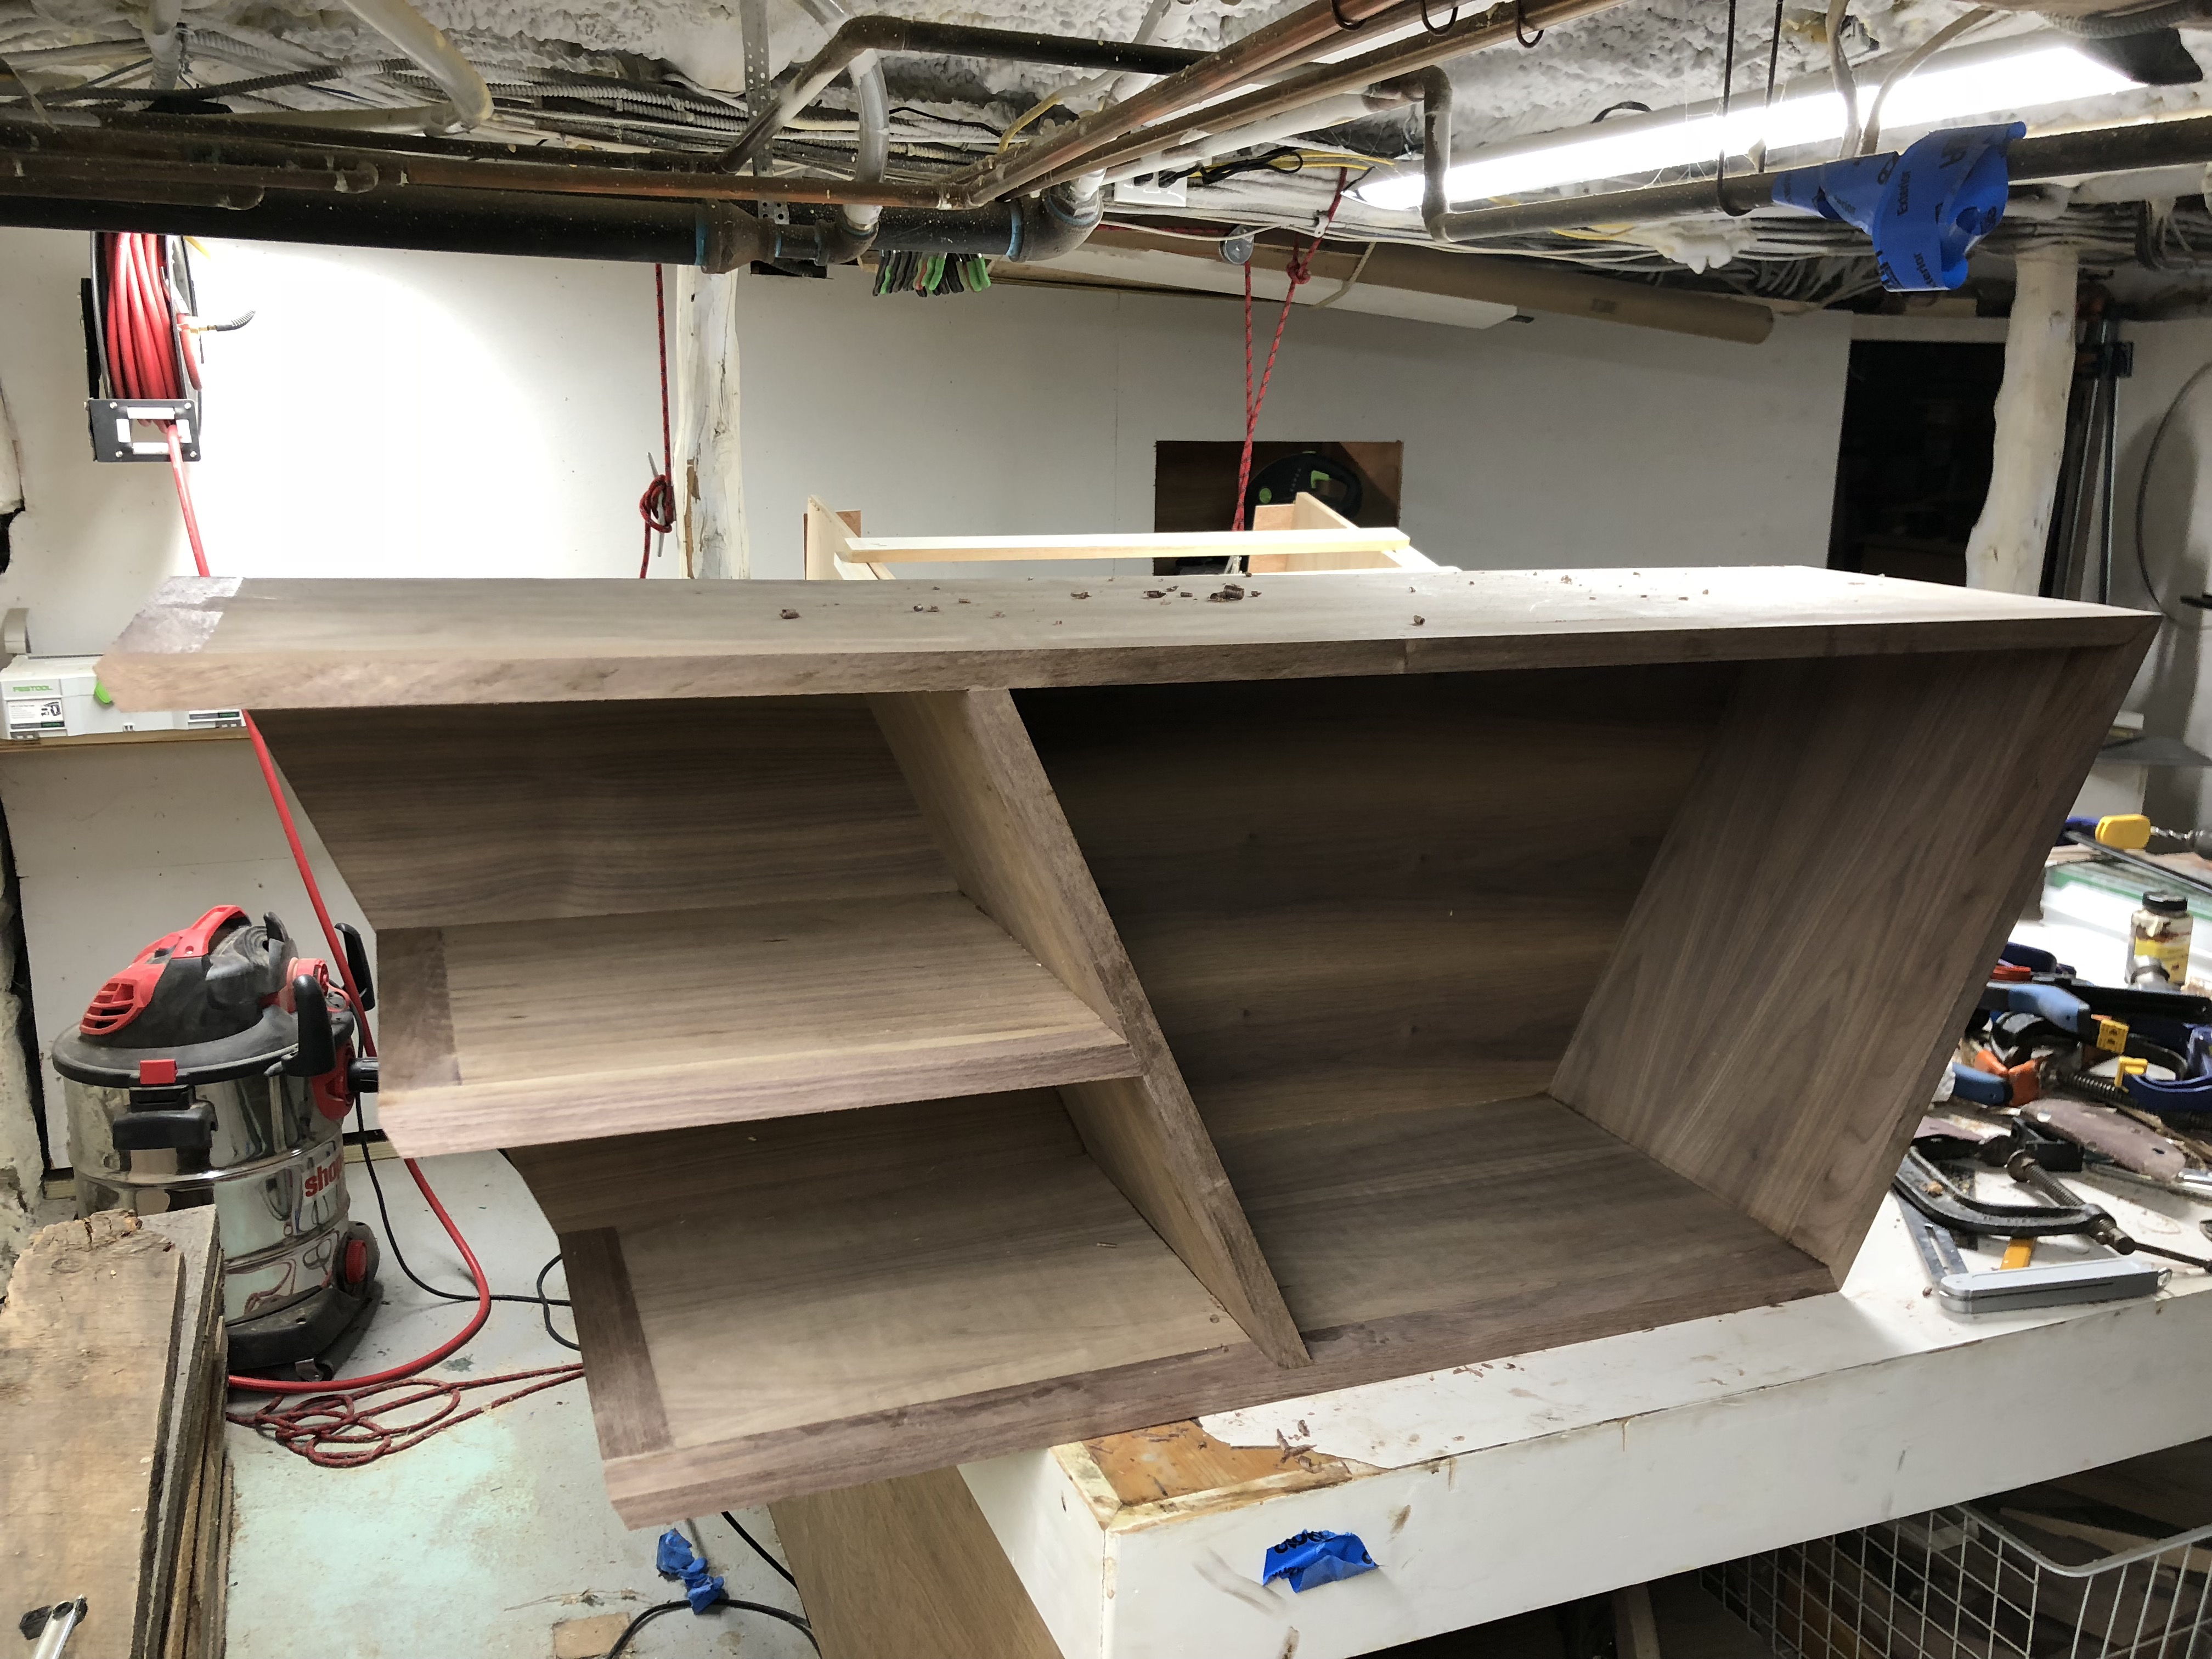
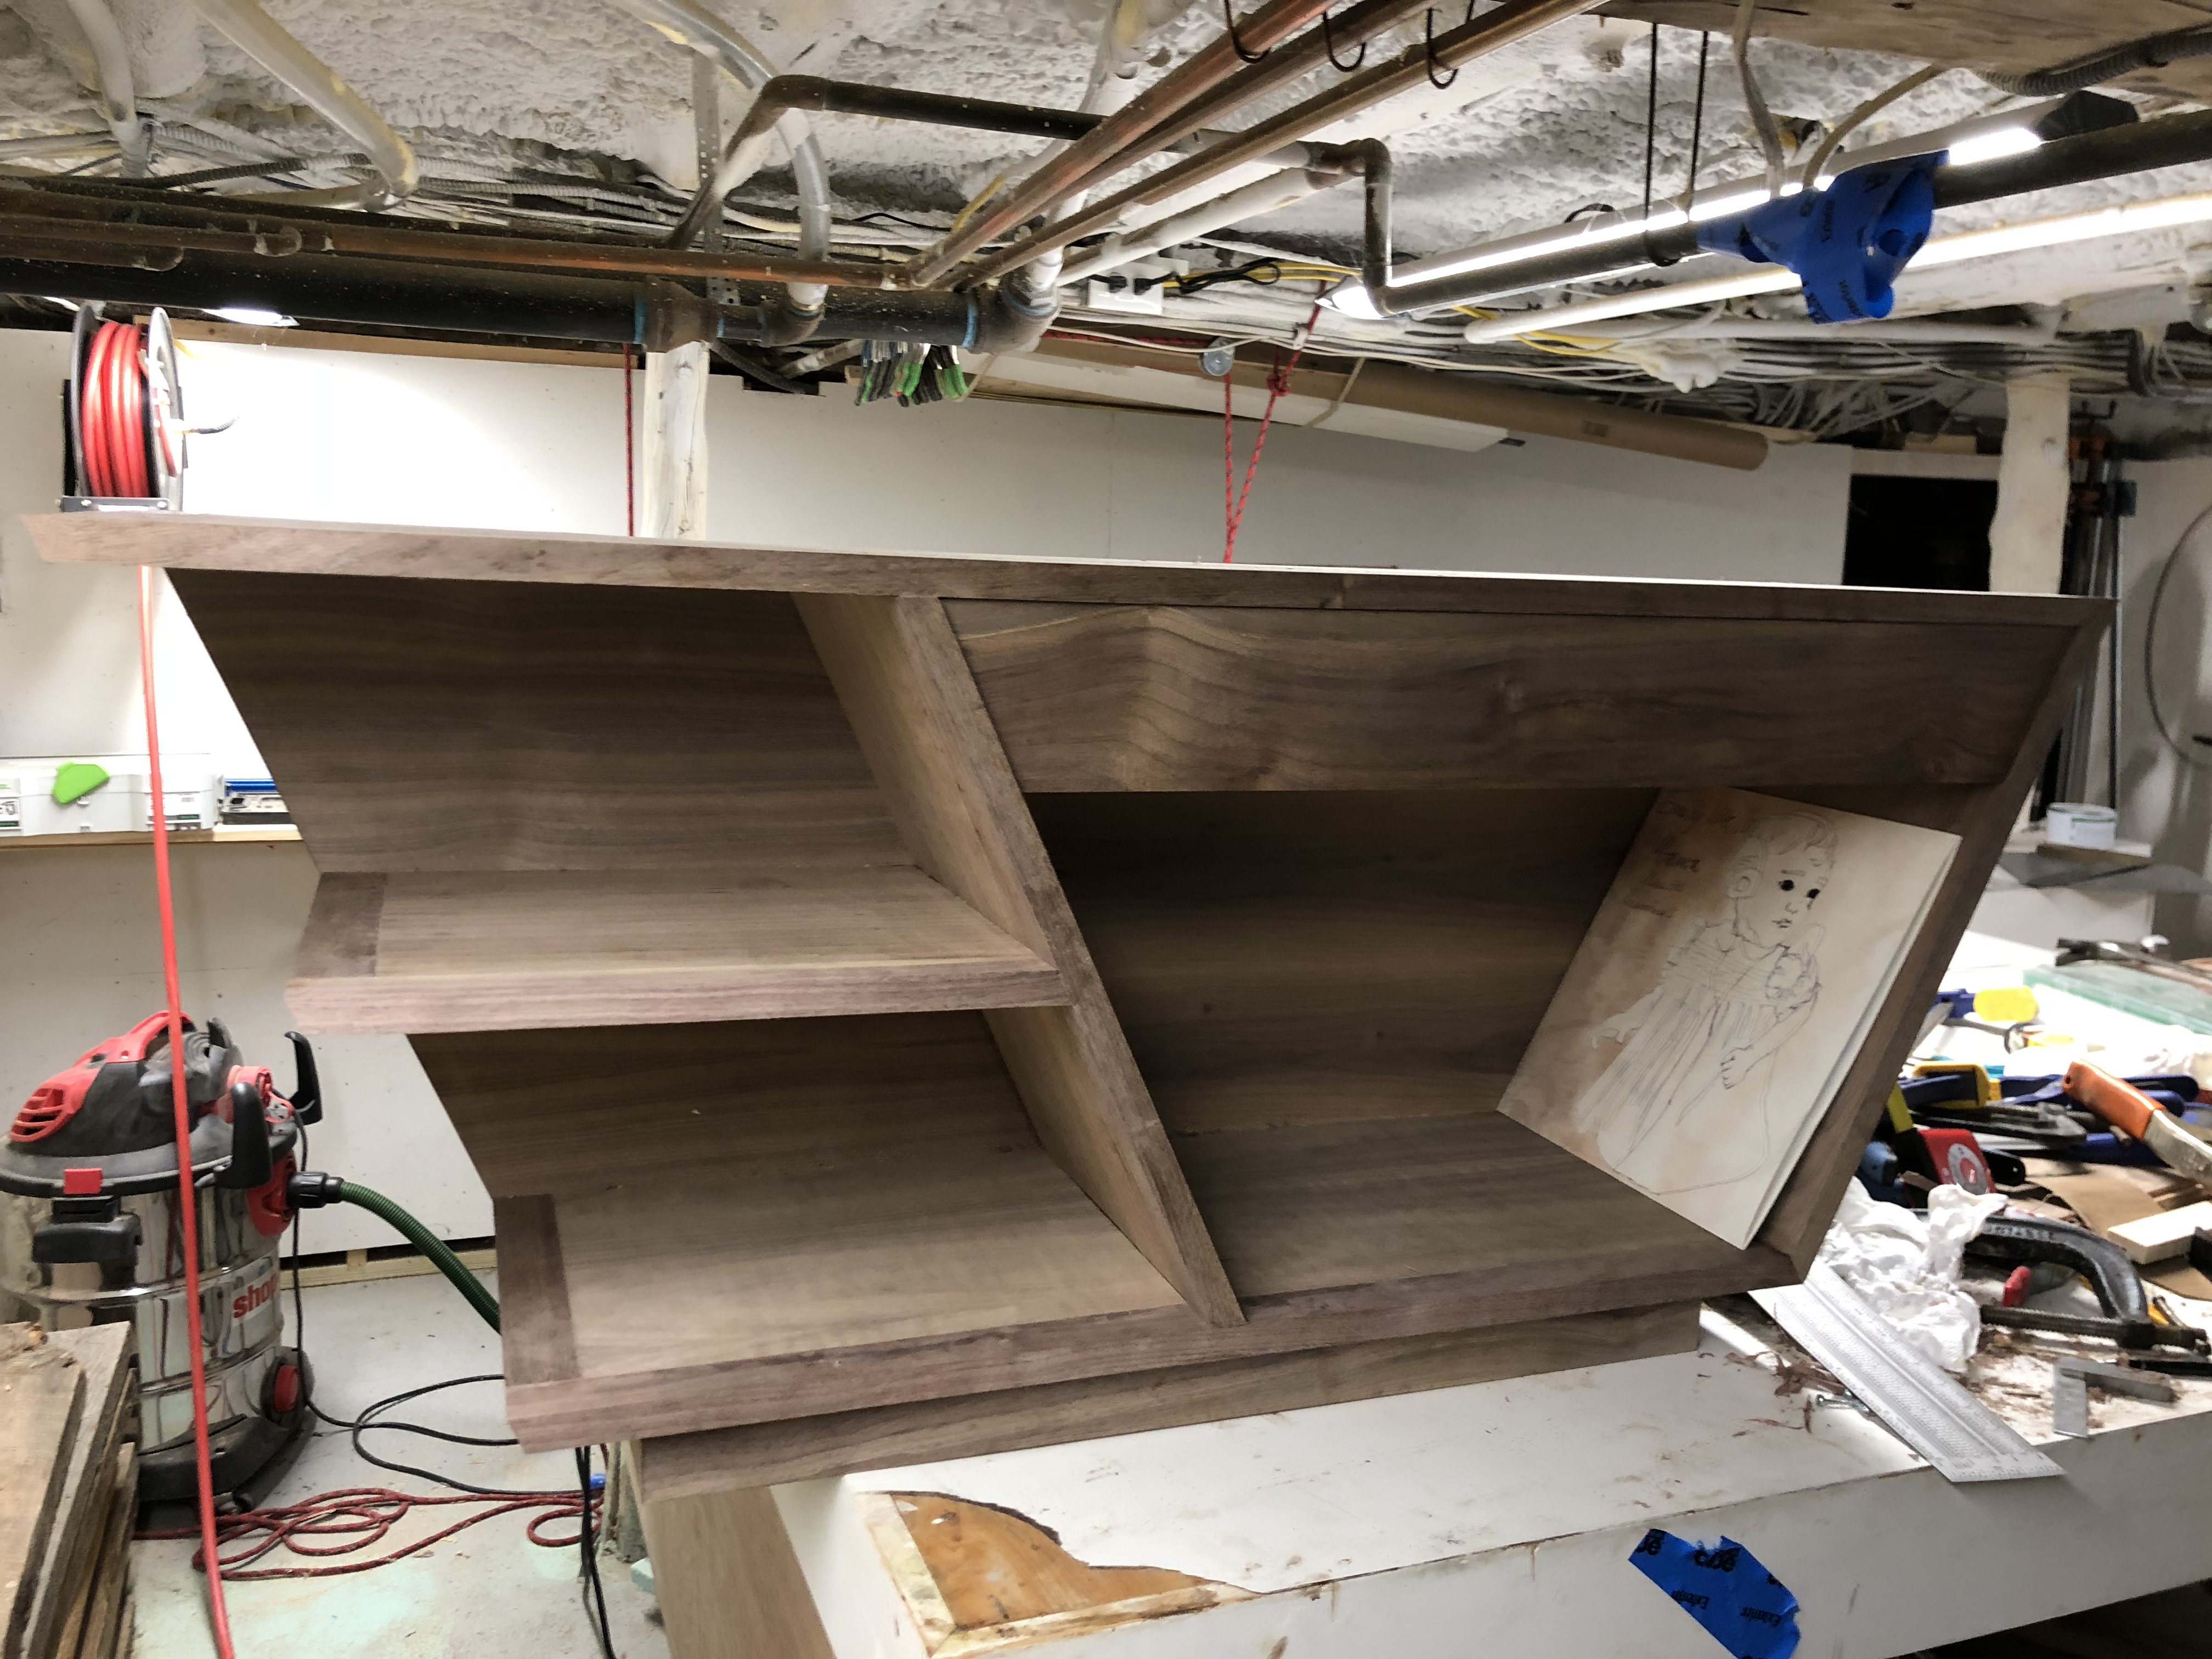
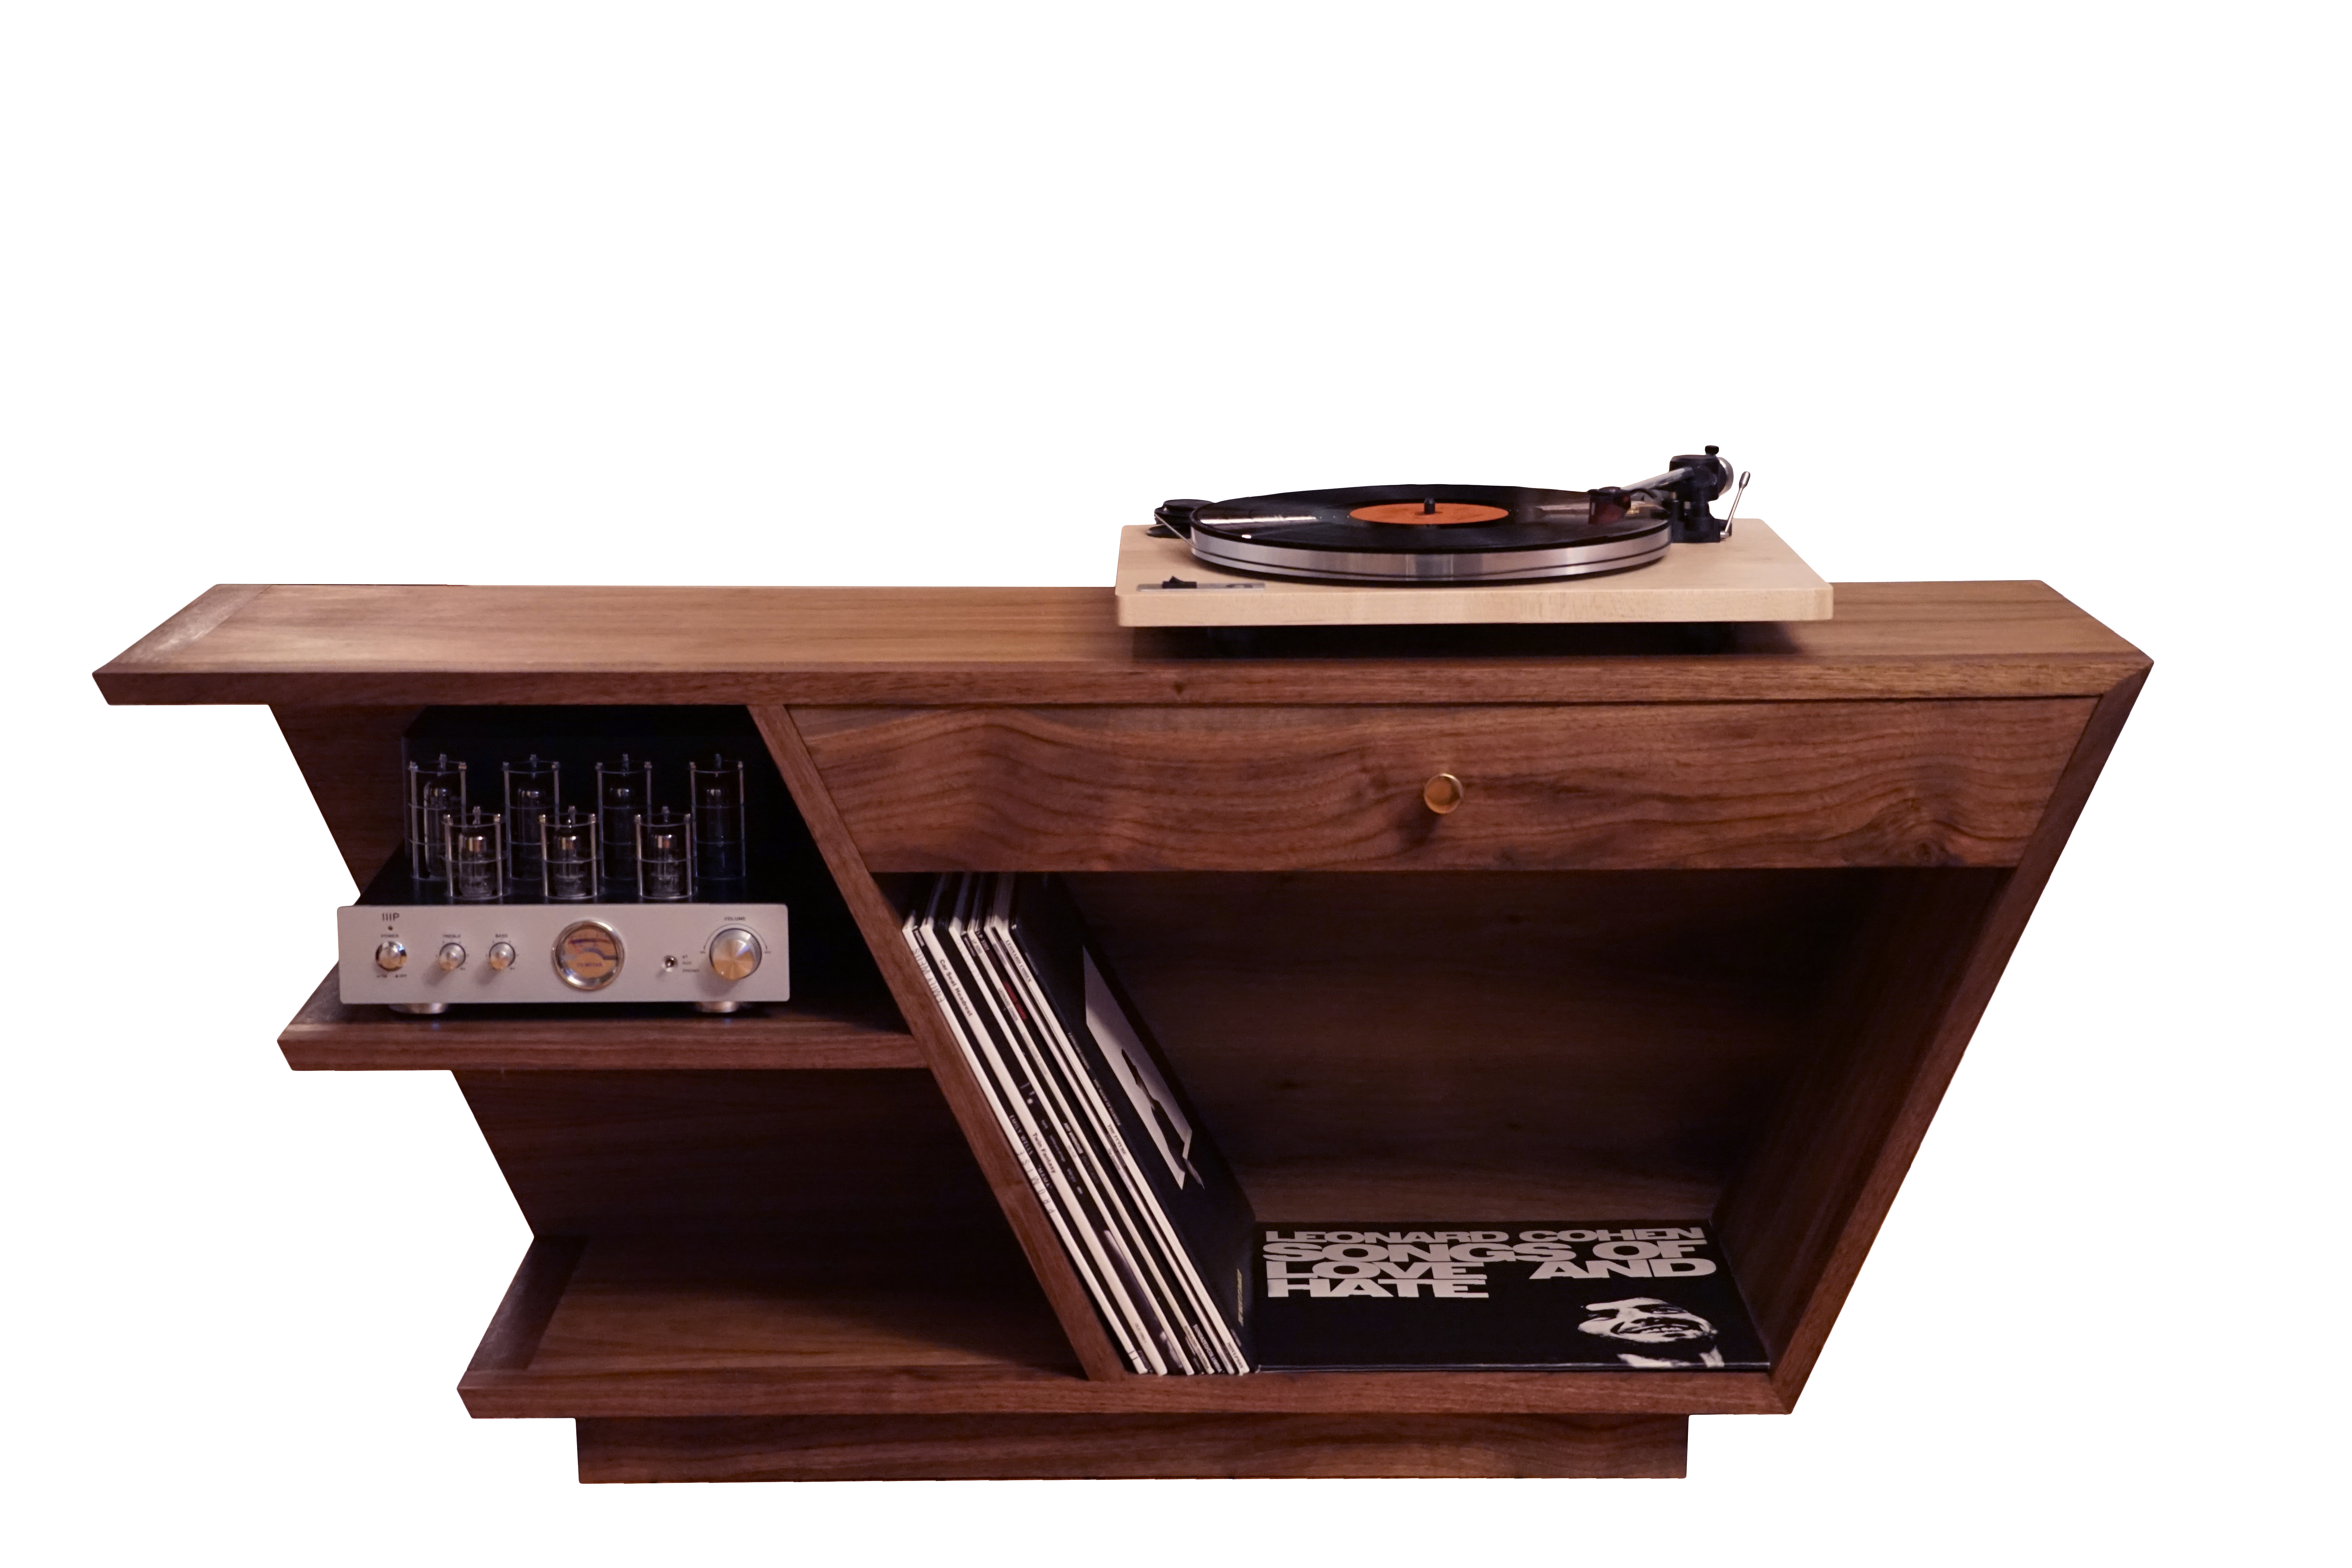
record cabinet
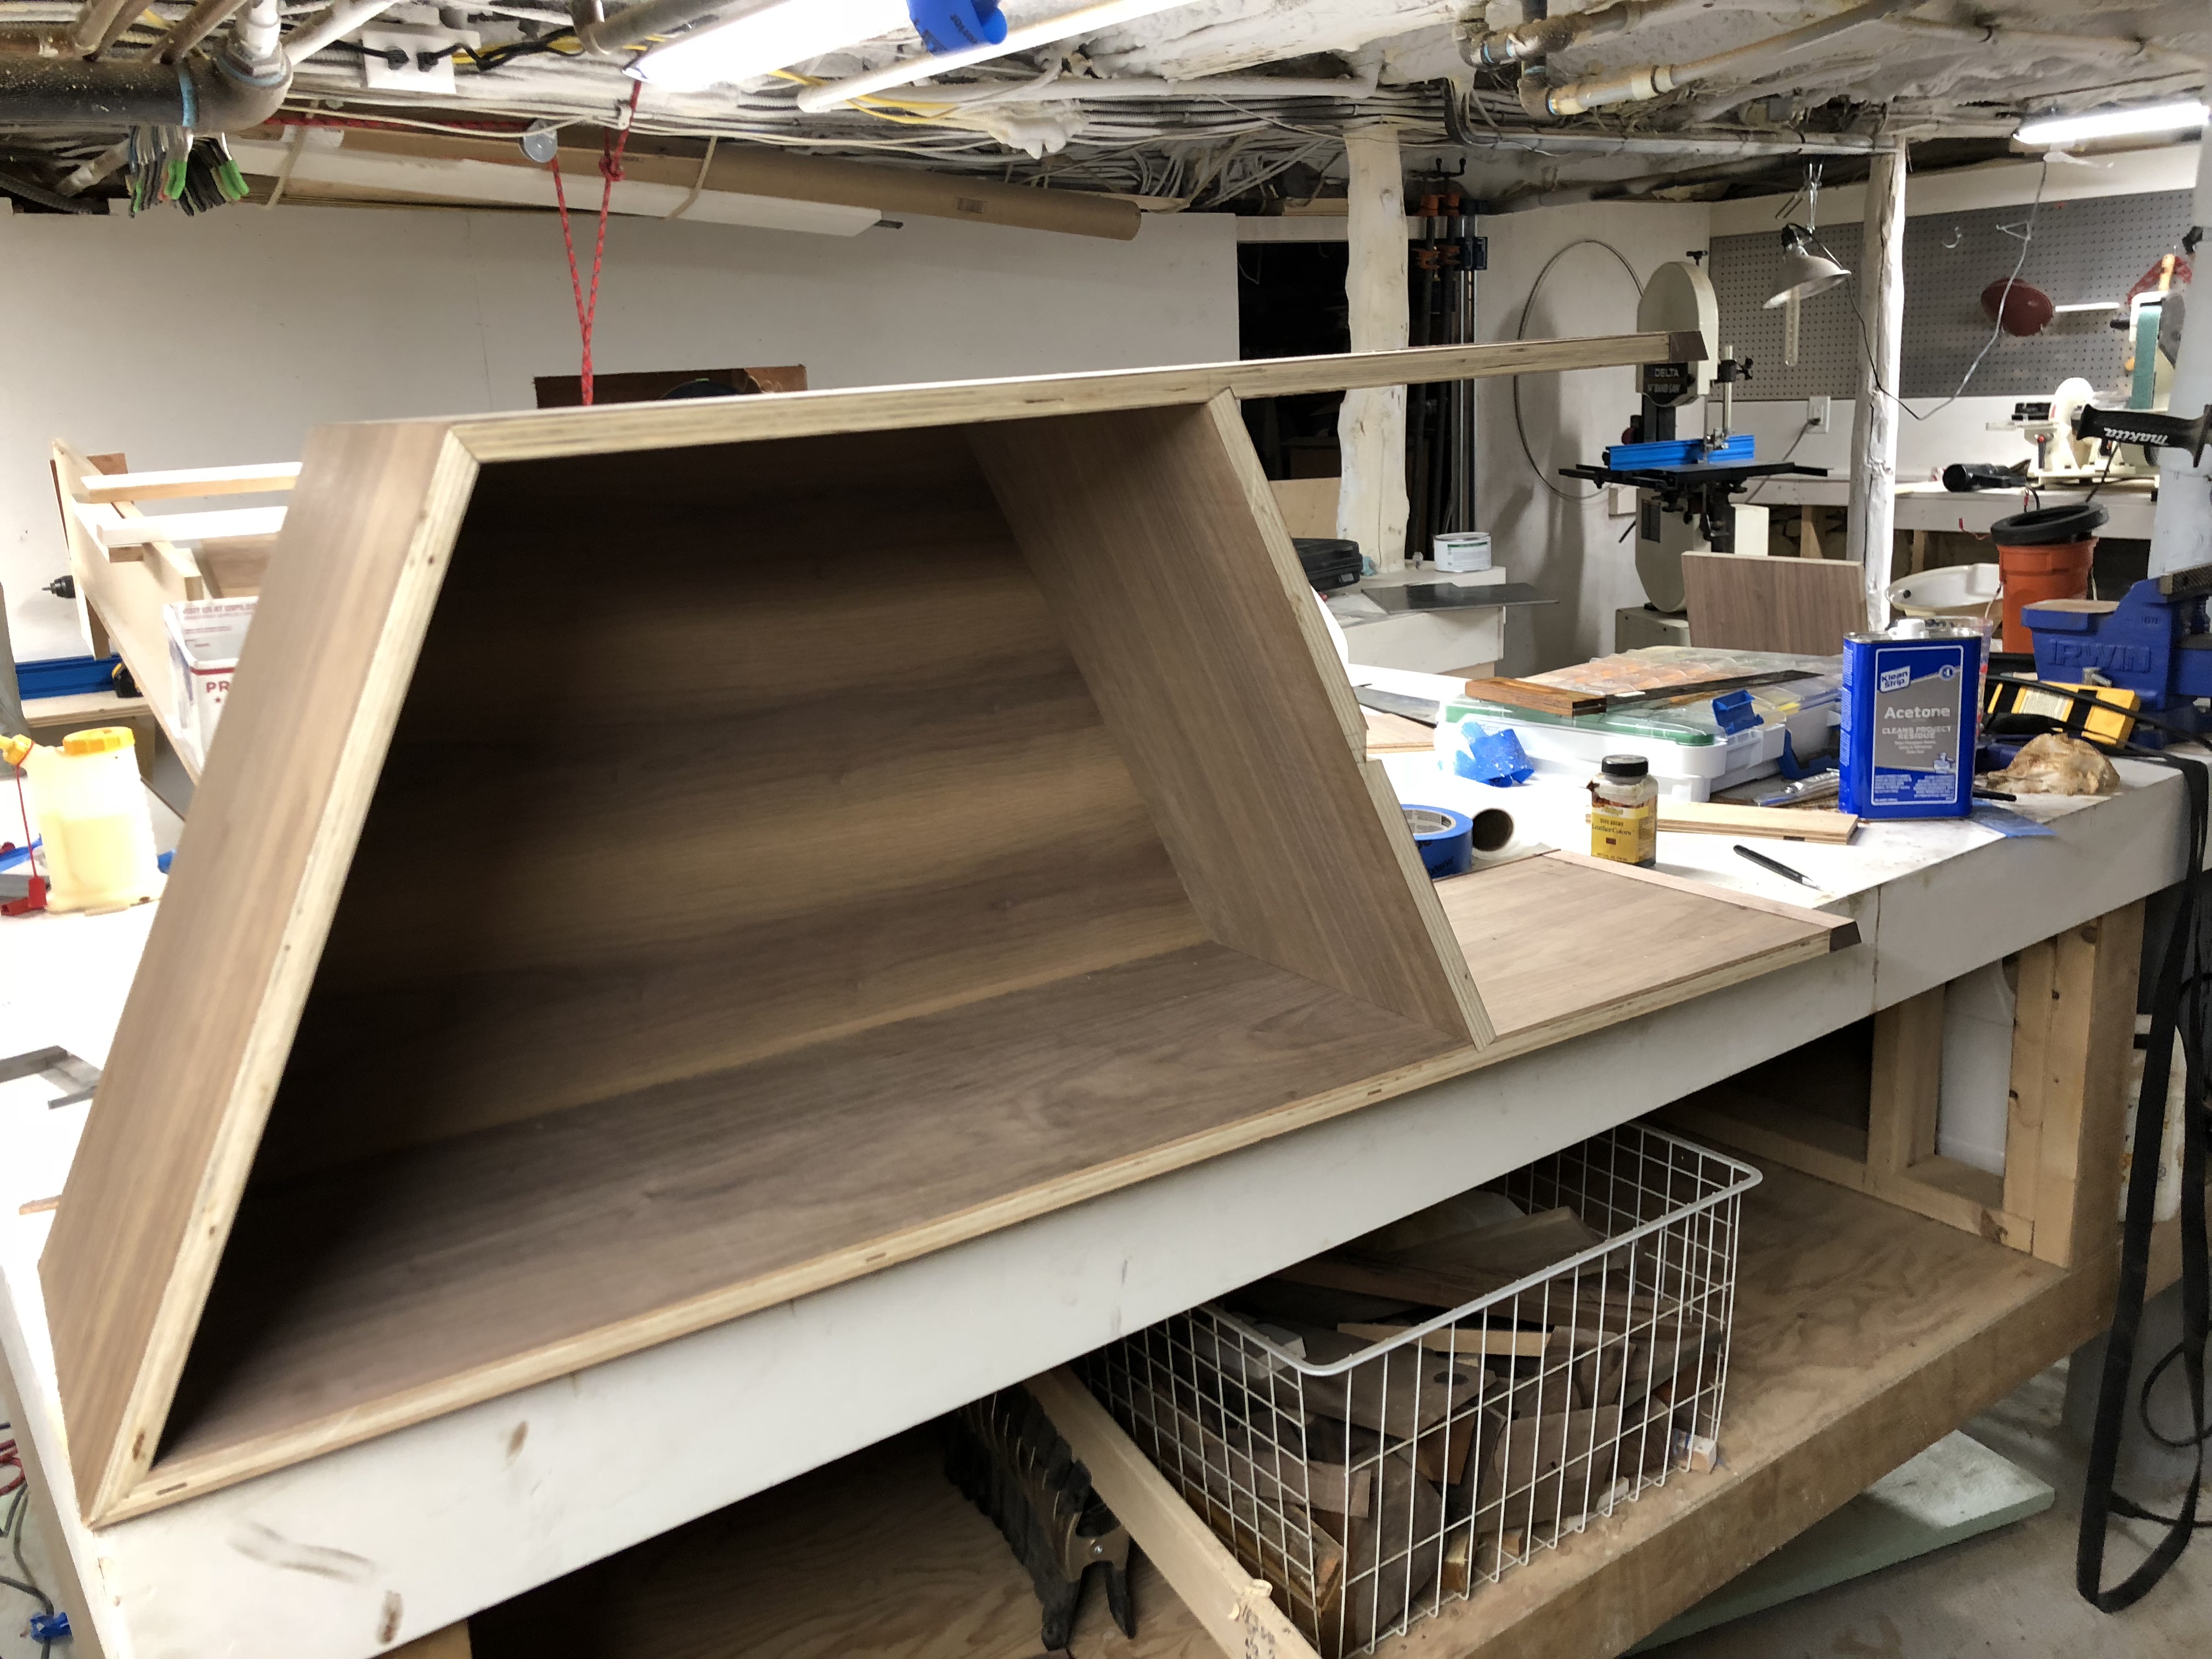
I built this record cabinet as an exercise in mid-century design. In both design and construction, it is one of my most complex projects. I began by choosing a record player and amplifier as I wanted the equipment and the cabinet to read as one cohesive unit. The form of the lower part of the cabinet was inspired by the way records naturally lay at an angle when stacked in a bin. This will encourage the user to leaf thorough the stack. After four separate CAD models, I settled on the proportions. Because of the intricate joinery, I created yet another model in which every cut, angle, and dimension was calculated.
From these models, I began building the piece. It was constructed of walnut veneered plywood and finished with a face frame that covers the raw edges. The most technically difficult aspects of this construction were the multiple angle cuts (or miters) required to achieve the trapezoid shape. Many of these cuts took multiple attempts.
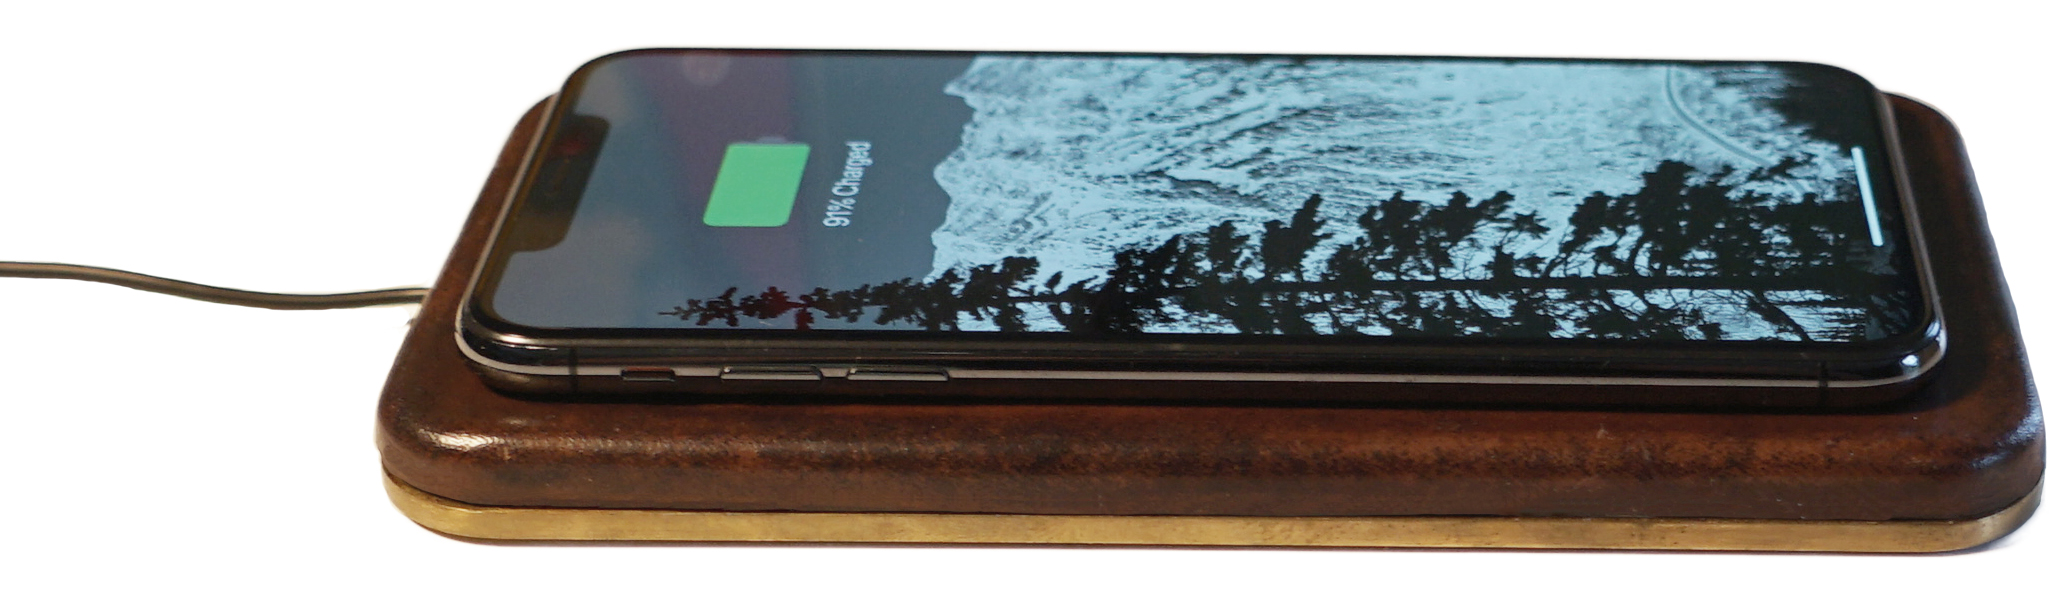
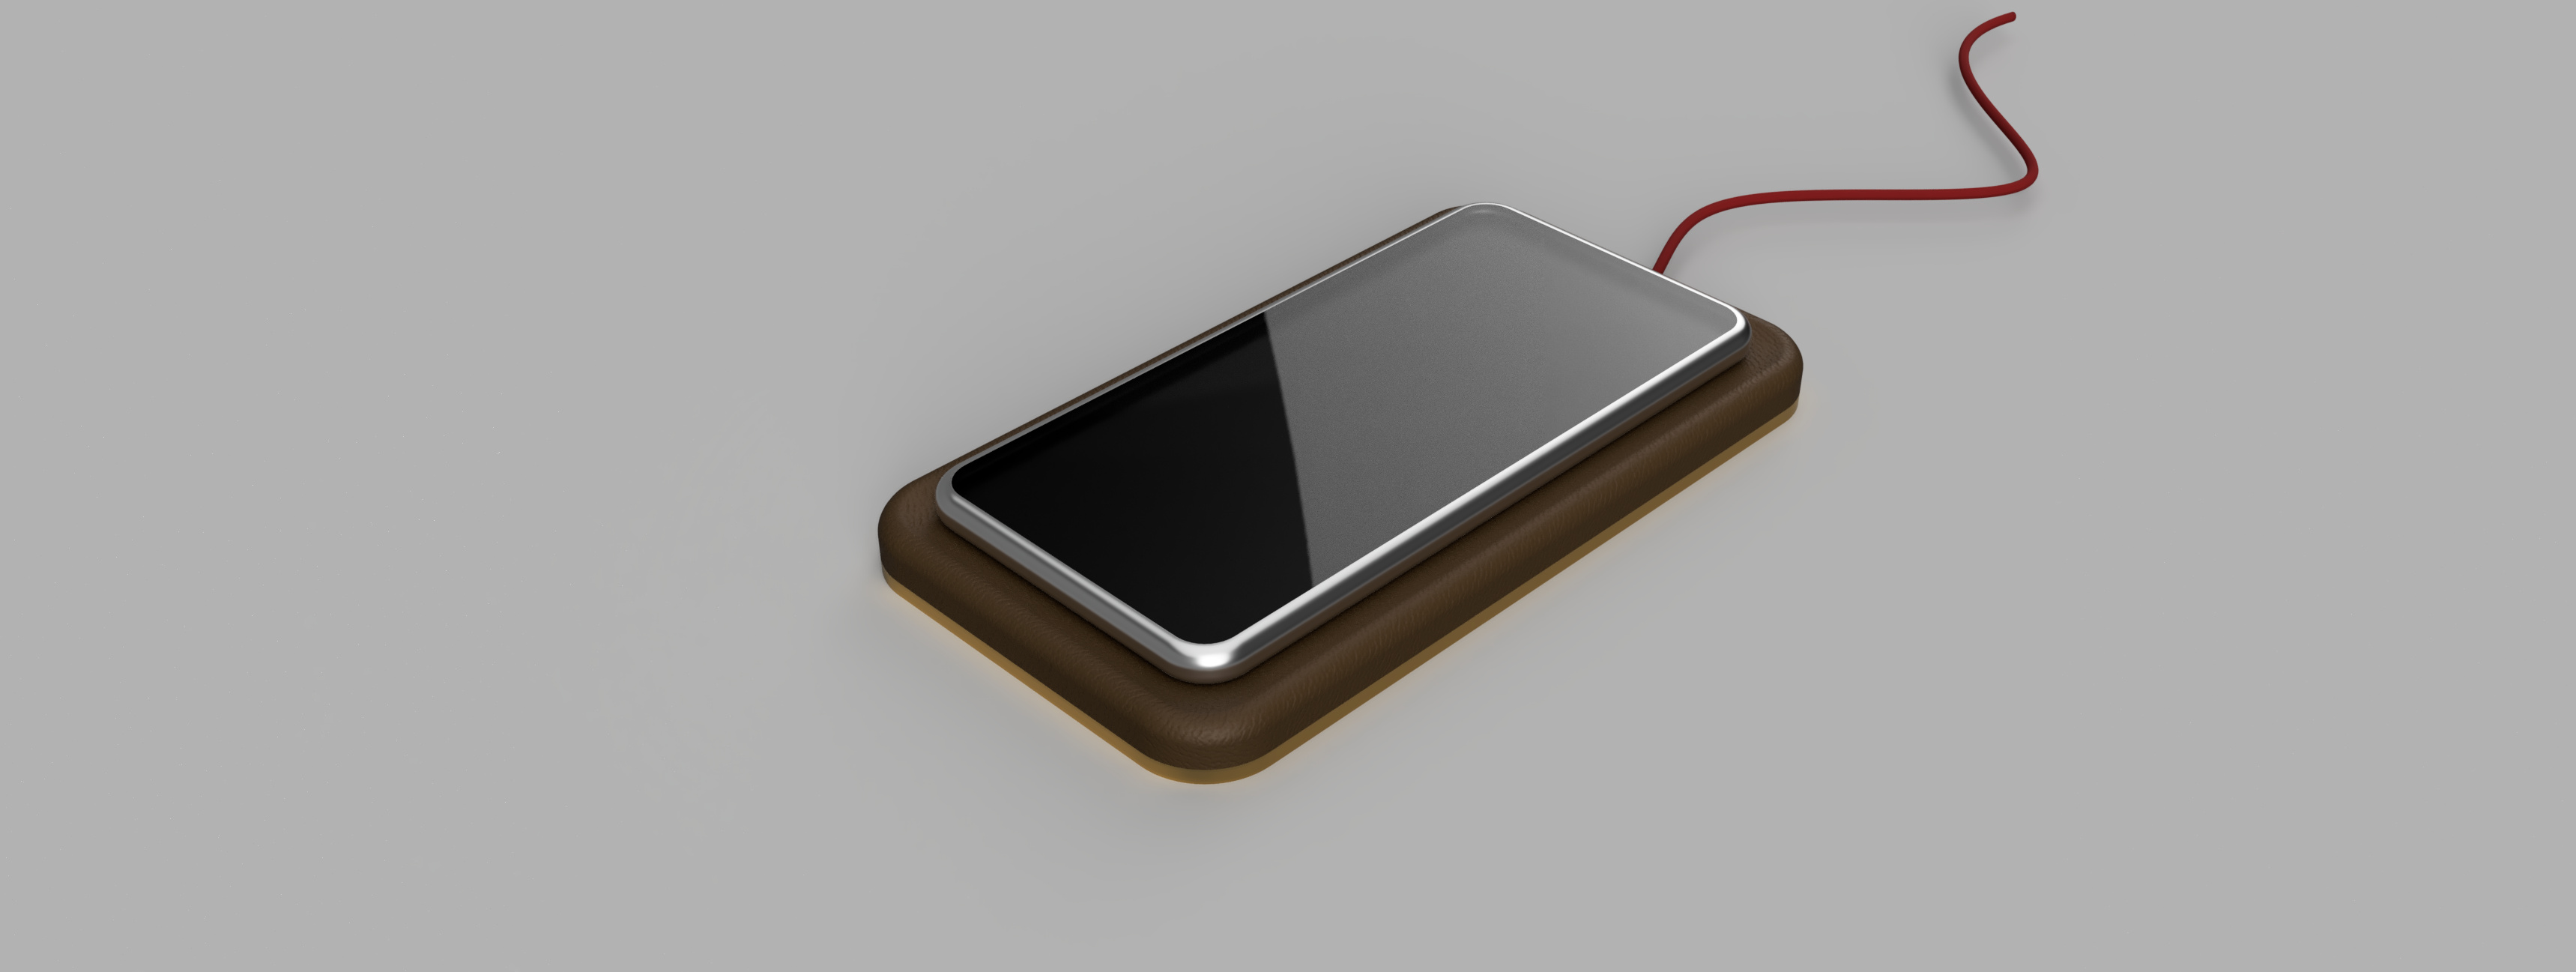
wireless charger
This wireless charger was designed to solve a frustrating problem. While wireless charging is quick and convenient, I would often wake up of find that my phone had vibrated off the charger during the night and had failed to fully charge. I came up with a simple solution: instead of a flat charging surface which allows the phone to slide from side to side, the charger should be more like a dish. When the phone vibrates, it naturally nestles itself in the charger. For materials, I chose leather and brass. The brass has a confidence inspiring weight, and the leather does not scratch the phone. I used a process called hydro-forming to shape the leather. This required two molds which I cut on a CNC machine. I clamped a saturated piece of leather under very high force between the two molds. Once the leather had dried in the form, it held its shape when removed from the form. I then cut a hole in the bottom form for the pre-made charging circuitry and sandwiched the two pieces together. I have been charging my phone on this device for the better part of a year. Every morning I awake to a reliably, fully charged phone.
2017
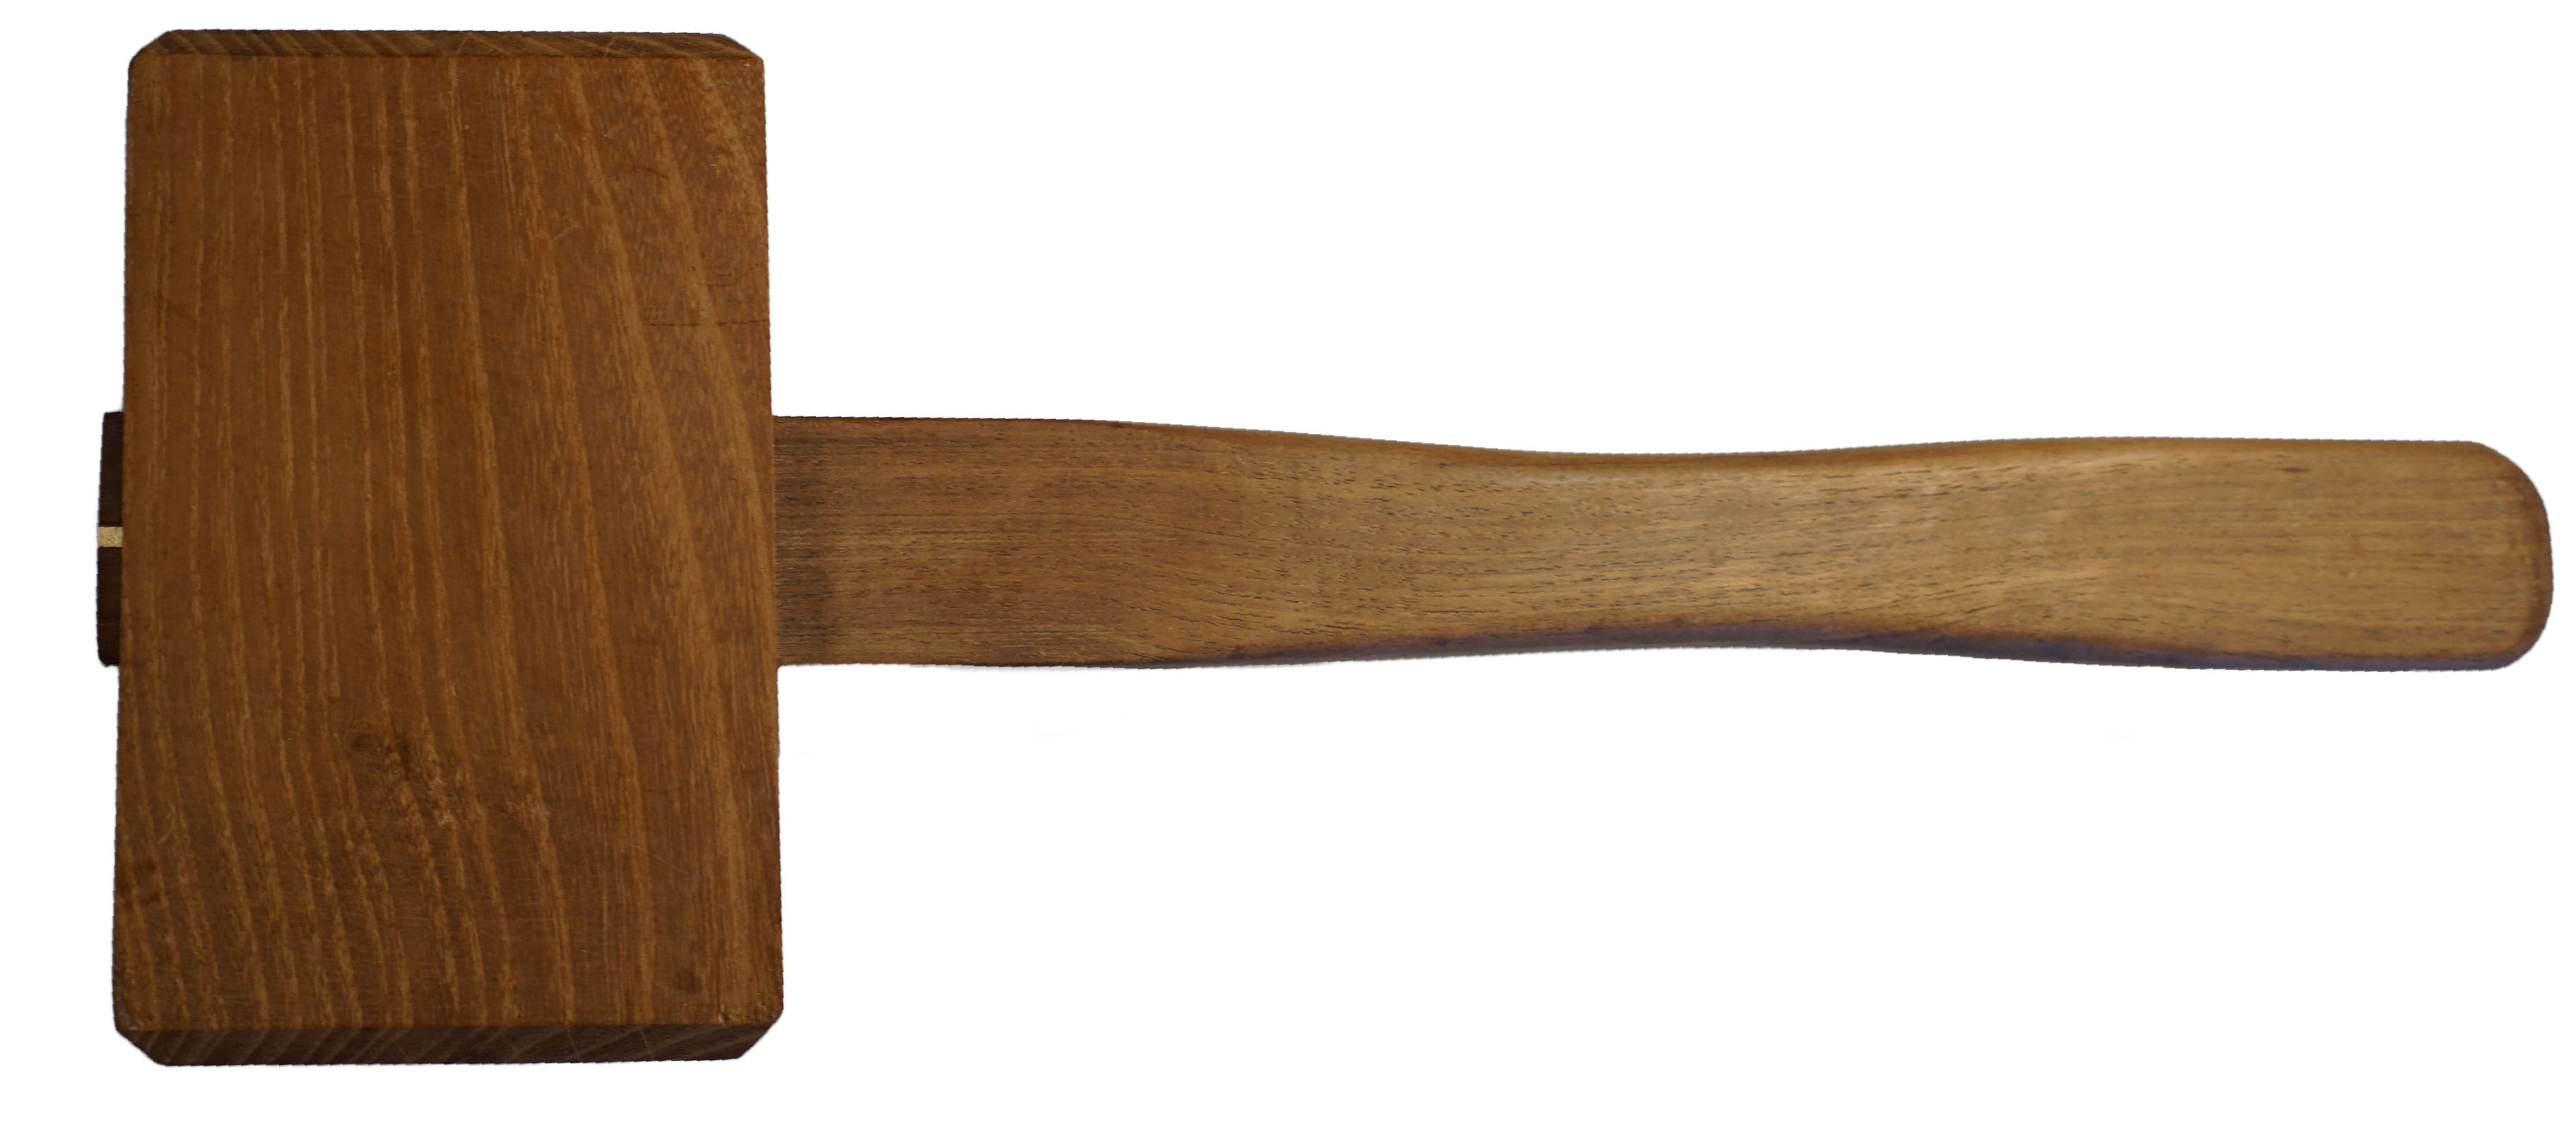
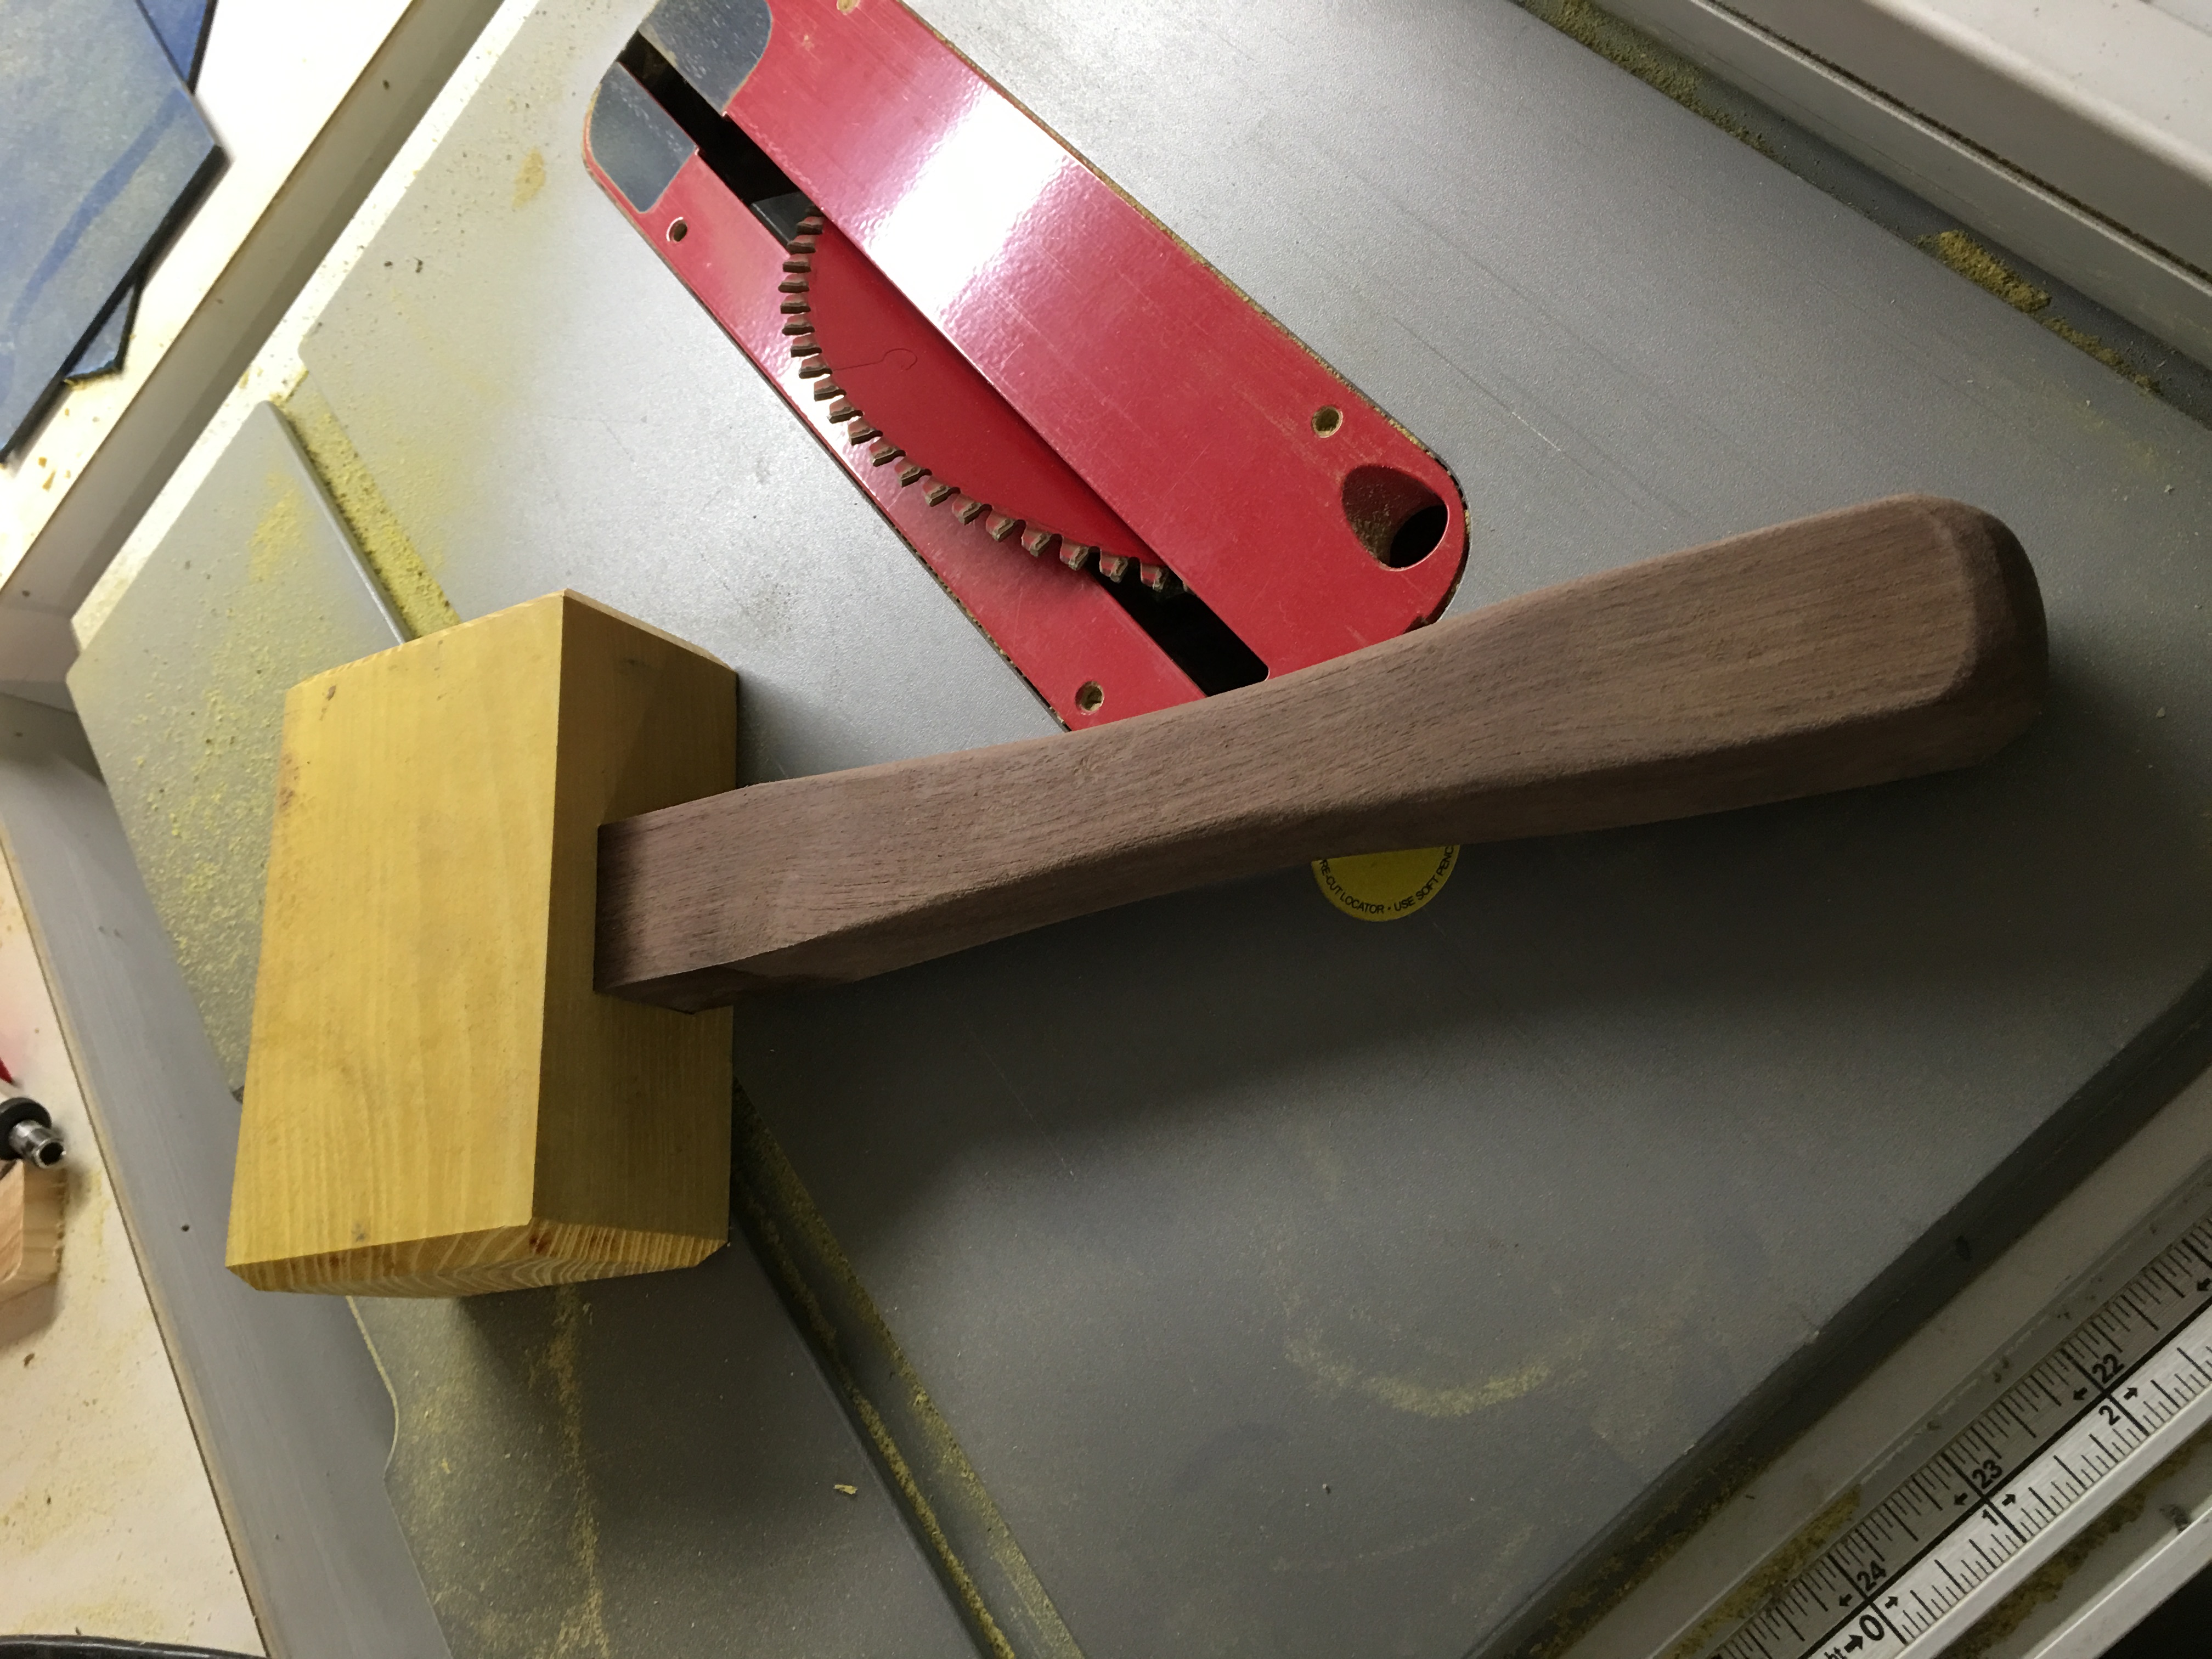
mallet
For many, the construction of a mallet demonstrates one’s entry into the woodworking field. This was certainly the case for me. While I owned a mallet, I wasn’t my mallet. I reasoned that if ash and oak were commonly used in mallets for their hardness, would not an even harder wood be better? I took to the internet and sourced a piece of osage orange. This unusual wood is twice as hard as white oak. The moment I held the piece of wood, I realized my mistake. Osage orange wood is so dense that a table saw audibly struggles to cut it. I would need to hand chisel a mortise through this wood. It took many day’s effort to cut the mortise, but now I possess an impressive, if impractical, mallet.
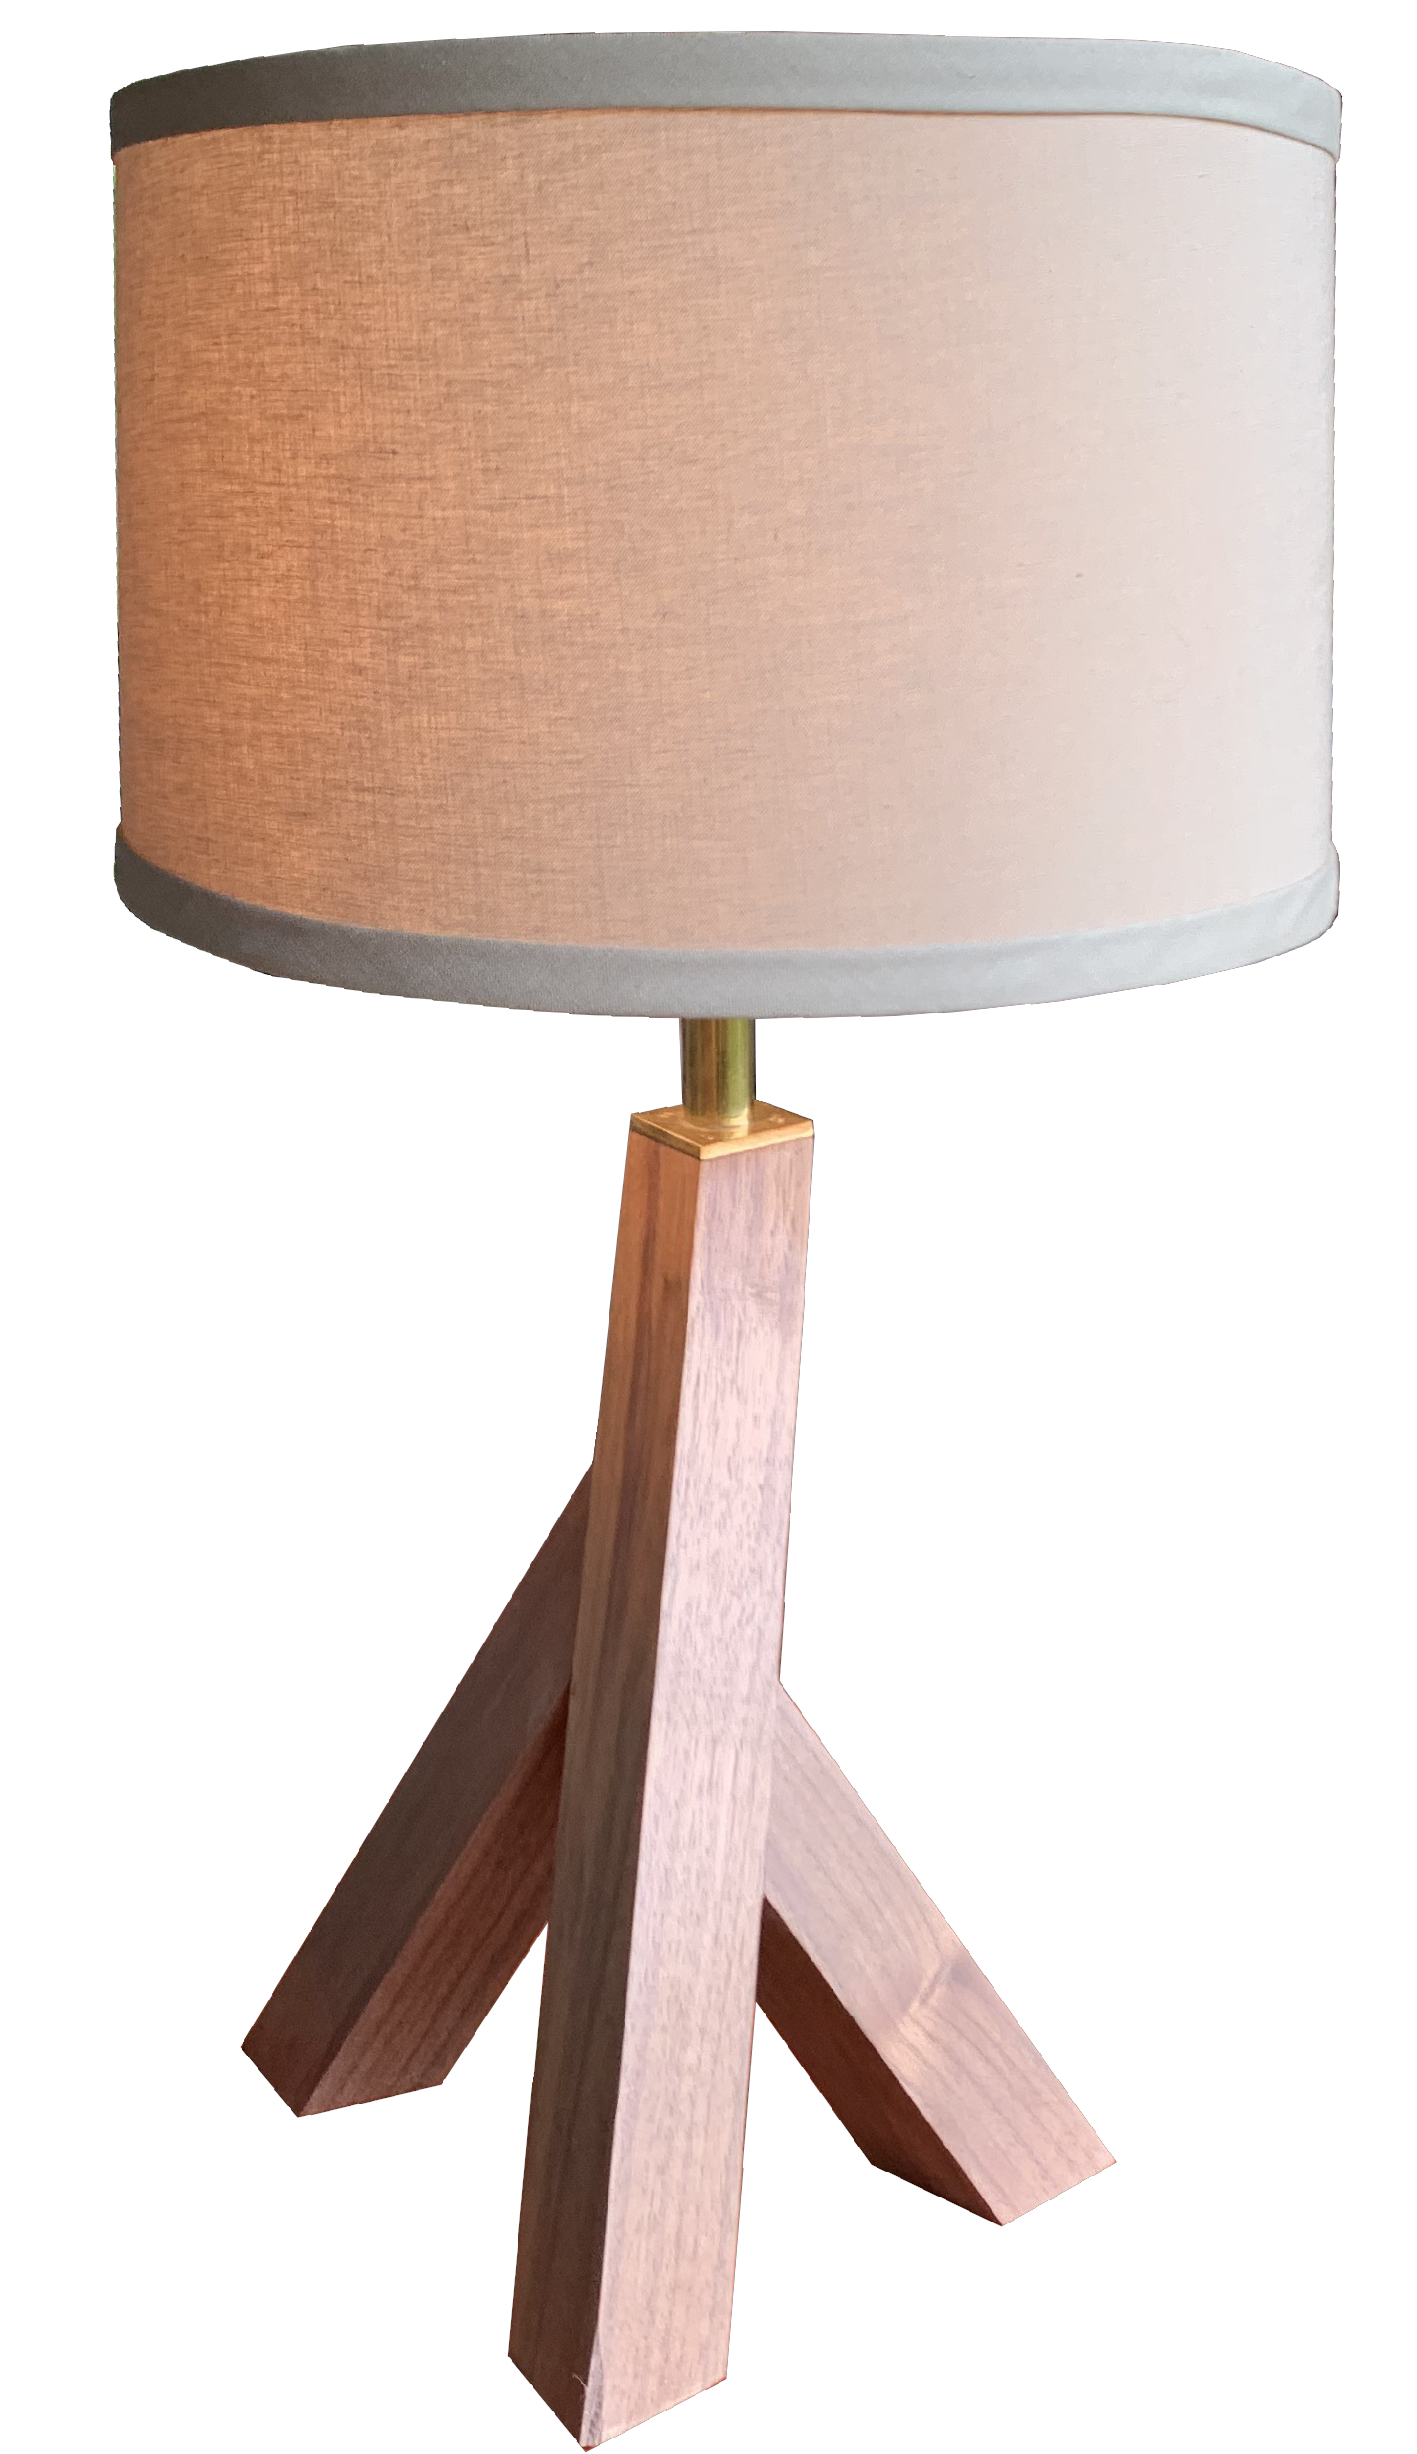
table lamp
This lamp was designed to look as if it is improbably balanced. This was achieved by moving the focal point of the lamp, the bulb, off center from the base. The unusual balance gives the lamp a jaunty appearance. It’s back is constructed from walnut. The primary leg is cut on a compound angle which means it is angled in two directions. The other two support the lean associated with each angle. Where the wood meets the bulb fitting, I fabricated a brass fixture to ease the transition.
After much trial and error, these angles all worked; however, it was not long before I realized my mistake. While the lamp was well balanced when I finished its construction, I had not considered the shade. The moment a lamp shade was added, the lamp developed a habit of falling to the floor. I took it back to the shop and was able to fix the weight distribution by drilling out the light leg and filling it with lead.
2016
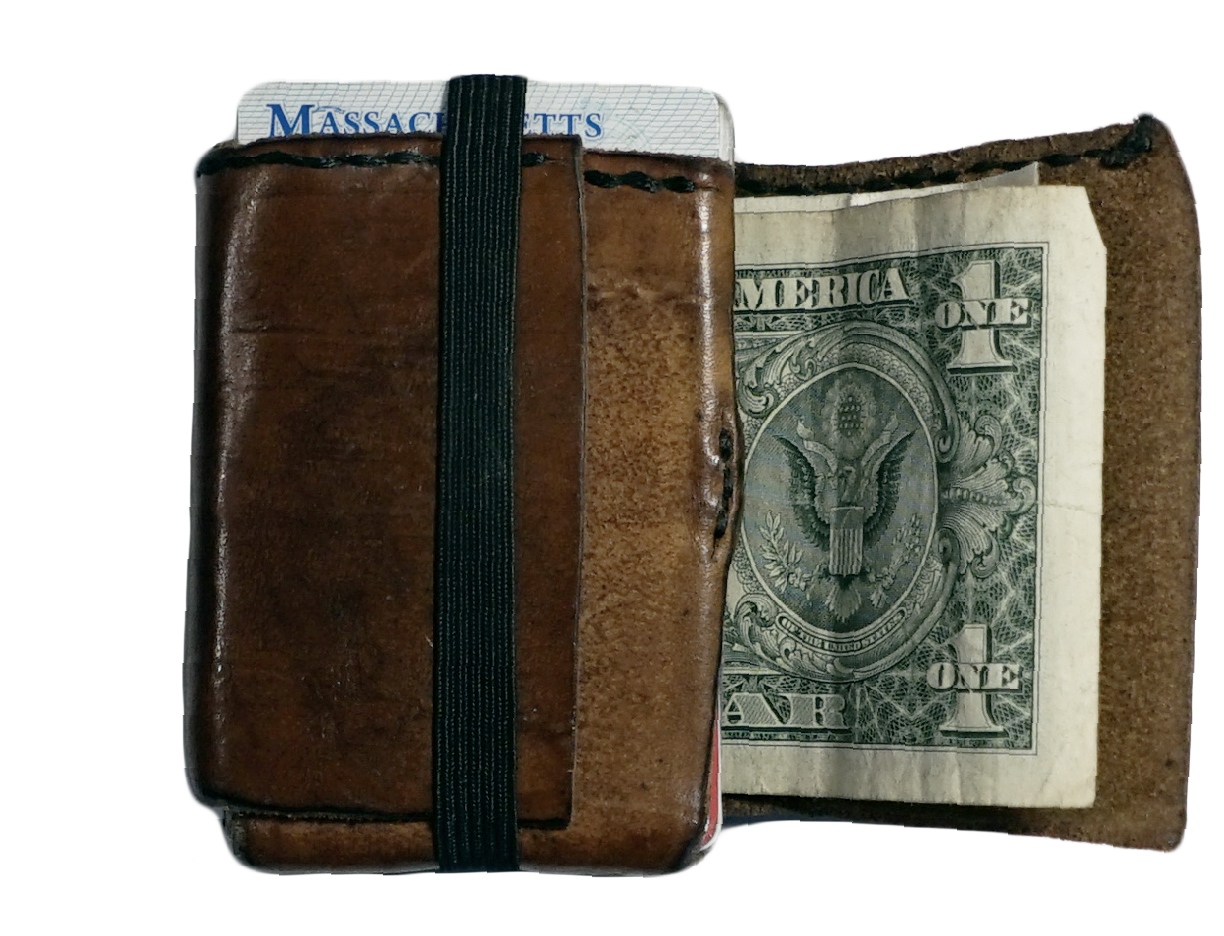
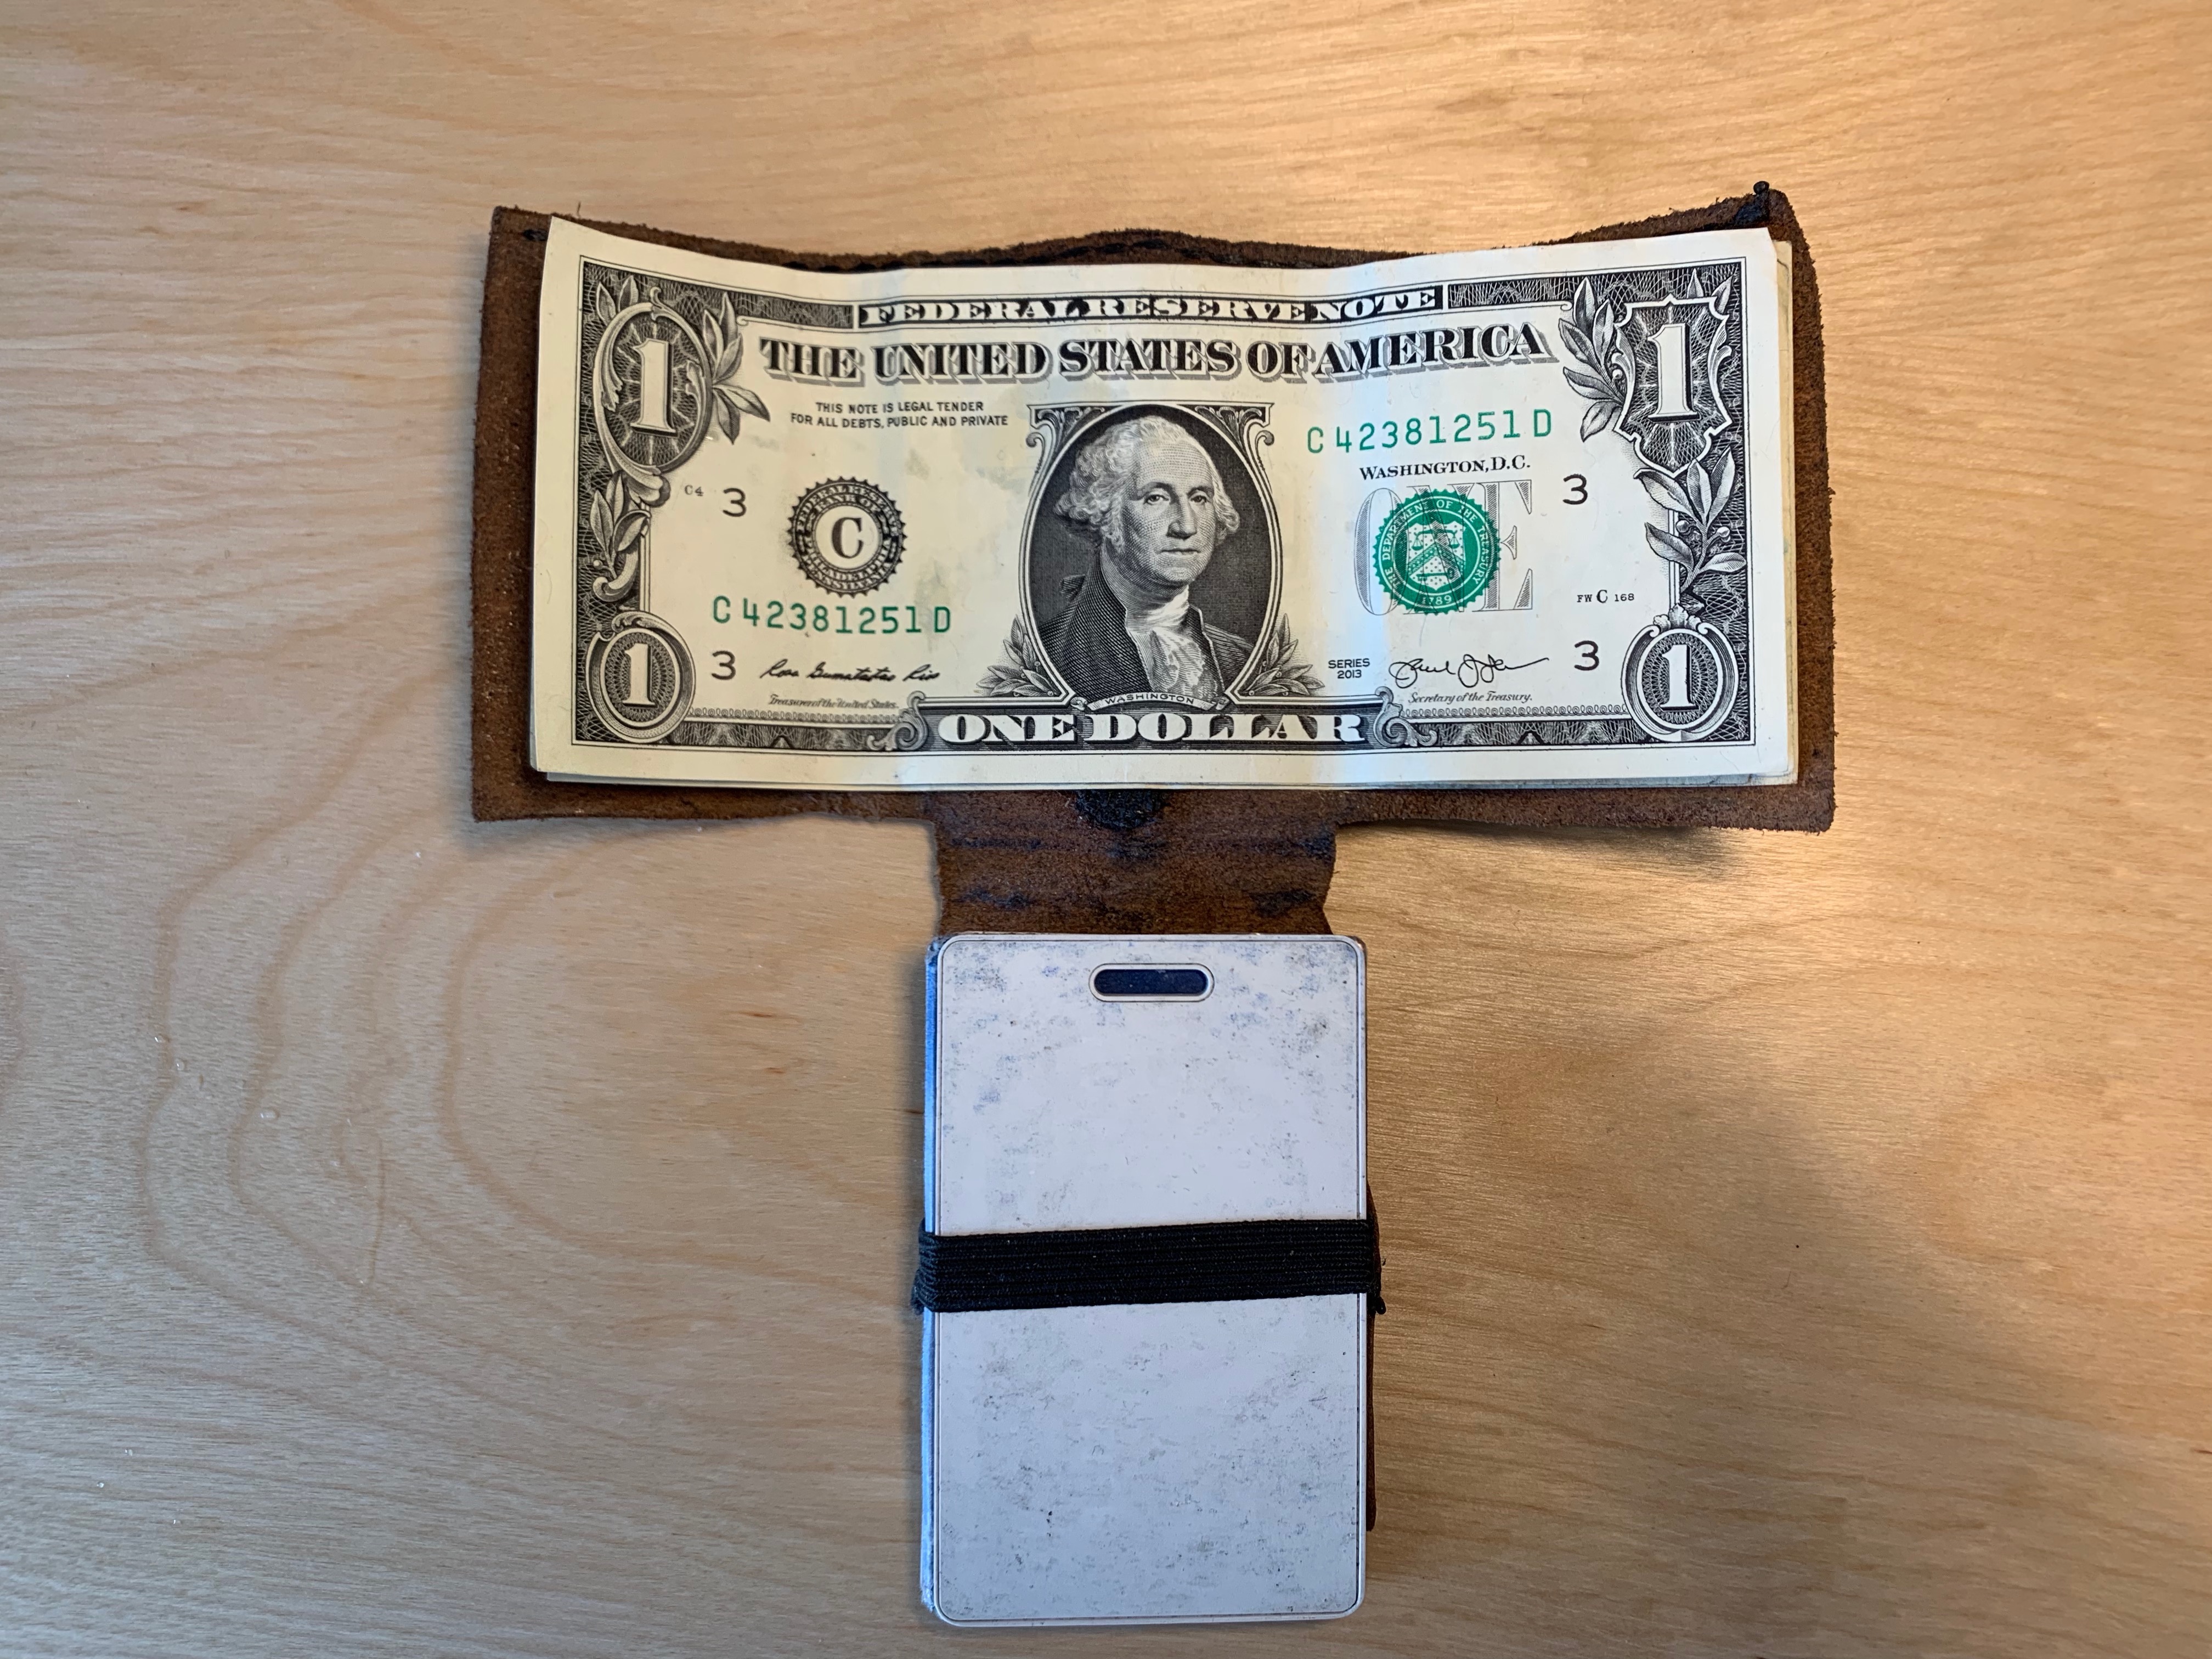
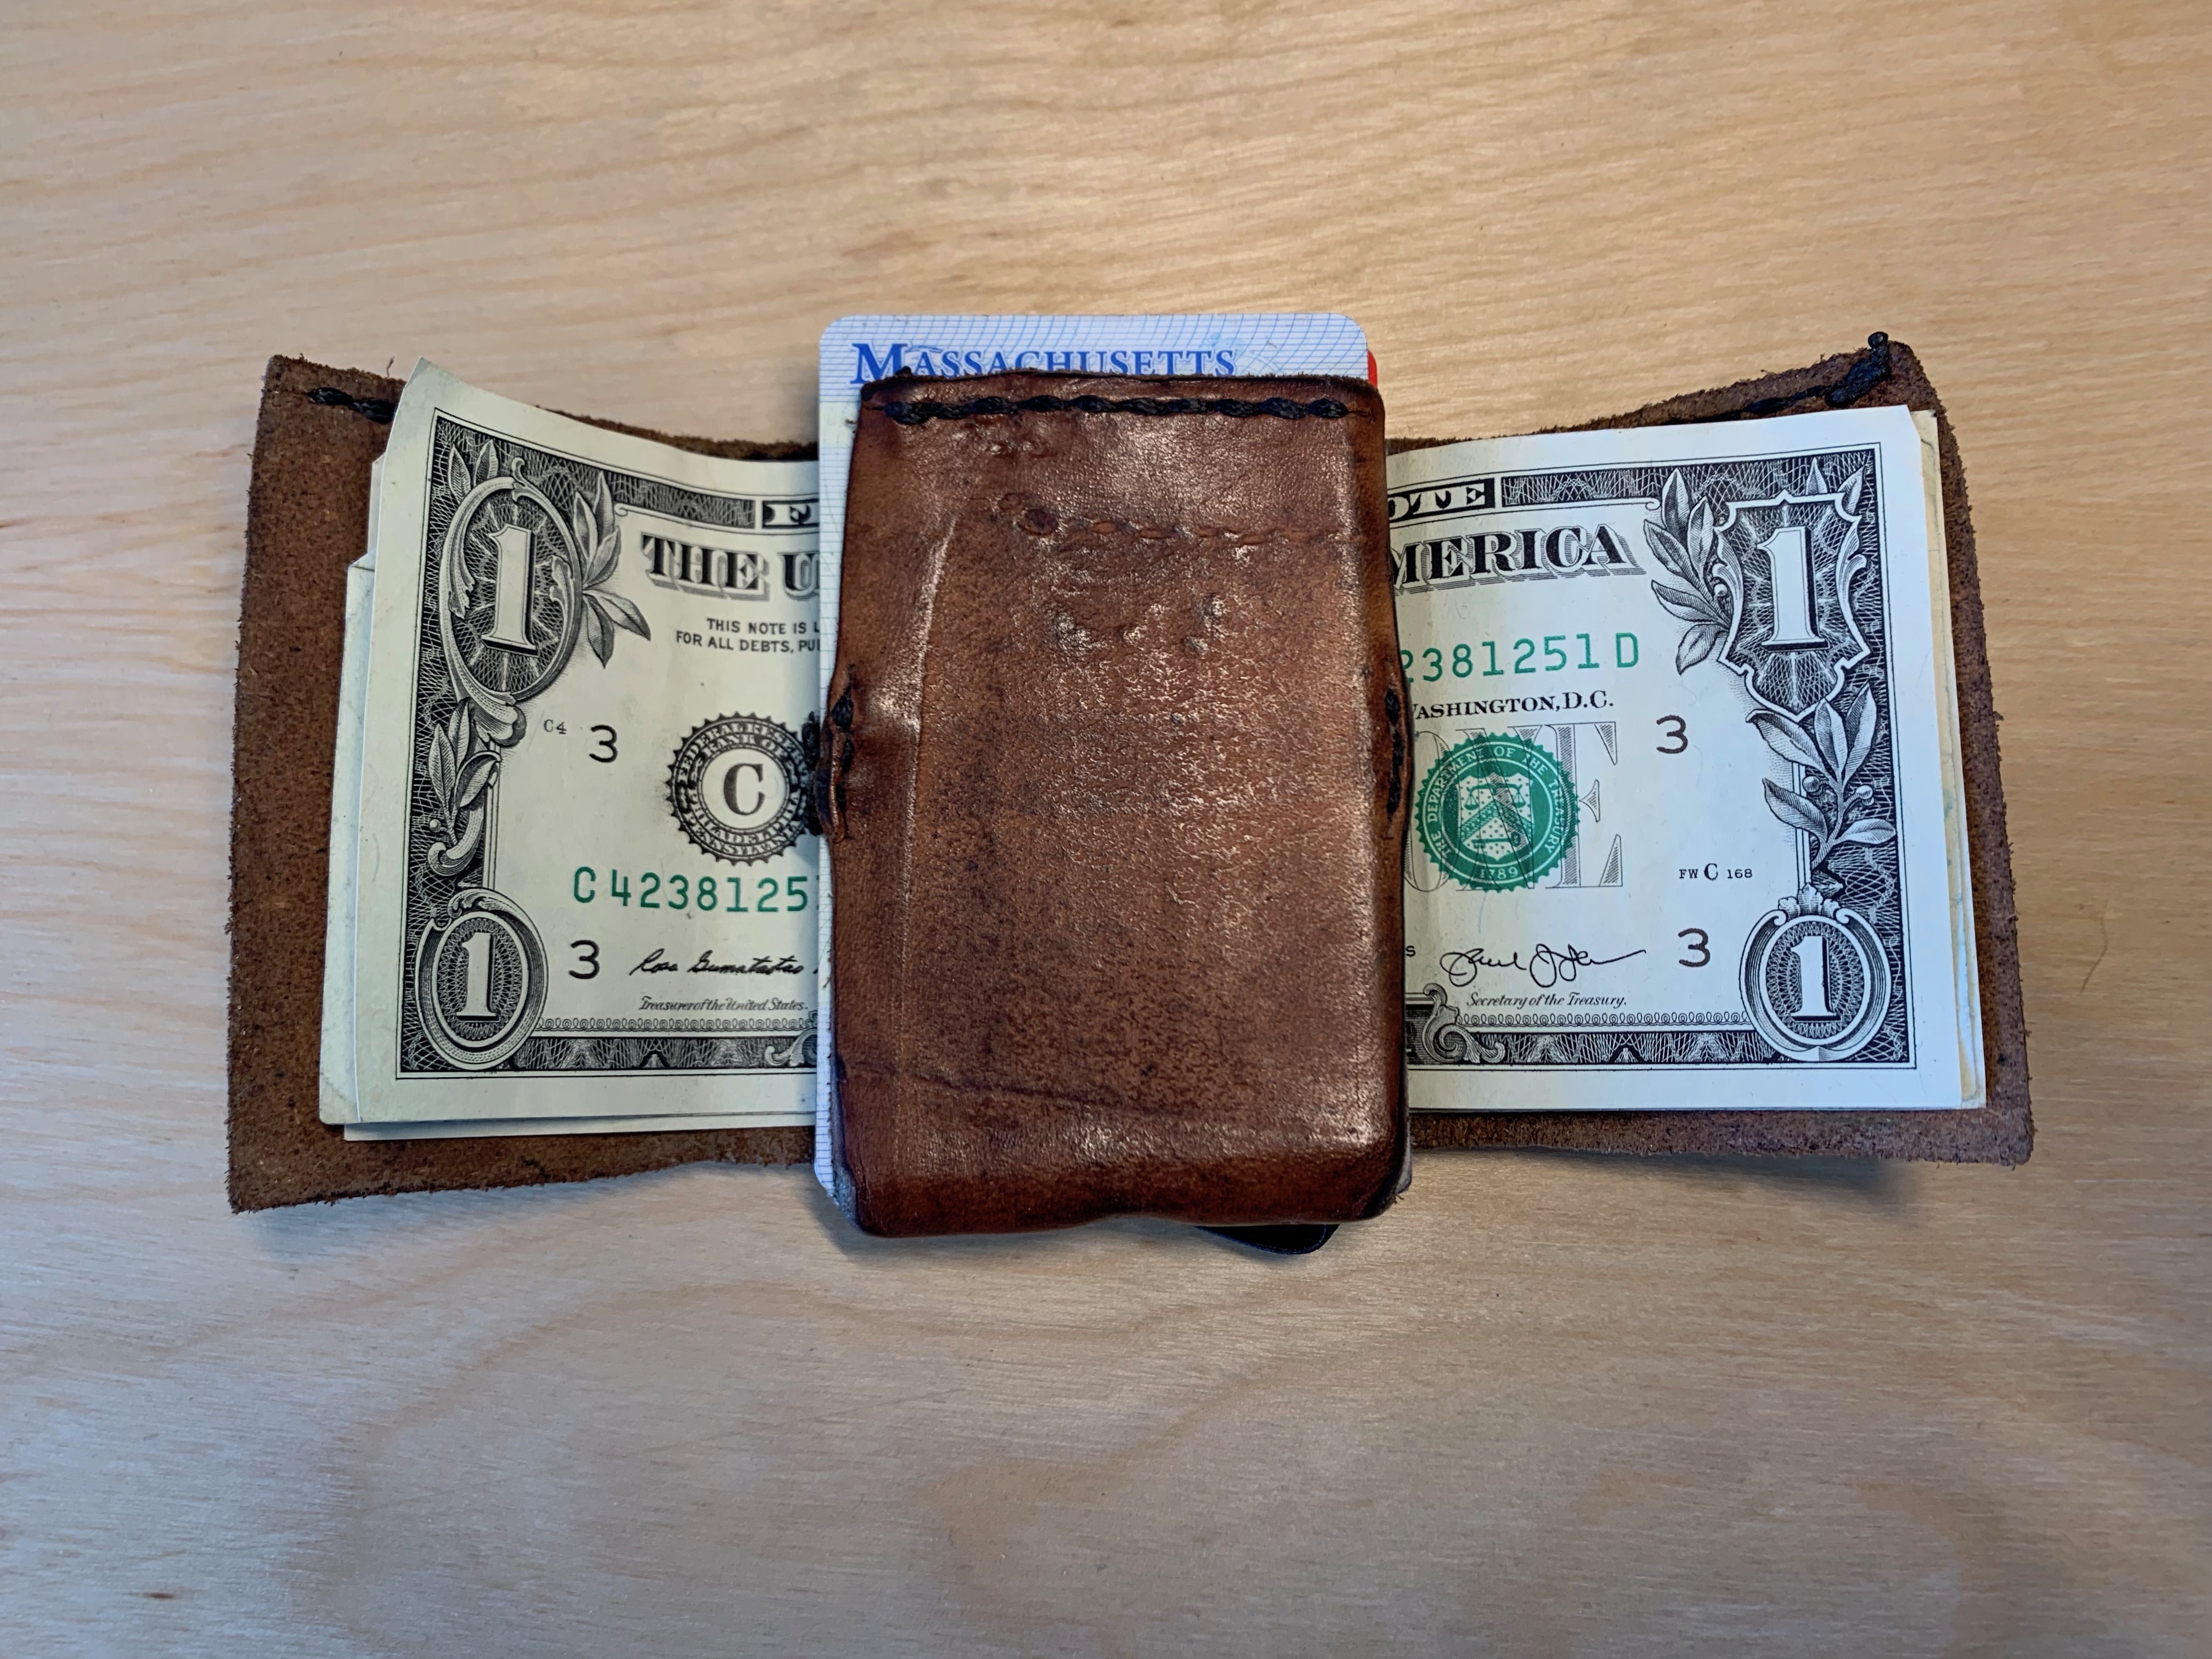
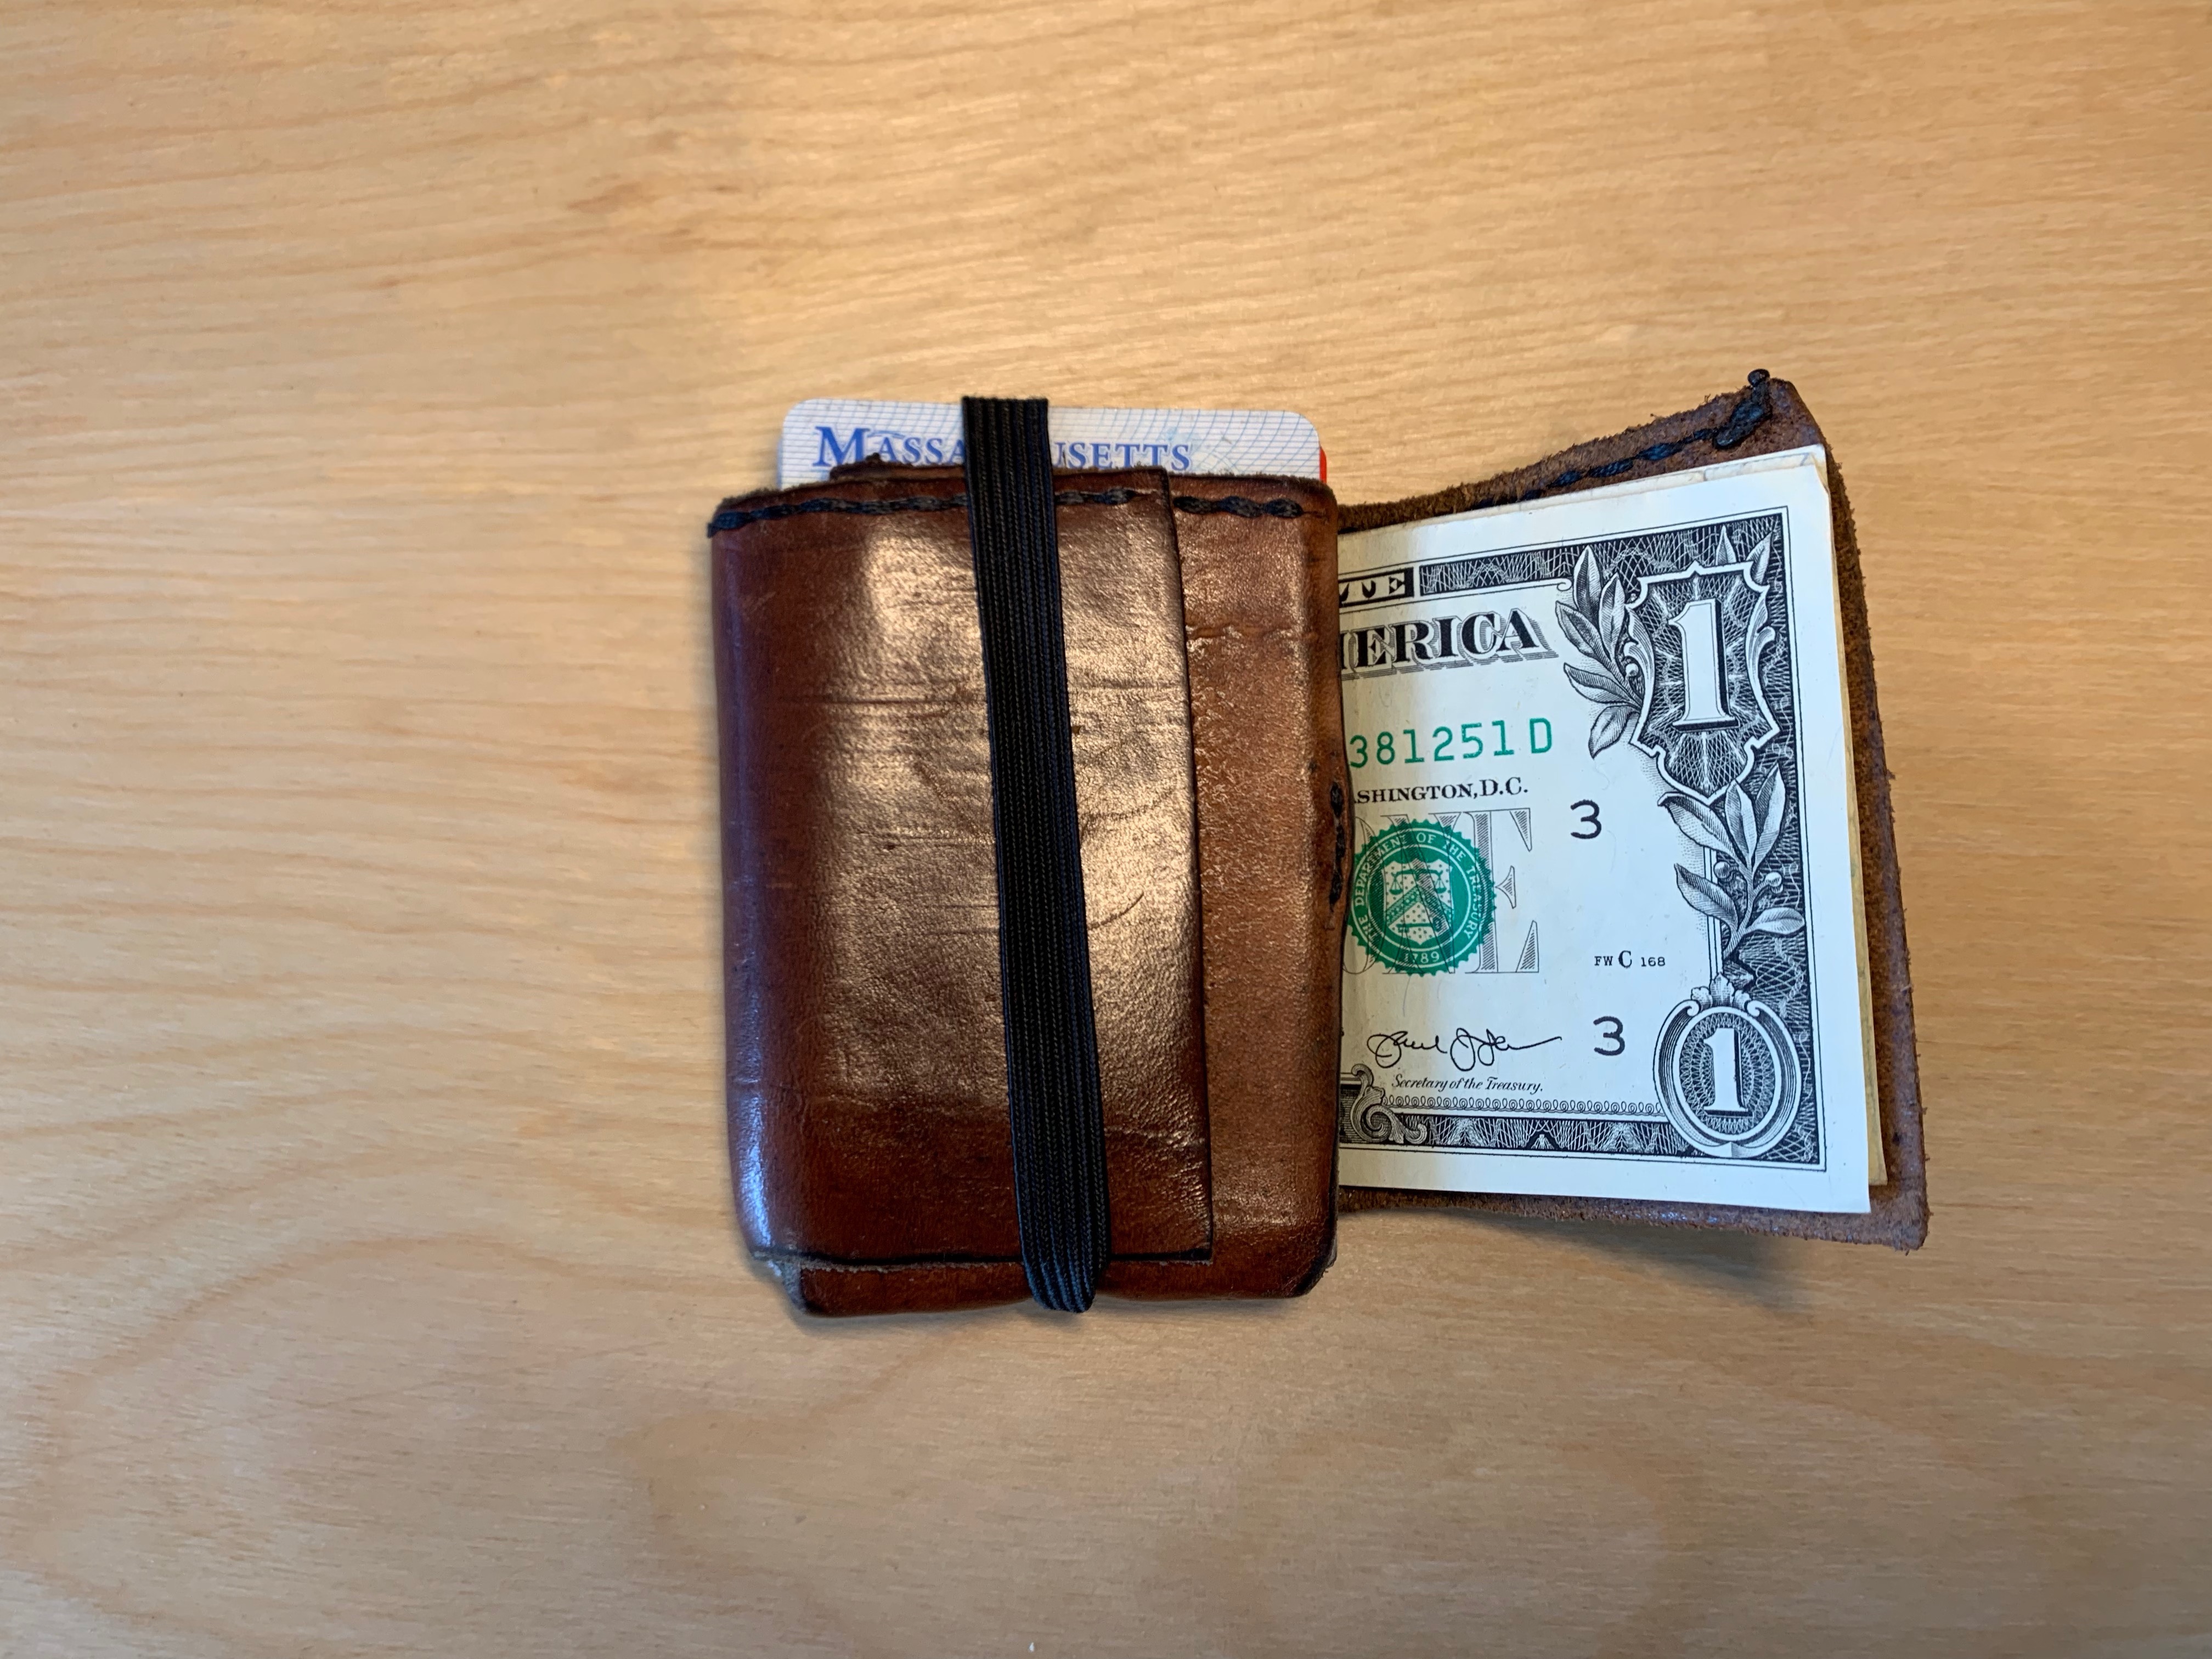
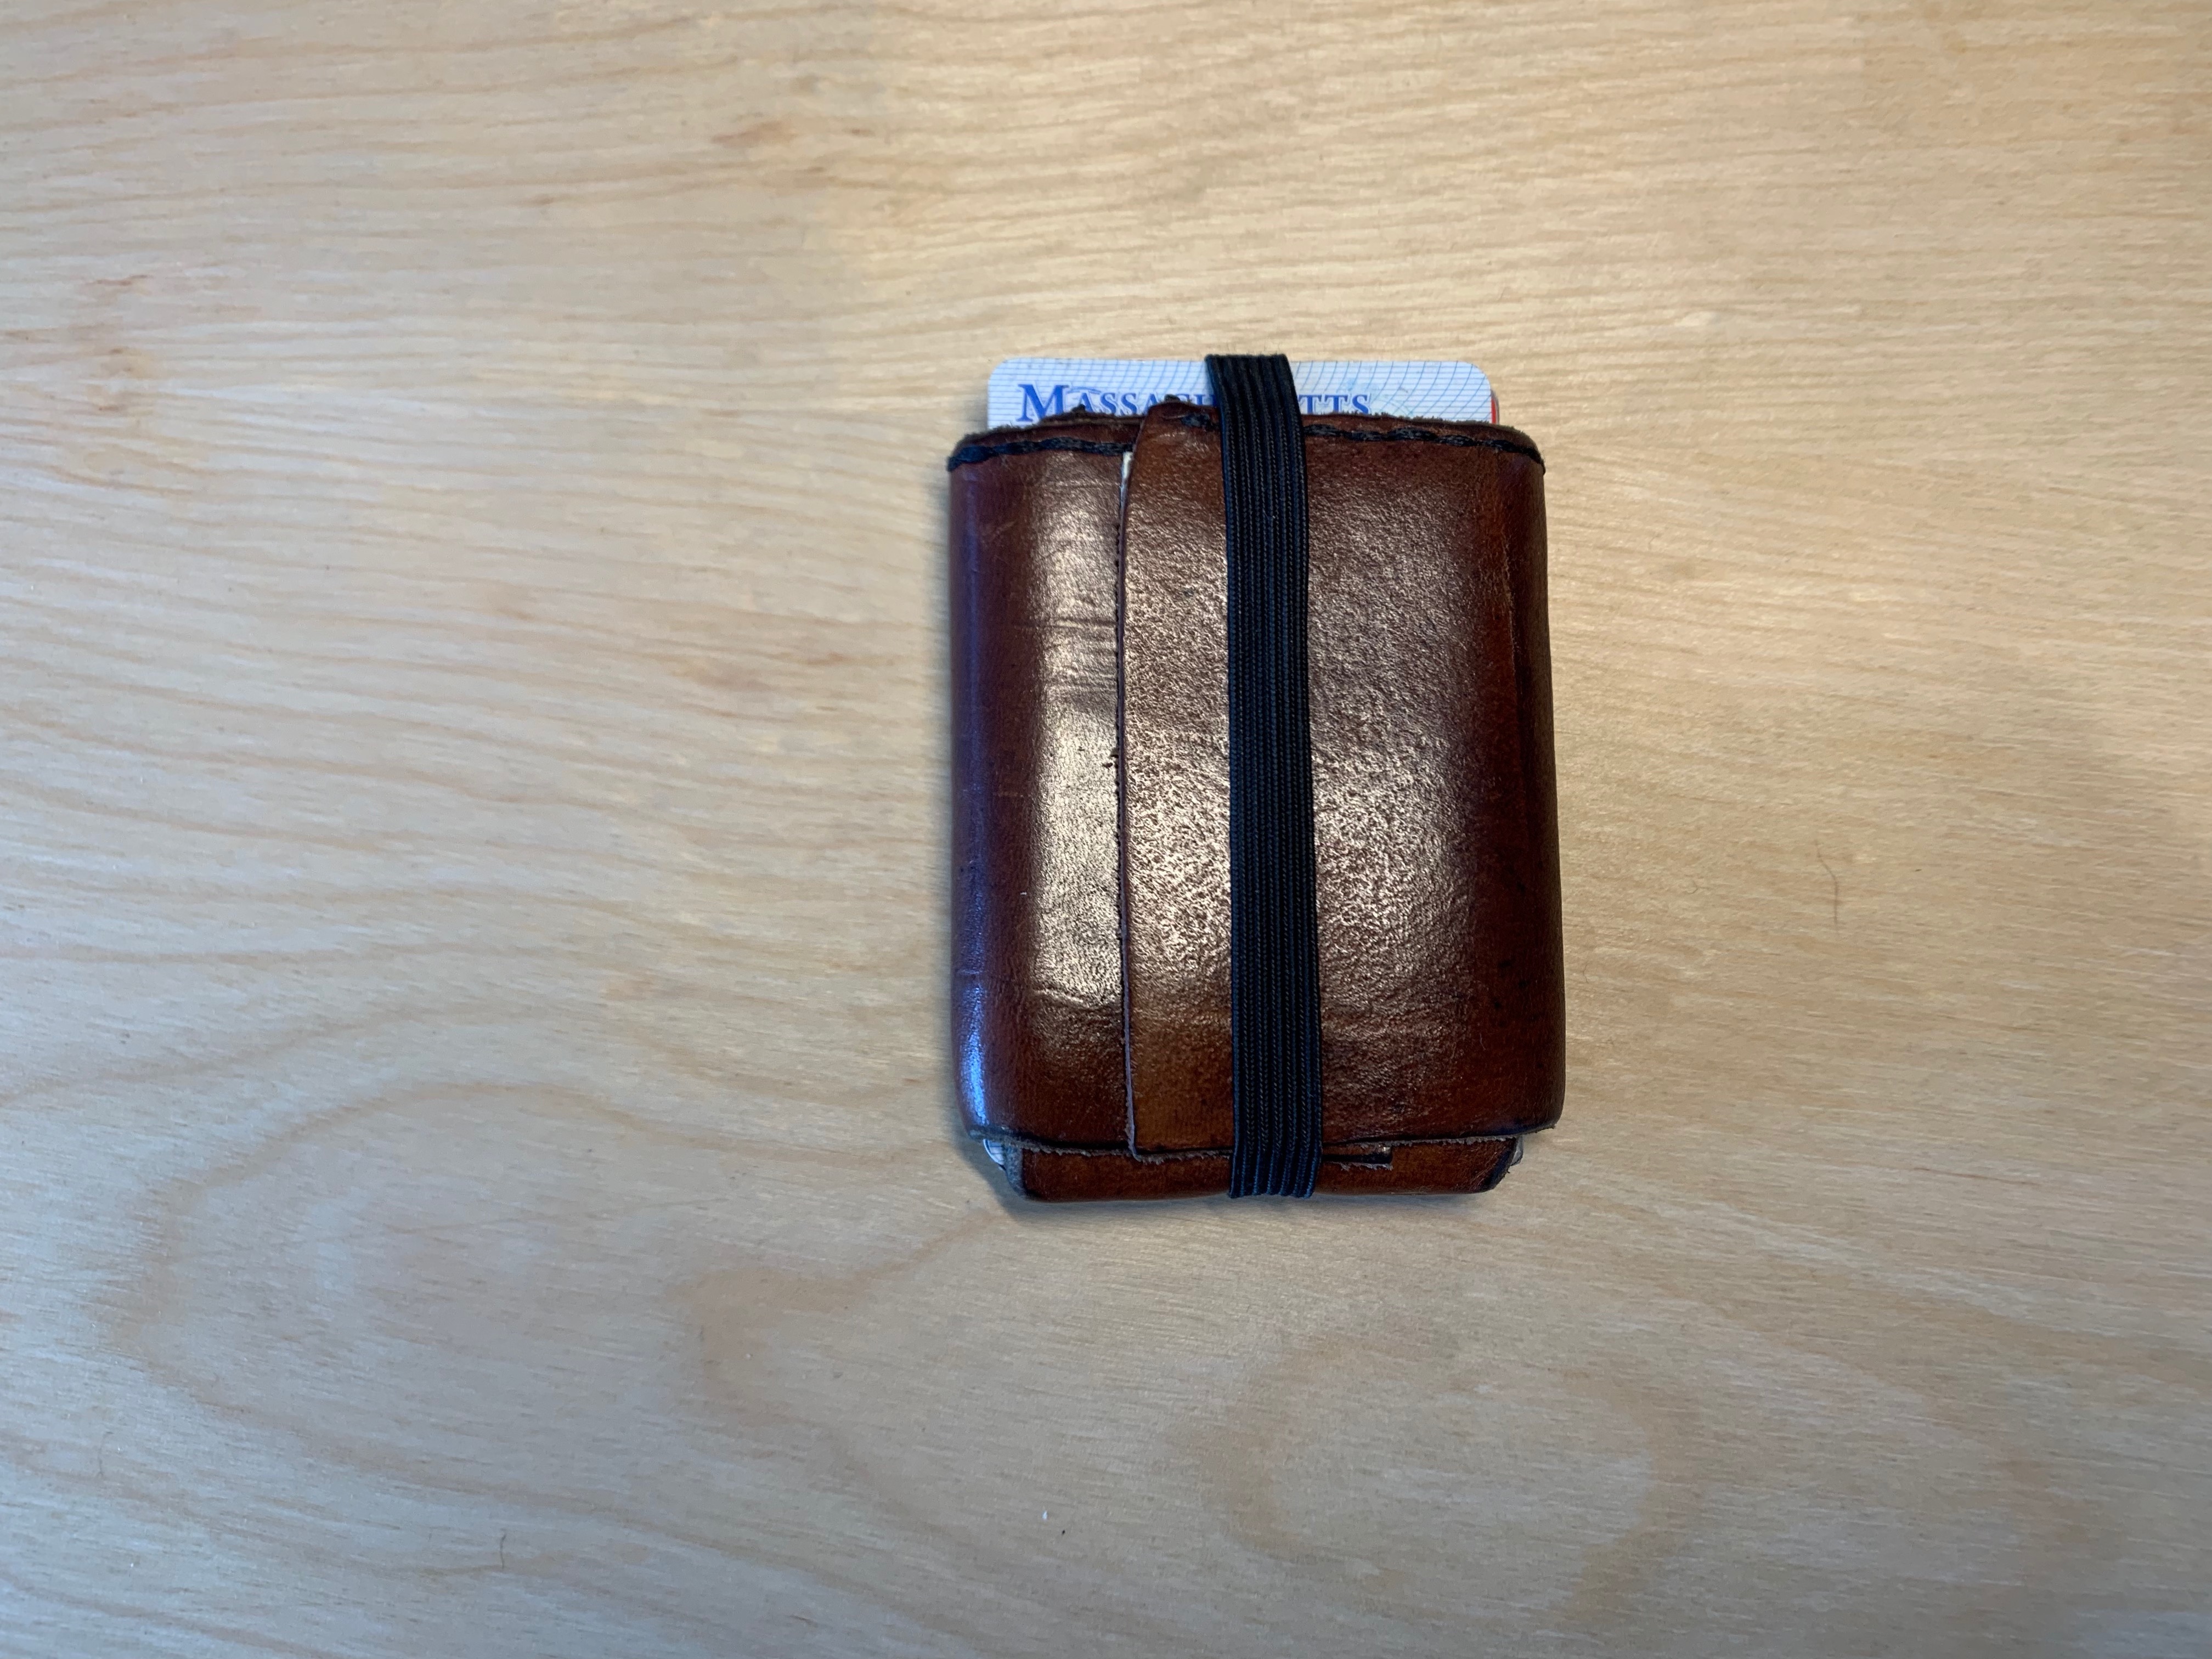
slim wallet
This wallet was one of the first things I made. I am pleased to report they I carry a version of the original around with me today. My goal was a small wallet that could grow to accommodate more on the odd lucrative days. I also wanted quick access to cards since they are regularly used. I began with a series of paper and rubber band prototypes that I would use for a few days and then adjust. I began to test in leather and learned that not all leather is created equal. After much trial and error, I settled on a vegetable tanned leather since it holds its form best. Over a period of a few years, I continued to adjust and refine the design. I learned what stitch is most durable for the elastic and where a stitch is needed to prevent long term deformation and stretching. This most recent iteration has lasted me about three years.